Simple & Stylish Crochet Bag Pattern For Beginners
“Wide your fashion potential with our Free Crochet Bag Pattern, offering chic versatility and stylish flair to complement any wardrobe choice.”
Its thoughtful design provides clear instructions that help transform simple materials into a functional accessory suitable for everyday use or special occasions. The pattern accommodates various skill levels, ensuring accessibility for beginners while still offering intricacy for those with more experience. The resulting bag combines durability with an aesthetically pleasing texture, making it both sturdy and fashionable.
Crochet Bag
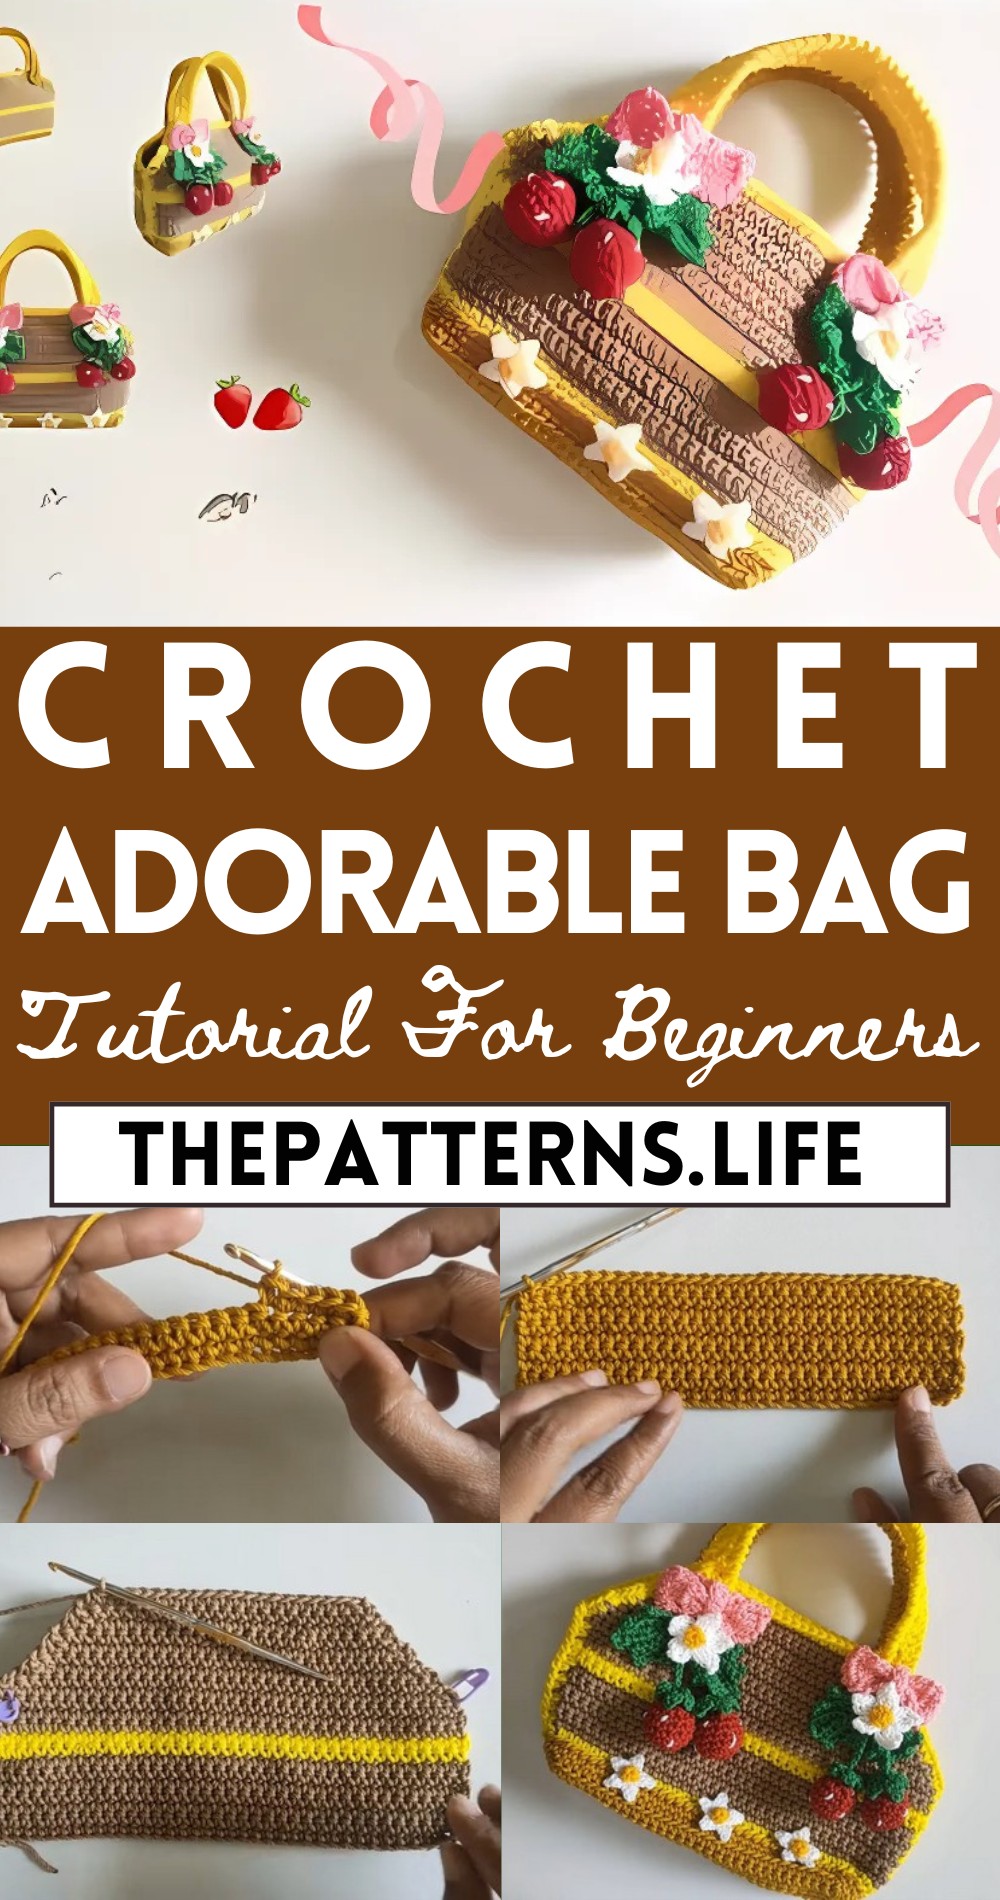
With options to adjust the size and color scheme to personal taste, it allows for endless creativity and personalization. The versatility of this pattern makes it a must-have for anyone looking to expand their crocheting repertoire while producing something both useful and stylish. Whether the finished product is for personal use or a thoughtful gift, it carries a unique touch that reflects individual style and effort.
Tip:
Consider using a lining to enhance durability and give your bag a polished look.
Materials:
- Onitsuga polythick yarn
- Tulip hook size 6/0.
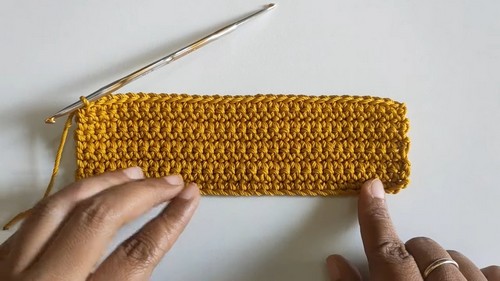
Beginning:
- Start with a slip knot.

- Make 30 chains, then add one more chain to start and go up the row.
- Fill the 30 chains with single crochet; at the end of the row, chain one, then make a single crochet in each stitch across.
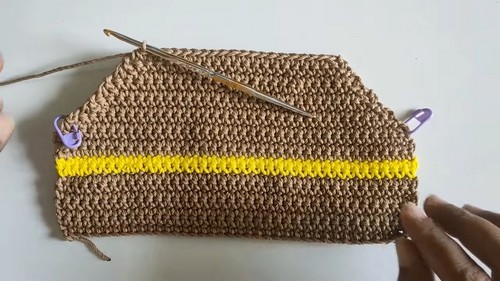
Body:
- For rows 2 and 3, chain one at the beginning, and make single crochet in each stitch across. The total stitches per row should remain 30.
- Continue with this pattern until you reach row 9.
- Place a marker on the last stitch of row 9.
Base:
- Starting from the end of row 9 to the marked stitch, crochet around the piece creating a base.
- In corners, make single crochet increases for shaping.
- Work 8 rows of single crochet around the base.
- Base dimensions approximately: Length 17 cm, Width 5 cm.
Sides:
- Continue with single crochets, working in back loops only for textured effect.
- Join rounds with slip stitches.
Strap Hole Markers:
- Leave a long strand before cutting the yarn for future joining.
- Mark specific stitches for creating strap holes.
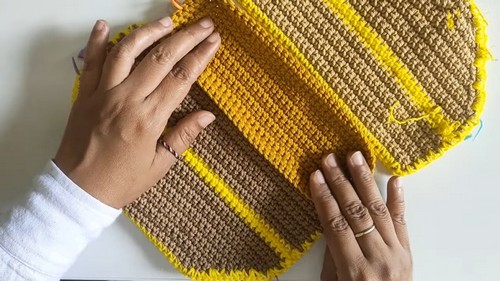
Leaf Attachment:
- Start with 39 chains.
- Work single crochets across for several rows, then create a color change in the last row with yellow yarn.
- Begin decrease rows starting from row 13 to shape the leaf.
Strap:
- With a contrasting yarn, crochet a strap by creating a chain of desired length and work rows of single crochets.
Decoration:
Ribbon:
- Chain 9, skip 4 chains, and work double crochets in successive rows to form a ribbon.
Strawberry:
- Start with a magic ring, work single crochet increases and continue with sc for several rounds, then decrease to shape the strawberry.
Leaf:
- Use the magic ring technique, chain, then work double crochets followed by picots to create a leaf effect.
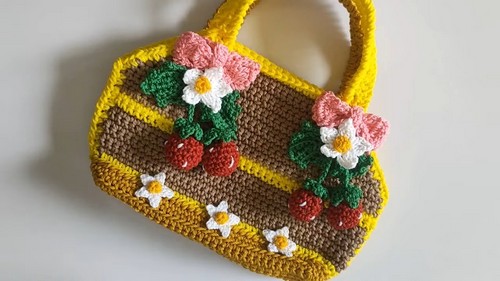
Final Assembly:
- Assemble the knitted pieces, attach the decorations, and secure all parts together to complete the bag.
Finishing Touches:
- Weave in all ends securely and trim any excess yarn.