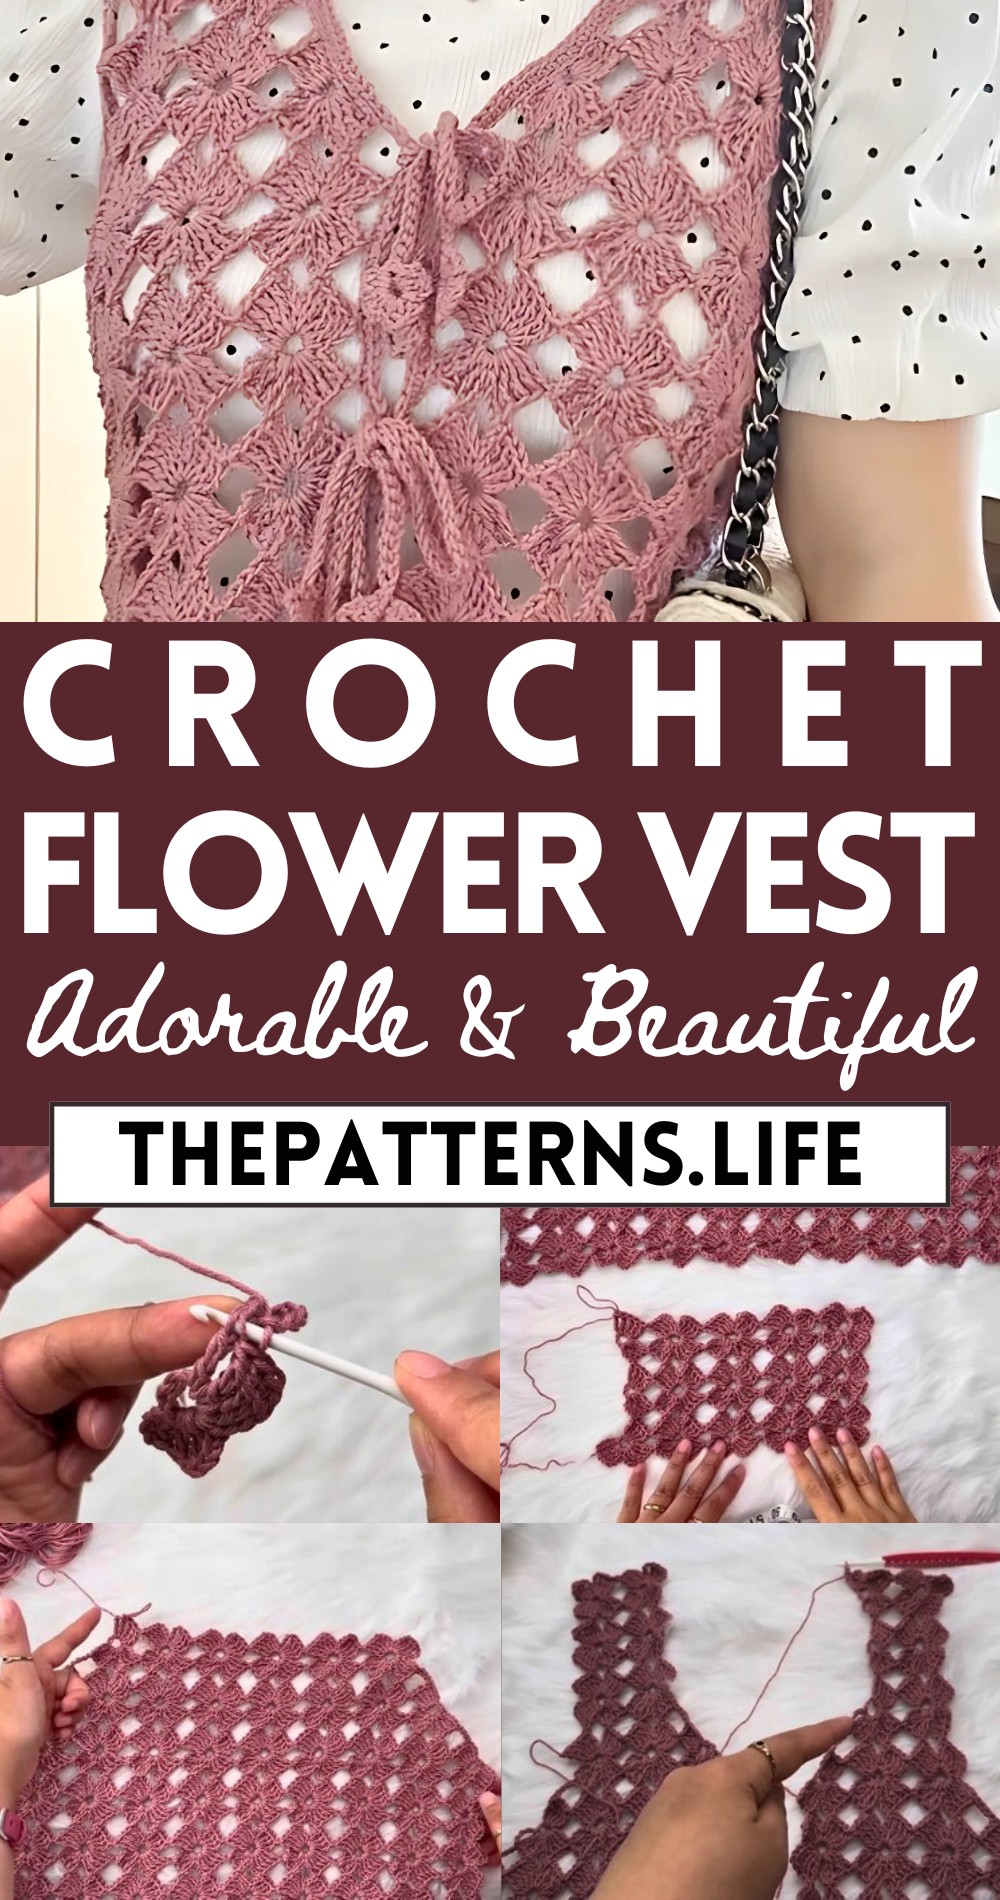
Beautiful Crochet Flower Vest Pattern For Chilly Summer
Wake up your wardrobe with the Crochet Flower Vest Pattern, an easy and stylish project perfect for adding a floral touch to any outfit.
This fun and engaging pattern guides you through creating a beautiful vest adorned with delicate flower motifs, perfect for adding a whimsical touch to any ensemble. The pattern is suitable for both beginners and experienced crocheters, featuring clear instructions and step-by-step visuals.
Crochet Flower Vest
Using lightweight yarn, you can crochet a vest with a pop of color that is comfortable to wear and perfect for layering over your favorite outfits. Ideal for any season, whether it’s brightening up spring and summer outfits or adding a unique layer in fall and winter, this versatile vest is a must-try project for any crochet enthusiast.
Quick Tip:
Use vibrant, contrasting colors for the flowers to make your vest a stunning statement piece.
Materials:
- Sport weight cotton yarn
- 3.5 mm crochet hook
- Scissors
- Yarn needle
- Tape measure
Measurements:
- Back Panel Width: 20 inches (51 cm)
- Back Panel Length: 17.5 inches (44.5 cm)
Instructions:
Starting the Crochet:
- For your vest, measure your bust circumference, divide by two to determine the width for the back and front panels.
- Example: Bust 36 inches -> Divide by 2 -> Back/Front Panel Width: 18 inches each.
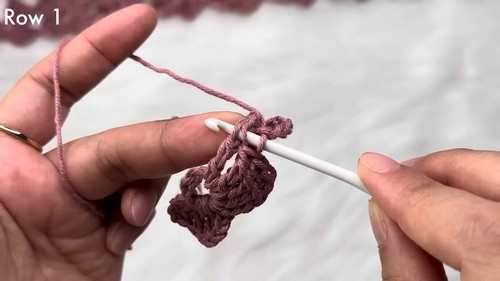
Making a Swatch:
- Start by creating a small swatch to determine how many flowers you need for your panels.
- Make a slip knot, chain 10.
- Six chains from the hook, slip stitch.
- Chain 4, slip stitch into the first chain. Those two chains count as the first two triple crochets.
- Make two more triple crochets into that loop.
- Chain 4, single crochet inside the loop – this is your first petal.
- Repeat the process for the second petal, making four chains and then four triple crochets.
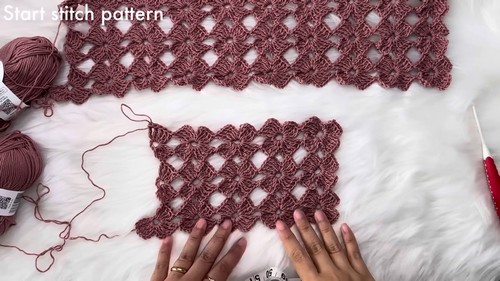
Building the Flowers
- Chain 10, then slip stitch 6 chains from the hook.
- Proceed as before to create each petal, connecting them to form a flower pattern.
- Repeat making flowers until you reach the width you need, keeping an even number of flowers.
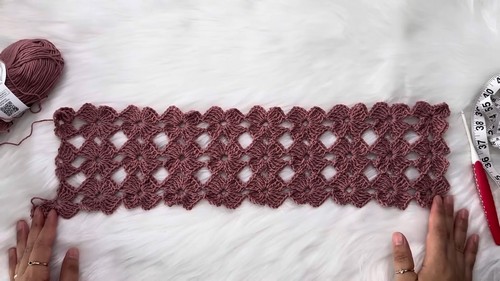
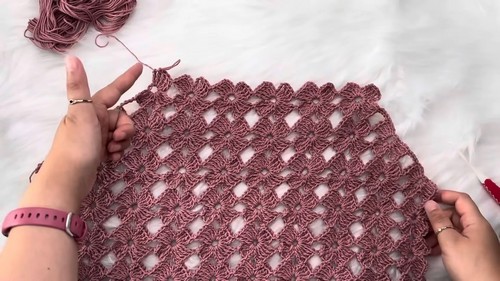
Creating the Back Panel:
- Continue working in rows, following the established petal and flower pattern, until you reach the desired length for the back panel.
- Make the necessary decreases for the armholes by skipping petals where required.
- Finish the back panel by mirroring the pattern from the start of the panel to create a symmetrical shape.
Creating the Front Panels:
- Divide the total number of flowers by two for each front panel.
- Work the flower pattern identical to the back panel, up to the underarm.
- Make decreases for the armhole and the neckline on each front panel as required, matching the shape to the back panel.
- Finish both front panels the same way you finished the back panel, creating symmetry.
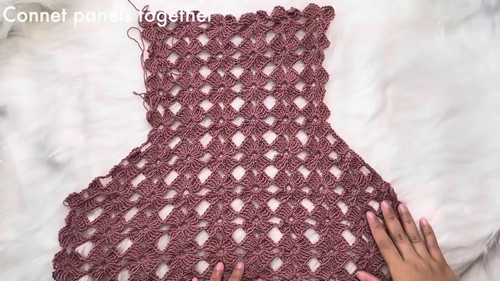
Assembling the Vest:
- Lay the back panel with the right side facing up.
- Lay the front panels down, aligning the shoulder and side edges with the corresponding edges of the back panel.
- Sew the shoulder seams and side seams together using slip stitches or your preferred joining method.

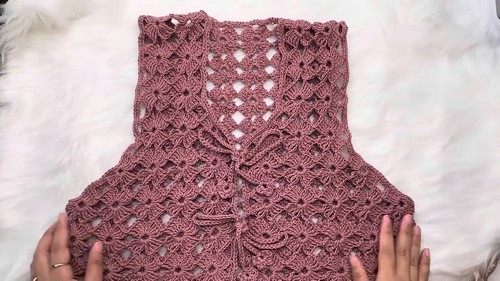
Creating Borders:
- Start at the armhole and make chains to connect the petals on the edges.
- Go back along the chains with single crochets to create a border.
- Repeat this process for the front and back edges if desired.
Making Straps:
- Chain 100 (or to your desired length for a strap).
- Create a small flower on one end, followed by slip stitches down the length of the chain.
- Add another small flower at the other end to complete the strap.
- Make a total of three straps.
Finishing Touches:
- Fasten off your ends cleanly, and attach the straps to the vest at the positions you prefer using a needle and yarn.