Step By Step Crochet Mini Heart Cake Valentine’s Gift Pattern
Add a sprinkle of joy with the Free Crochet Mini Heart Cake Pattern – create adorable, fun, and sweet crochet cakes perfect for any celebration!
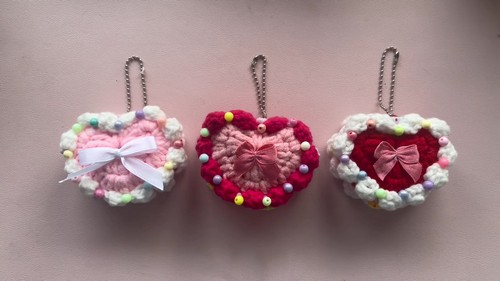
Get ready to whip up some crochet magic with the Crochet Mini Heart Cake Pattern! This delightful pattern lets you create adorable, heart-shaped crochet cakes that are perfect for decorations, party favors, or cute little gifts. With its easy-to-follow instructions, you can master the art of creating these mini marvels in no time.
Crochet Mini Heart Cake
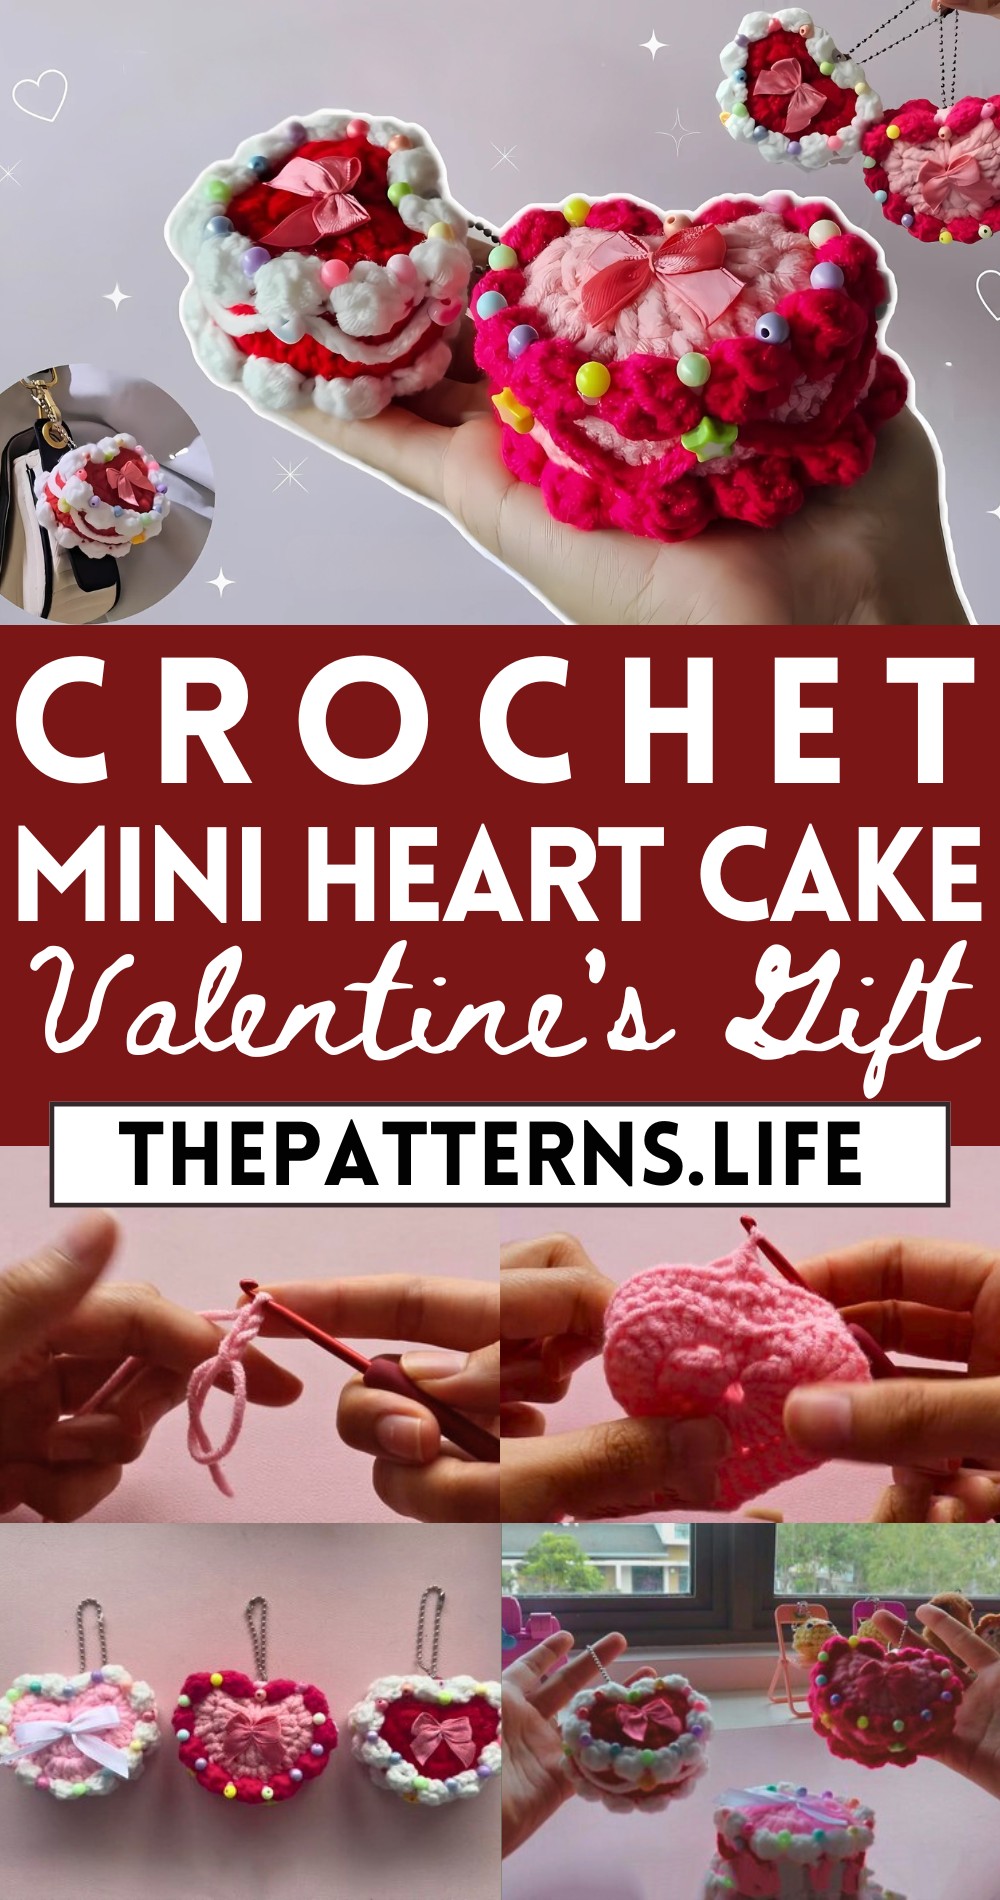
Each mini heart cake features charming details like icing, sprinkles, and even tiny cherries on top. The pattern is perfect for crocheters of all levels, making it a fun project whether you’re a beginner or an experienced crafter. Customize your mini cakes with different colors and embellishments to match any theme or occasion. These cute creations are sure to bring a smile to anyone’s face!
Tip:
Use a small hook size for tighter stitches to give your mini heart cakes a neat and firm finish.
Materials:
- Main yarn color for the cake (light pink in the tutorial)
- Yarn for the cream and piping (a different color if desired)
- Stuffing
- 3.5 mm hook
- 2 mm hook
- Scissors
- Beads for decoration
- Glue
- Optional: Key ring or chain for a keychain
Abbreviations:
- SC: Single crochet
- DC: Double crochet
- HDC: Half double crochet
- TC: Triple crochet
- Ch: Chain
- St: Stitch
- Sl St: Slip stitch
Instructions:
Making the Cake Body:
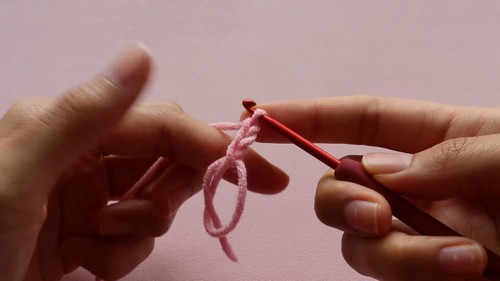
Create a magic ring with your main yarn color.
- Ch 3 and TC 3 into the magic ring.
- DC 4 into the magic ring.
- TC 3 to form the point of the heart.
- Repeat steps 3 and 4 on the other side of the heart.
- Ch 3 and Sl St into the magic ring to close the heart.
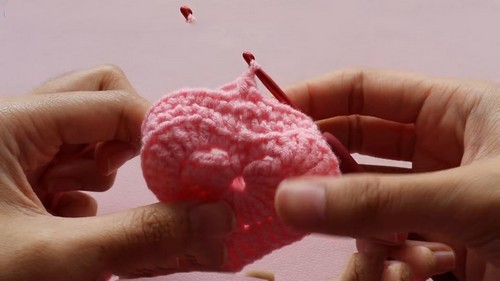
- Ch 1 and SC in the back loops all the way around. Repeat this for two more rounds.
- Ch 1 and fasten off to complete the bottom of the cake.
Making the Cake Top:
- Repeat steps 1-8 for the top of the cake, but stop after the second round.
- Leave a long tail for sewing.
Assembling the Cake:
- Align the bottom and top of the cake, with the points matching.
- Insert your needle into the middle of the bottom and top, and sew the two pieces together, leaving a small gap for stuffing.
- Stuff the cake with just enough stuffing to create a nice shape.
- Sew up the remaining gap and fasten off.
Making the Cream:
- Insert your hook into the middle of the top of the cake and make a slip knot.
- Ch 4.
- DC cluster 3 times into the first chain.
- Skip 2 stitches and Sl St into the third stitch.
- Repeat steps 2-4 all the way around until you reach the beginning.
- Ch 1 and fasten off.
- Repeat for the bottom of the cake.

Making the Piping:
- Switch to your 2 mm hook and the same yarn as the cream.
- Make a slip knot and insert your hook somewhere on the top of the cake.
- Ch 13.
- Sl St the chain onto the cake, shaping it as desired.
- Repeat this all the way around the cake.
Decorating:
- Add beads or other decorations to the cake and piping.
- Attach a chain or key ring if desired.