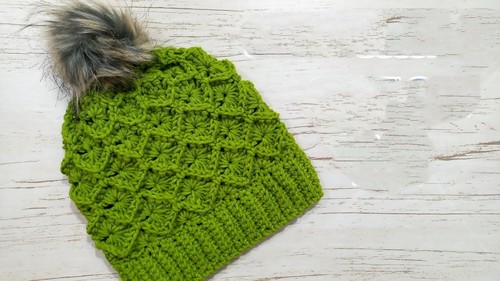
Stylish And Cute Crochet Beanie Hat Pattern For Autumn Season
Grab a Free Crochet Beanie Hat Pattern and keep your head warm while your fashion sense stays cool using your favorite yarn and colors
This pattern beautifully combines classic stitches with modern flair, resulting in a timeless piece that enhances any wardrobe. The hat with a twist of unique texture and design elements create an eye-catching appearance, perfect for both casual outings and more polished looks. Available in a range of customizable colors and yarn types, it allows you to express your personal style effortlessly.
Crochet Beanie Hat Pattern
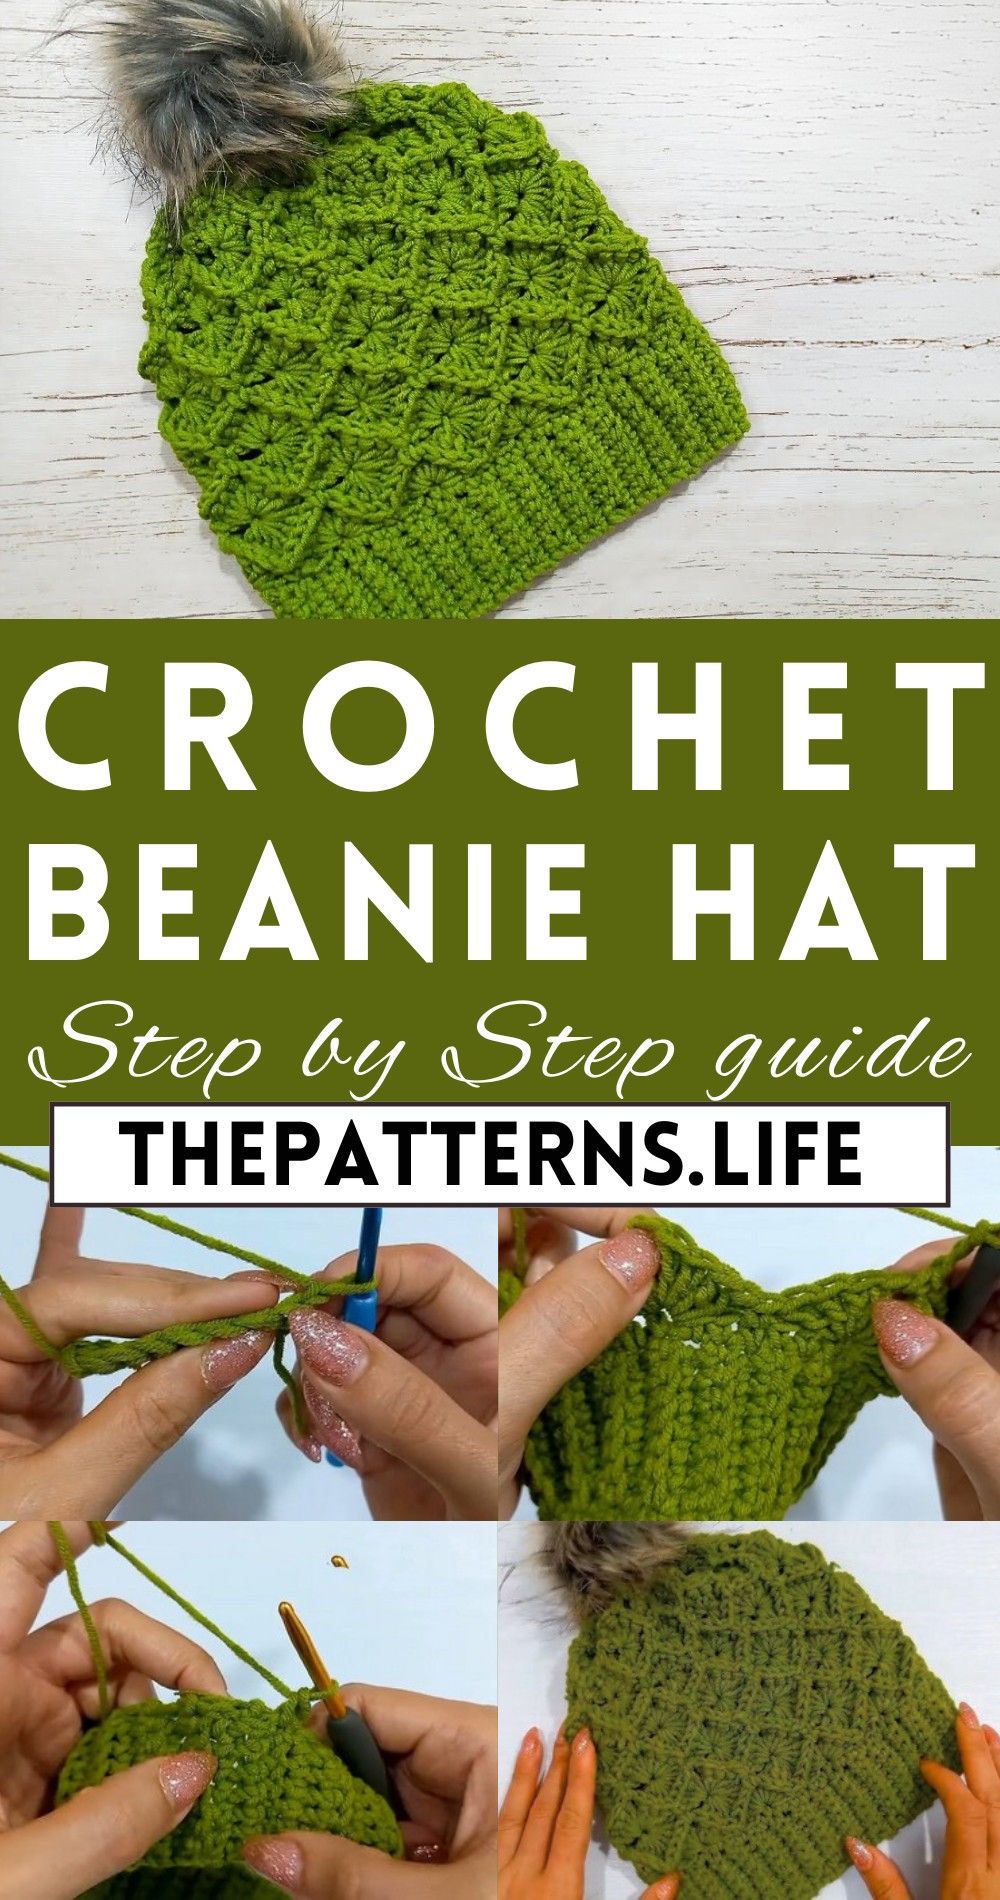
Easy to follow with detailed instructions, this pattern suits both beginners and seasoned crocheters looking for a chic project. The finished beanie not only provides comfort but also showcases the meticulous attention to detail that makes it a standout accessory.
Tip:
For added sophistication, try incorporating a subtle metallic yarn to give your beanie a stylish shimmer.
Materials Needed:
- Worsted weight yarn
- 4.5 mm crochet hook (for the ribbed band)
- 5.0 mm crochet hook (for the body of the hat)
- Tapestry needle for weaving in ends
- Scissors
Pattern Overview:
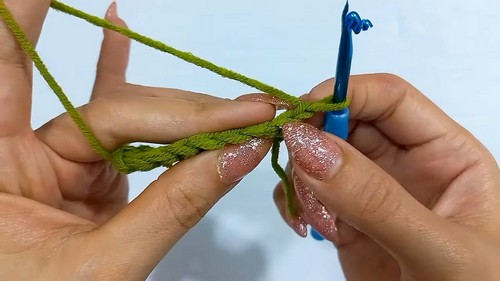
Ribbed Band:
- Begin with a 4.5 mm hook.
- Make a slip knot.
- Chain 9 to start. These chains determine the width of the ribbed band. Adjust the number of chains for width as needed.
Row 1:
- Skip the first chain. Single crochet into the second chain and then into each chain across (8 single crochets).
Row 2:
- Chain 1, turn. Single crochet into the first stitch under both loops, then make a single crochet into the back loop of the next and each stitch across until the last stitch, which is under both loops. Repeat Row 2, making sure the total number of rows is a multiple of 6, until the rib band reaches your desired circumference.
Joining Ribbed Band:
- Lay flat and fold so the first row and the last row are touching. Join using slip stitches through the back loop of the first row and both loops of the last row.
Starting the Hat Body:
- Change to a 5.0 mm hook.
- Rotate the band so the seam is inside, and working along the top edge of the ribbed band, evenly space single crochets around. The number of single crochets should match the number of rows in your ribbed band.
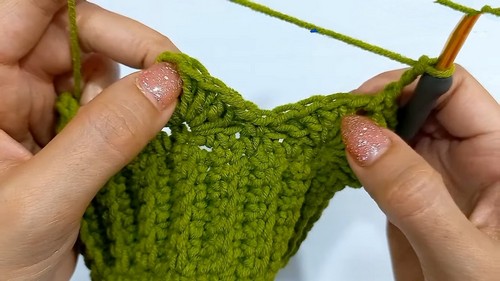
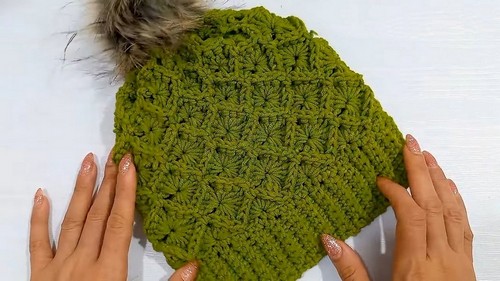
Textured Body Pattern:
Setup Round:
- Chain 1, single crochet in the same space. Skip two stitches, then in the next stitch, make 4 double crochets, chain 1, and 4 more double crochets (creating a Fan Stitch), skip two stitches, then single crochet in the next stitch. Repeat from * to * around. Join with a slip stitch to the first single crochet.
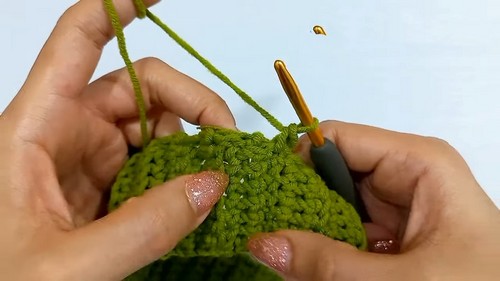
Round 1 (Decrease Round):
- Chain 1, single crochet in the same space, chain 3. Make an incomplete back post double crochet around each of the next 4 double crochets, chain 3, then pull through all loops on the hook (this forms a decrease). Chain 3, single crochet into the next chain-1 space, and repeat this sequence around.
Round 2 (Fan Stitch Round):
- Repeat the setup round, placing fan stitches on top of each decrease stitch from the previous round.
- Repeat Rounds 1 and 2 until the hat reaches the desired height.
Closing the Hat:
Decrease the number of stitches in each fan by crocheting 3 double crochets instead of 4, and then in the next round decrease to 2 double crochets per fan. Continue until there is only 1 double crochet, 1 chain, and 1 double crochet for each fan stitch.
- Finish by cutting the yarn, leaving a long tail. Use a tapestry needle to weave through the chain-1 spaces of the last round, pull tight to close the top, secure, and weave in ends.
Finishing Touches:
- Turn the hat right side out.
- You can attach a pom-pom at the top if desired.