
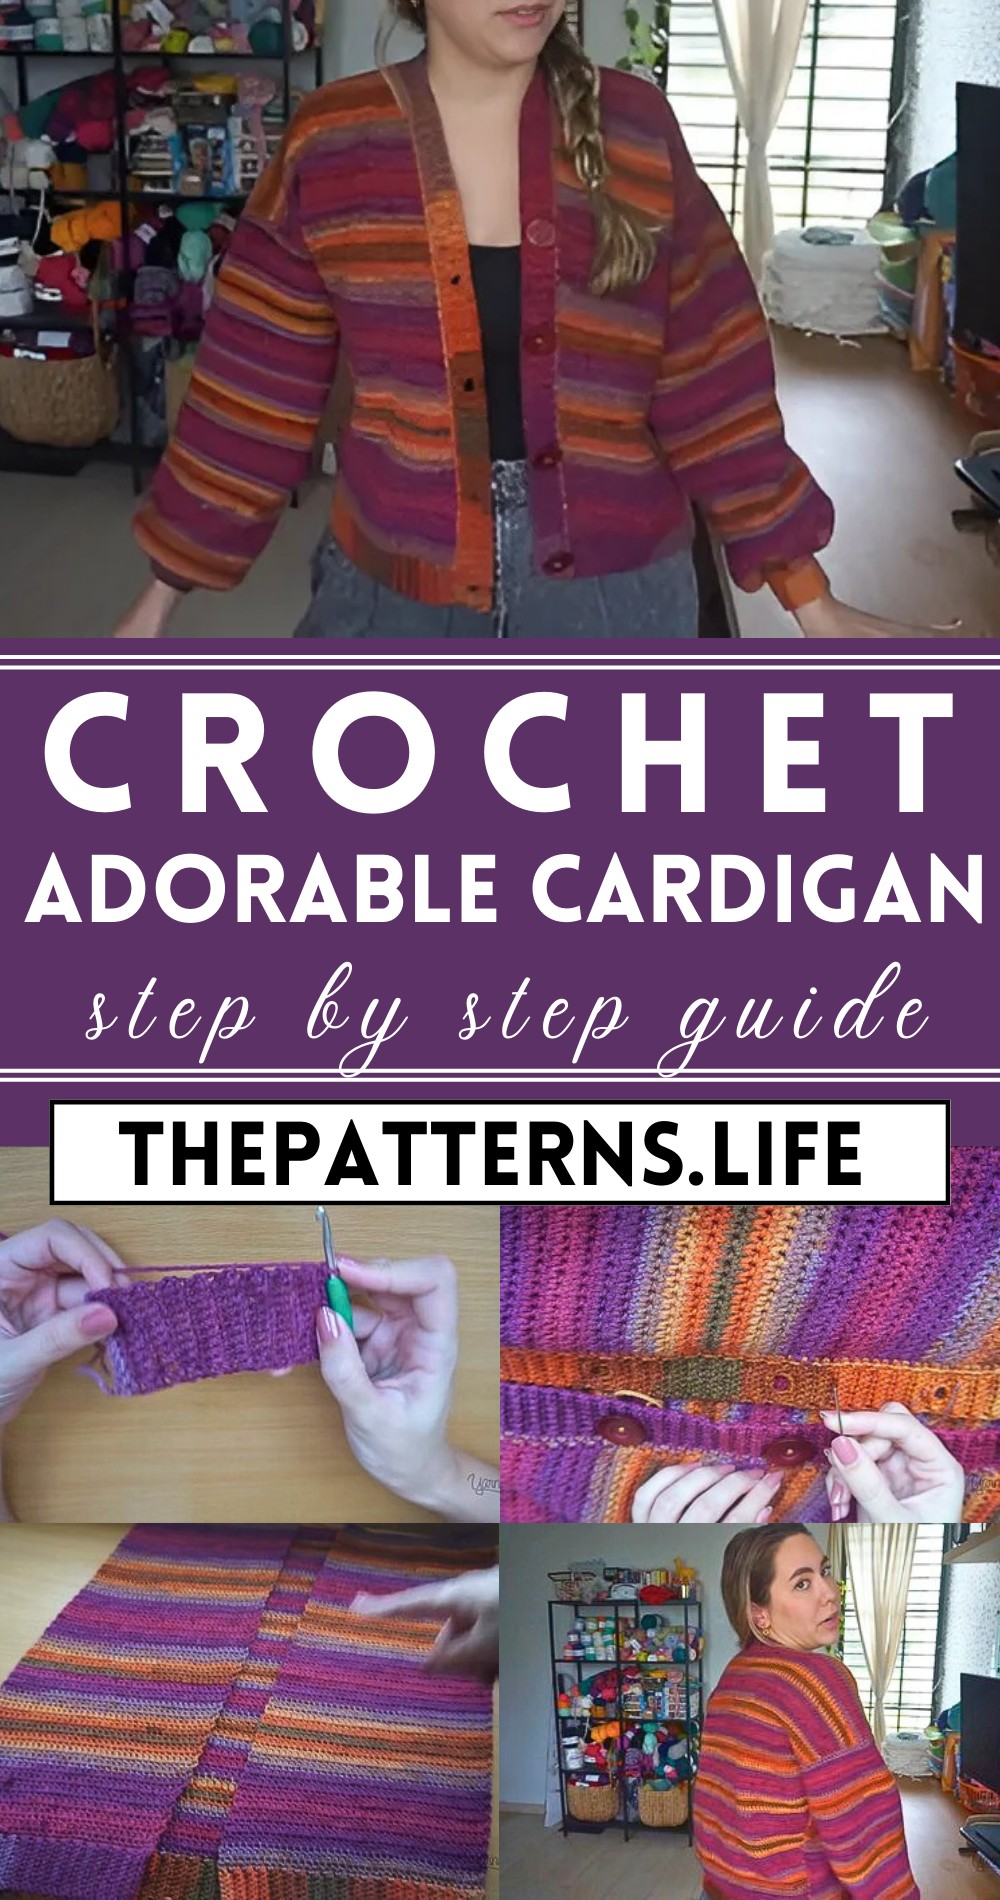
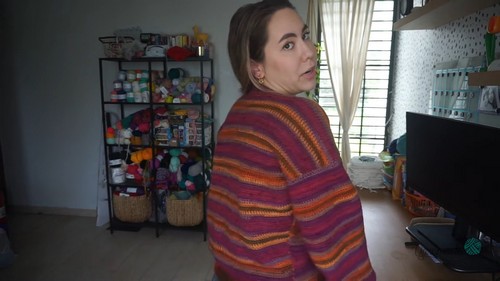
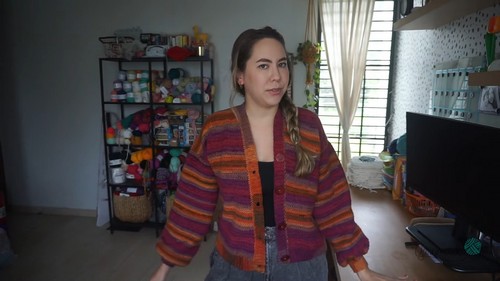
Simple & Adorable Crochet Cardigan Pattern
Get cozy and chic with the Free Crochet Cardigan Pattern – craft a stylish, snuggle-worthy cardigan that you’ll love to wear in any season!
Perfect for all skill levels, this pattern guides you through creating a versatile piece that can be dressed up or down for any occasion. From casual daywear to a cozy evening layer, the cardigan’s flexibility ensures it becomes a staple in your closet. Utilizing a variety of stitches and techniques, the pattern not only helps you craft a stylish garment but also hones your crocheting skills.
Crochet Cardigan Tutorial
The Crochet Cardigan Pattern offers a delightful way to enhance your wardrobe with a handmade touch. Benefits of making your own cardigan include customized fit, your choice of yarn colors and textures, and the satisfaction of creating a wearable piece of art. Ideal for gifting or personal use, this pattern allows for endless creativity and personalization.
Tip:
For a professional finish, block your cardigan after completing to enhance its shape and drape.
Materials Required:
- Premier’s Color Fusion DK weight yarn – Color Autumn sky
- 4.5 mm crochet hook
Pattern:
Back Panel Instructions:
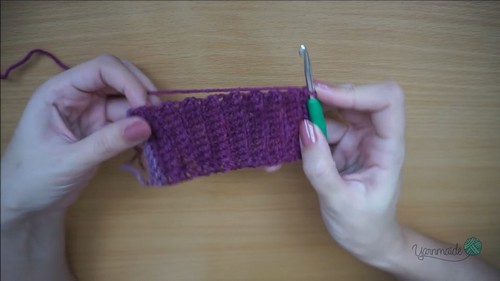
- Start with a slip knot and chain 11 (or adjust for desired width of the ribbon).
- Start single crochets on the second chain from the hook, one per chain, until you reach the end.
- At the end of the row, chain one, turn around, and single crochet into the back loop only of each stitch across.
- Repeat the previous step until you reach the required measurement for the back panel (as provided on the screen or in the video description).
Creating Edges & Beginning Pattern Stitches:
- Single crochet along the edge of the ribbon to create a neat border.
- Start a new pattern row by chaining two, then work extended single crochets across the row, beginning from the second stitch.
- Chain two, turn, and then work extended single crochets by inserting the hook between stitches from the previous row.
- Alternate between these two rows (steps 2 and 3) until the back panel reaches the necessary size.
Front Panels Instructions:
- Create front panels by following the same pattern as the back panel but with the measurements for the front panels.
- Use stitch markers to mark where the middle is if needed.
Sleeves Instructions:
- Create a ribbon for the wrist by chaining 11 and creating a single crochet in each chain just like the back panel ribbon.
- Increase stitches as necessary to create a wider sleeve.
- Continue working the extended single crochet pattern with increases until the sleeve is wide enough to fit comfortably.
- Work the second and third row pattern until the sleeve reaches the required length.
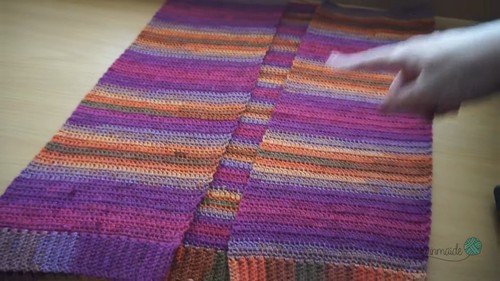
Assembly Instructions:
- Sew together the panels, starting with the back panel and front panels.
- Attach the sleeves, aligning the middle stitch of the sleeve with the shoulder seam.
- Sew the side seams from the sleeve edge down to the bottom edge of the cardigan.
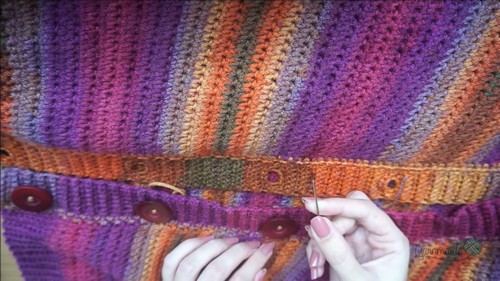
Front Edging and Button Instructions:
- Attach yarn on one corner of the front panel and single crochet along the entire front edge.
- Chain eight and work the ribbon pattern along the edge using single crochets.
- Incorporate buttonholes by chaining and skipping stitches as indicated.
- Sew the buttons opposite the buttonholes.
Finishing:
- Weave in any loose ends.
- Block the cardigan if necessary for proper sizing and drape.
Conclusion:
Enjoy your beautiful, handmade cardigan. Remember to check the description or screen notes in the video for specific measurements and additional instructions.


