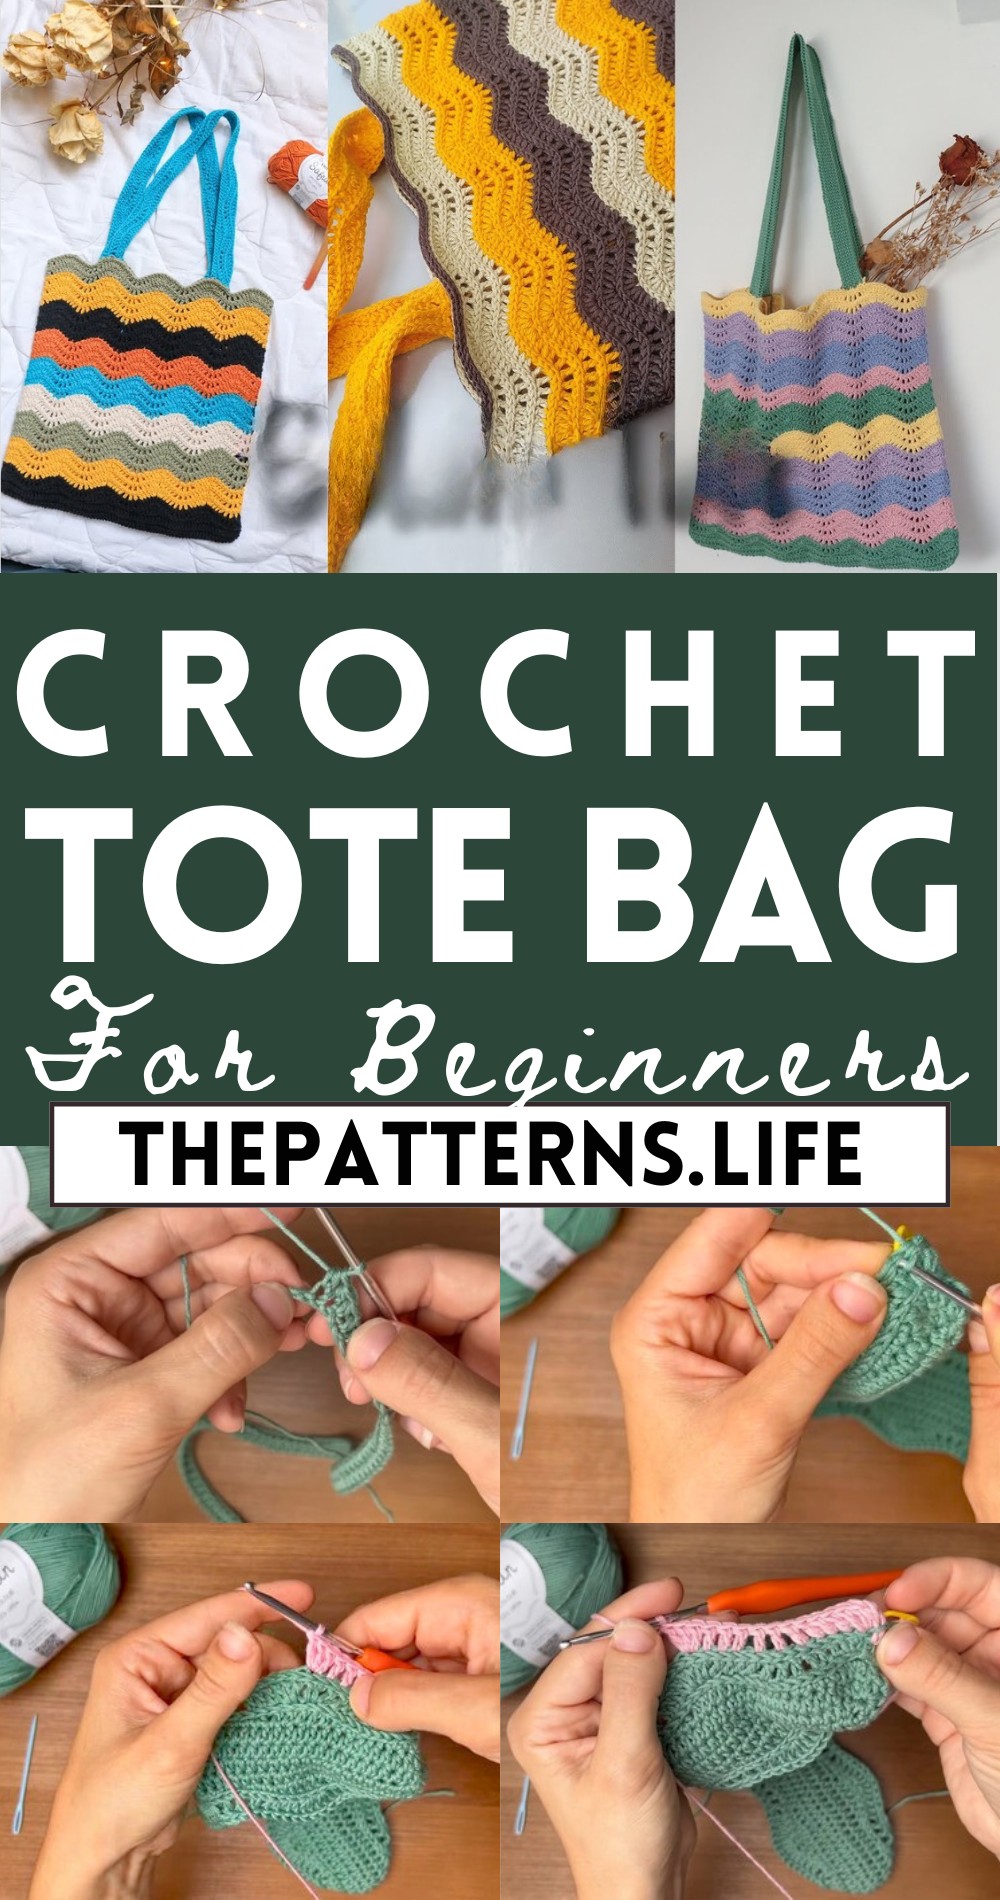
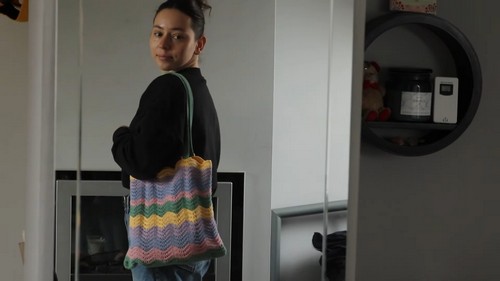
Stylish Crochet Wavy Tote Bag Step By Step For Beginners
Dig up the vibrant Free Crochet Wavy Tote Bag Pattern, perfect for crocheting an eye-catching accessory while enhancing your crochet skills!
A fun and fabulous project that combines style with practicality. Picture yourself crocheting joyous, playful wavy textures that bring a playful touch to any outfit. This pattern features easy-to-follow steps, making it perfect for crochet enthusiasts looking to whip up a trendy tote that’s as functional as it is fashionable.
Crochet Wavy Tote Bag Tutorial
Whether you’re off to the beach, a picnic, or a shopping spree, this tote will be your ultimate companion, turning heads wherever you go. The vision behind this pattern is to ignite your imagination and let your personality shine through your handmade creations.
Tip:
Use vibrant and contrasting yarn colors to make your wavy design pop and add a cheerful vibe to your tote!
Materials Needed:
- Approximately 150 grams of sport weight yarn (Drops Safran was used in the video)
- 3 mm crochet hook
- Stitch markers
- Yarn needle
Pattern Overview:
- The tote has a wavy pattern with stripes and the medium size measures about 42 cm.

Starting the Base:
- Create a Slip Knot.
- Chain 85. Make sure you end up with 85 stitches.
- Chain one more stitch, then skip the first stitch.
- Half Double Crochet (HDC) in the next 84 stitches. Skip the last stitch.
- In the last stitch, make three HDCs in the same stitch.
- You will now crochet from the other side of the chain, half double crochet in the next 83 stitches (do not work in the last stitch as you already have one HDC in this stitch from the other side).
- Make two more HDCs in this last stitch.
- Join with a slip stitch to the first stitch.
Growing the Bag:
- Chain one, make two HDCs in the first stitch.
- HDC in the next 83 stitches. Stop before the last three stitches.
- In the first of these last three stitches, make two HDCs.
- In the second, make three HDCs.
- In the third, make two HDCs.
- HDC in the next 83 stitches, again stopping before the last two stitches.
- Make two HDCs in the second-to-last stitch and three HDCs in the last stitch.
- Join with a slip stitch.
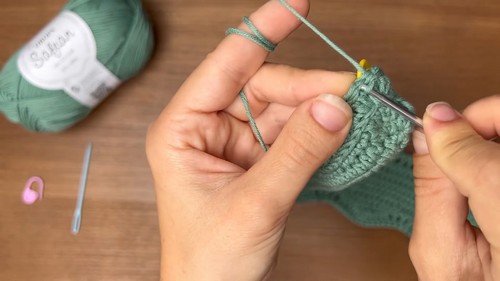
Wavy Pattern:
- Chain two.
Start the stitch pattern repeat:
- Two Double Crochets (DC), one HDC, three Single Crochets (SC), three Slip Stitches, three SCs, one HDC, and two DCs.
- Continue this pattern until the end of the round.
- Join with a slip stitch and mark the first stitch with a stitch marker.
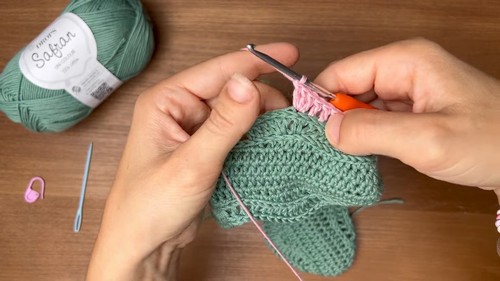
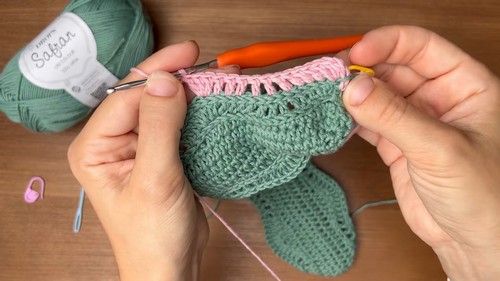
Braid Top:
- Make a round of slip stitches.
Work in the back loops only for the next round:
- Chain two, and make three DCs in the first stitch (where you placed the marker).
- Continue with DVs in the next three stitches.
- Skip one stitch, then DC in the next stitch, repeating four times to create little gaps.
- Finish the sequence with two DCs, then three DCs in the last stitch of the repeat.
- Repeat these steps all around and join with a slip stitch.
Finishing the Bag:
- Change colors every six rounds if you wish.
- When the bag reaches your desired length (30 cm in the video), it’s time to work on the straps.
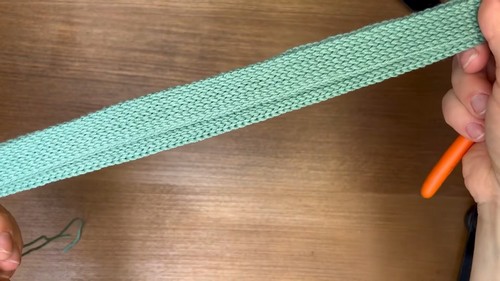
Straps:
- Chain 60 cm for the strap, then slip stitch in every stitch until the end.
- Chain one, turn your work, and slip stitch into the back loop only.
- Repeat the process for as many rows as necessary until your strap is as wide as you want (14 rows were made in the video).
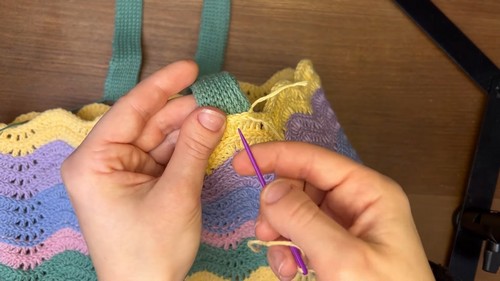
- Sew the straps to the bag using a yarn needle and the appropriate color yarn.