
C2C Crochet Shawlette & Scarf Cowl Free Fun Pattern
“Wrap up in elegance with the Free C2C Shawlette & Scarf Cowl Pattern – a versatile, stylish accessory that’s fun and easy to crochet!”
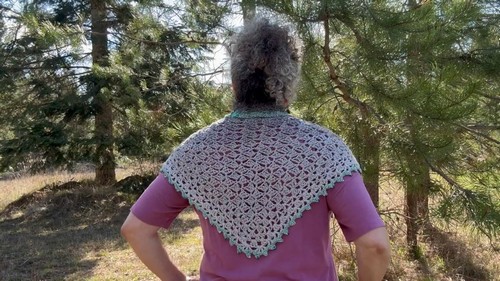
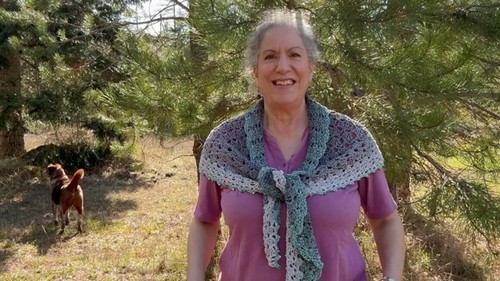
This fun project allows you to craft a piece that transitions effortlessly from a cozy shawlette to an elegant scarf cowl, making it suitable for any occasion. Ideal for those chilly days or as a fashionable statement piece, this pattern uses the popular Corner-to-Corner (C2C) technique, offering a stunning texture that’s engaging to crochet. Elevate your wardrobe with the captivating Crochet C2C Shawlette & Scarf Cowl Pattern, a sophisticated accessory that blends style and practicality.
C2C Crochet Shawlette & Scarf Cowl
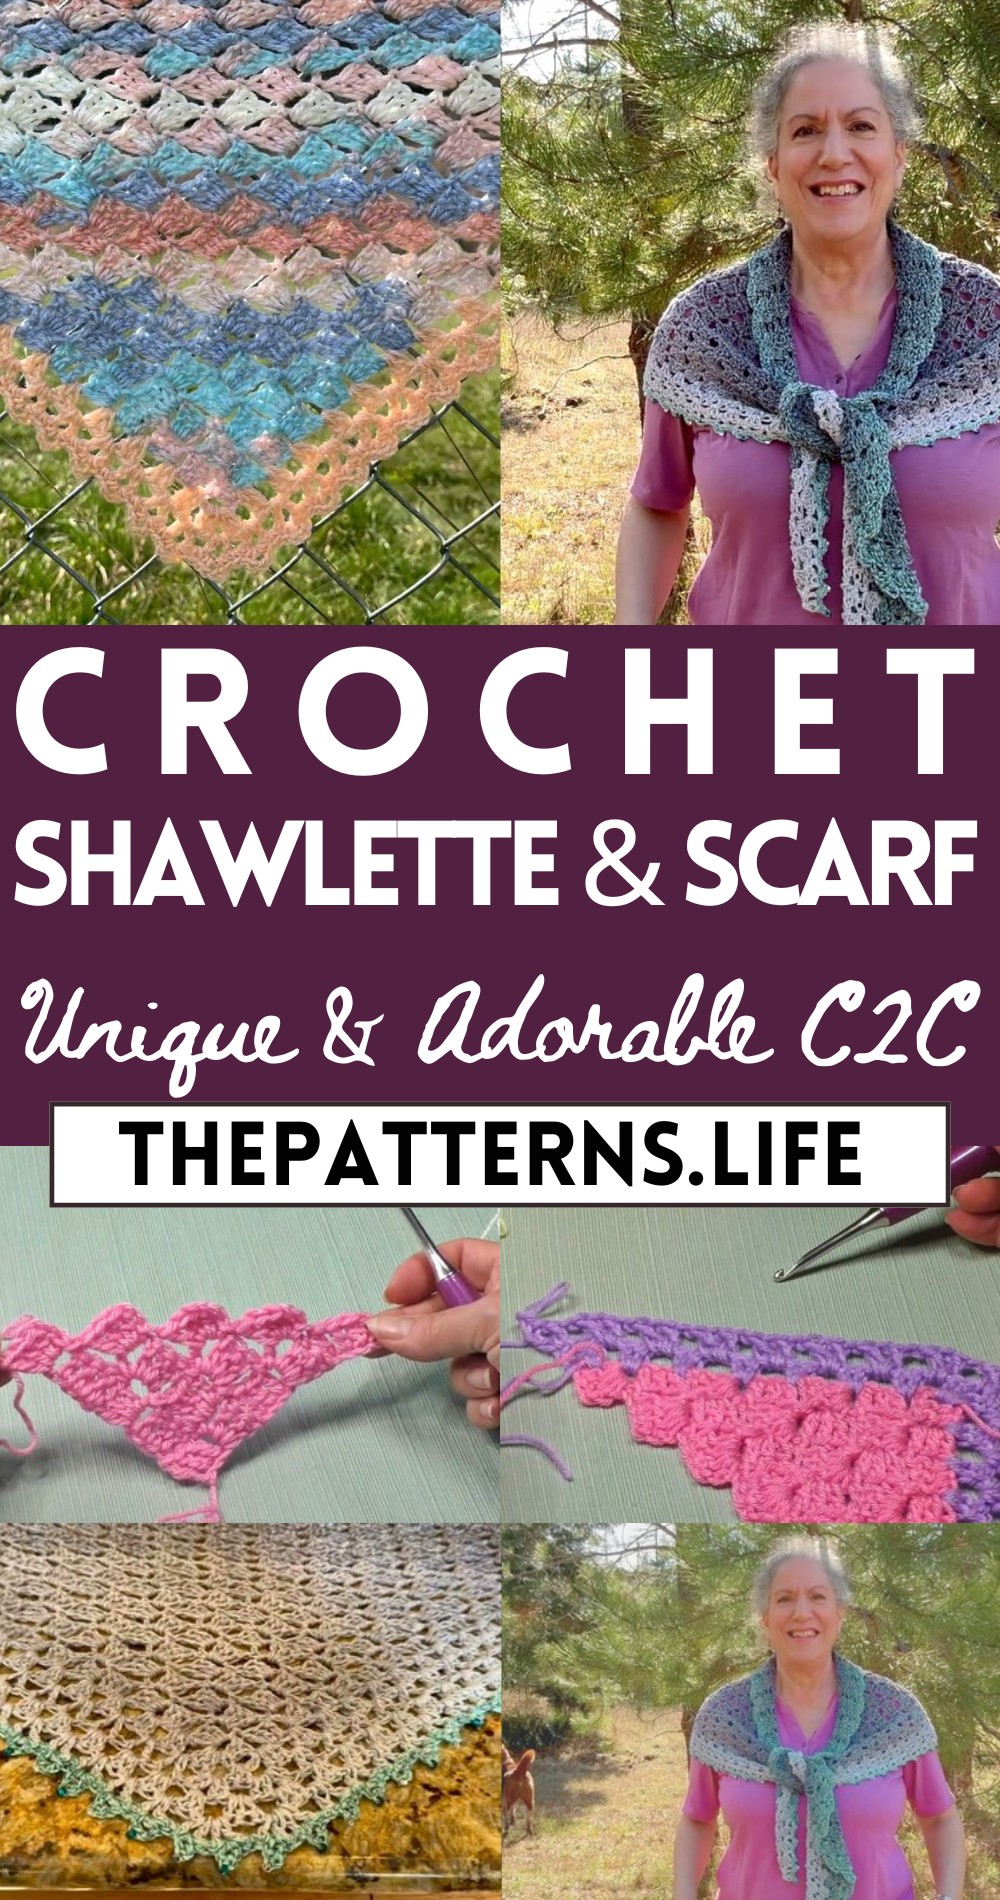
Perfect for both beginners eager to expand their skills crocheters looking for a rewarding project, this pattern provides clear instructions and room for creative flair. Envision the endless possibilities as you customize it with your favorite yarns and colors for a truly unique accessory.
Tip:
Use a lightweight, gradient yarn to highlight the texture and drape of your finished shawlette and scarf cowl.
Materials Needed:
- Light weight yarn (Recommendation: K Weight Number 3) – approximately 3.5 oz skeins.
- Crochet hook size H/5 mm (or size needed to obtain gauge or desired drape).
- Scissors and a yarn needle for weaving in ends.
- Optional: Beads for embellishment.
Pattern Overview:
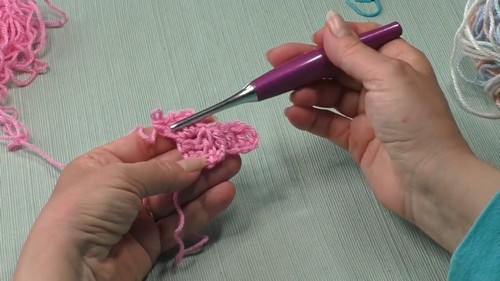
Starting the Shawlette:
- Start with a slip knot.
Row Setup:
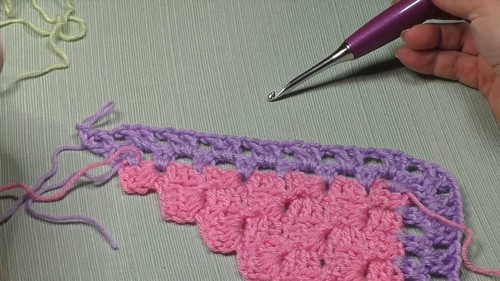
- Chain 6, then double crochet in the fourth chain from the hook and in the next two chains.
- This forms your first “block” or “tile”.
Building Blocks:
- For each new block at the start of a row: Chain 6, double crochet in the fourth chain from the hook and in the next two chains.
- Rotate your work so the tail is at the bottom.
- Slip stitch into the “chain 3 space” of the previous row’s starting block.
- Chain 3 (counts as a double crochet), and then make 3 more double crochets into the same space.
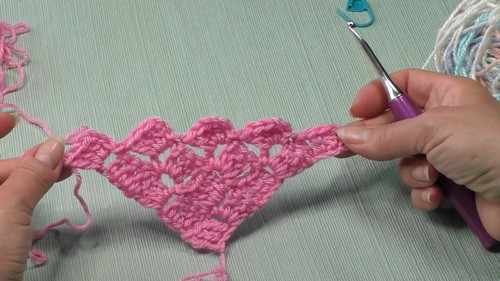
Continuing Rows:
- Each row will increase by one block.
Continue creating blocks with:
- Chain 6 to start, and then proceed as above.
- Join to the adjacent block with a slip stitch into the chain 3 space.
- Complete each block by adding 3 double crochets into the same chain 3 space.
- Rotate work as needed to keep the tail end on the bottom.
Adding Width and Fastening Ends:
- Continue until the shawlette reaches a width that extends beyond your wingspan or desired final width.
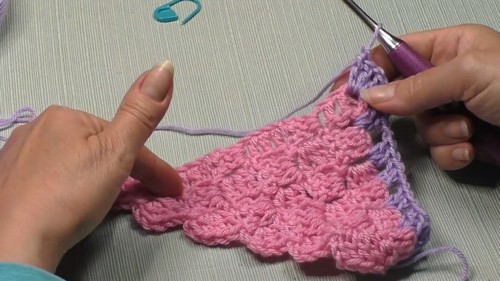
Adding Borders:
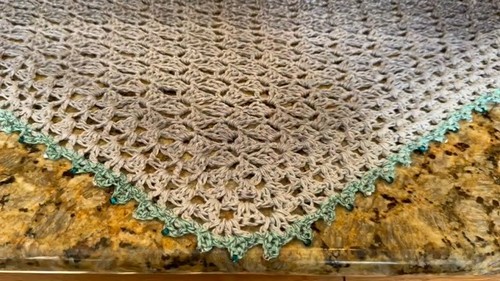
- Start the border by chaining 3 (counts as a double crochet) at the edge of the shawlette.
Row 1 (Border):
- 2dc in the space between the blocks, chain 1 repeat to the edge, then start the scalloped edge with a chain 3.
- Add optional beads for embellishment following Helain’s bead tutorial.
Finishing:
- Cut and fasten off the yarn.
- Weave in all ends.
Optional:
- Add fringe or tassels to the ends for a finished look.
- Lightly block the shawlette to enhance the drape and even out the stitches.
Final Tips:
- Always make sure that the tail of the yarn is kept at the bottom to maintain the direction and alignment of the blocks.
- Experiment with different yarn weights and hook sizes to achieve different textures and thicknesses.
Notes:
- This shawlette can serve as a charming addition to your spring or autumn wardrobe, perfect for those slightly chilly mornings and evenings.
- It can be crafted from various yarn types and colors, including gradients for a fascinating color transition effect.


