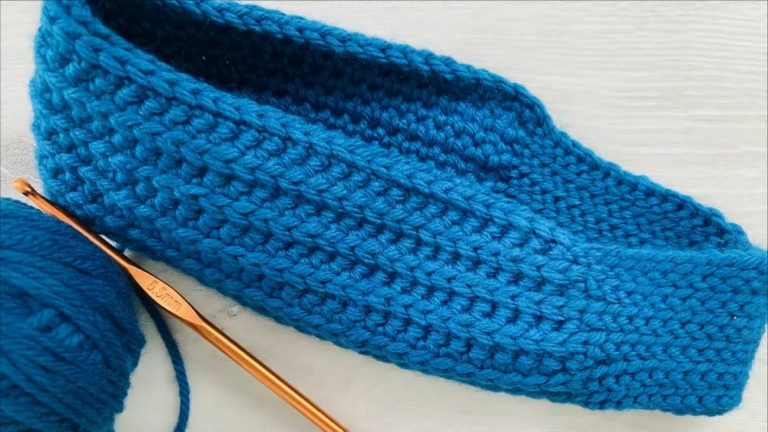
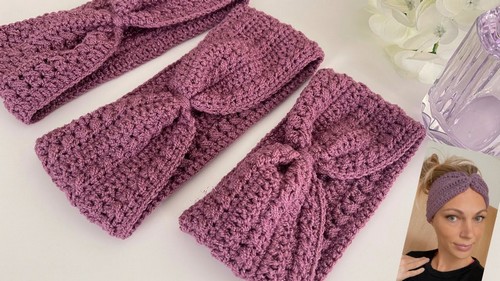
Cozy And Stylish Crochet Headband Pattern For Winter Times
Intuitive and fabulous, this Free Crochet Cozy and Stylish Headband Pattern is perfect for curious crocheters seeking a modest yet chic accessory to create.
This delightful accessory keeps you warm during chilly weather while adding a touch of elegance to your outfit. Perfect for all ages, this pattern is easy to follow, making it ideal for those who want to add a trendy addition to their collection. The headband provides a snug fit, ensuring it stays in place during your daily activities, from casual outings to sporty adventures.
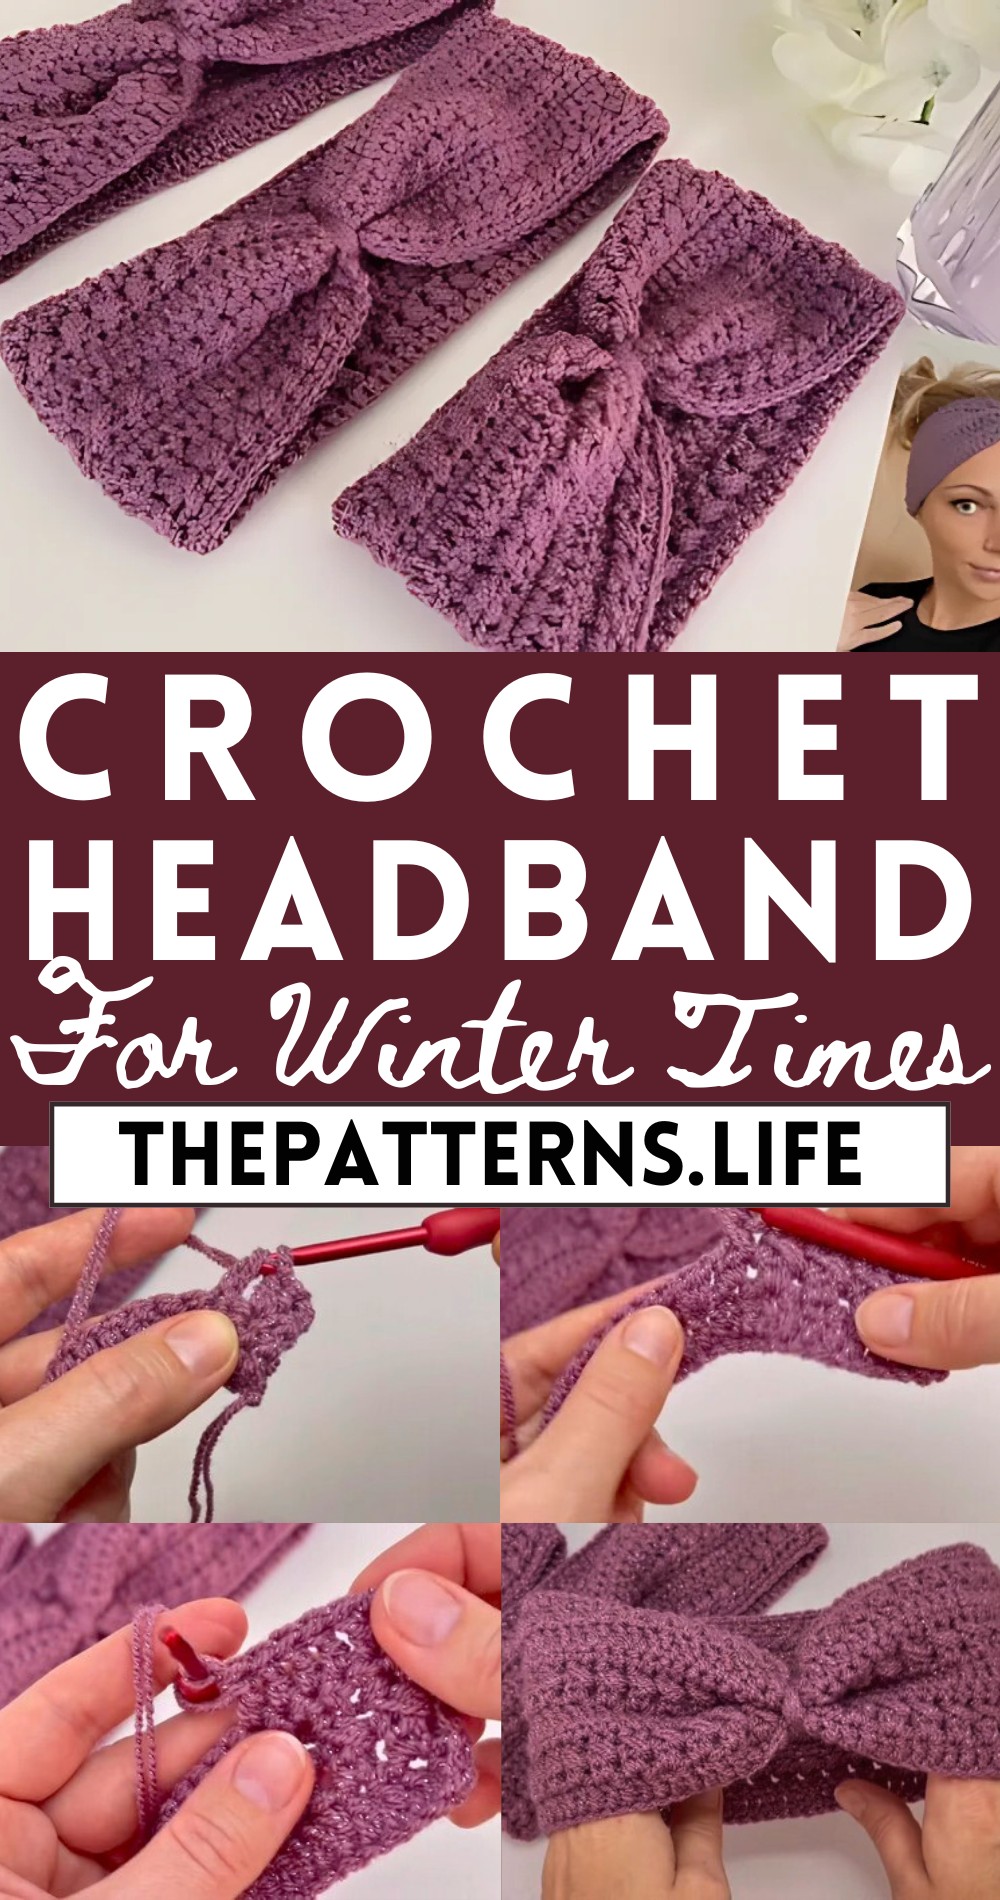
Crochet Headband Tutorial
One of its key benefits is its versatility—you can customize the colors and embellishments to match any style or occasion. Additionally, crocheting your own headband offers a sense of accomplishment and makes for a thoughtful handmade gift.
Tip:
To achieve the best results, use a soft yarn with a slight stretch for a comfortable fit, and always check your gauge before starting to ensure the headband fits perfectly. This pattern combines practicality and fashion effortlessly.
Materials:
- Yarn (The example uses Gold from Yarn Art)
- 4.5 mm crochet hook
- Scissors
- Yarn needle
- Measuring tape
Pattern Steps:
Foundation Chain:
- Start with a slip knot using two strands of yarn for thickness. Make a foundation chain to the desired length. For an adult-sized headband, create a 50 cm long chain. Note: The chain should be 4-5 cm shorter than the head circumference due to the stretchiness of the yarn.
First Row:
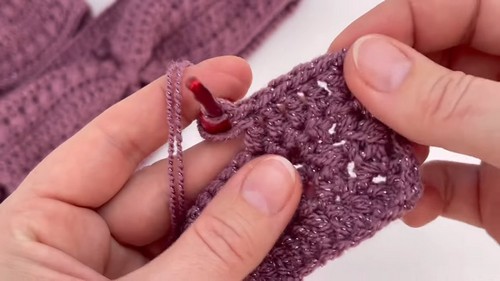
- Begin double crocheting in the fifth chain from the hook. Continue with one double crochet in each chain across until you reach the end. Finish by chaining two and turning your work.
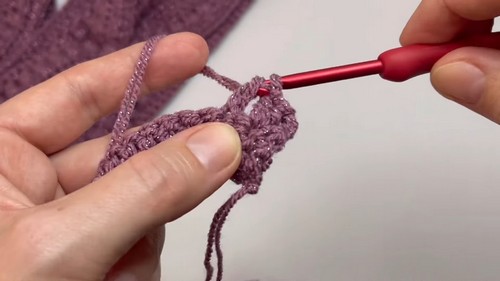
Second Row:
- Work two half double crochets (HDC) in the second stitch from the hook (not the first stitch). Skip one stitch, then make two HDCs into the next stitch. Continue this pattern (skip one stitch, two HDCs in the next stitch) across the row. When you reach the end, skip the second-to-last stitch and make one HDC in the last stitch (which was the chain space from the beginning of the previous row). Chain two and turn your work.
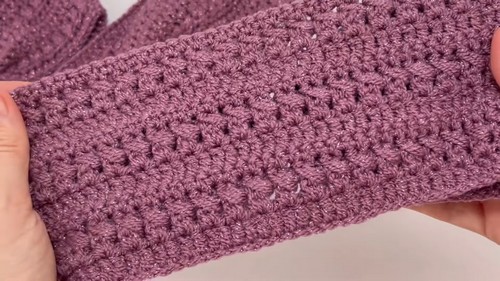
Third Row:
- Starting in the second gap between the sets of half double crochets from the previous row, make one HDC. Then, go back into the first gap and make another HDC, creating a crossed stitch effect. Continue this pattern across the row: skip a gap, make an HDC in the next gap, then go back to the skipped gap and make another HDC. Finish by making an HDC into the turning chain from the previous row. Chain one and turn your work.
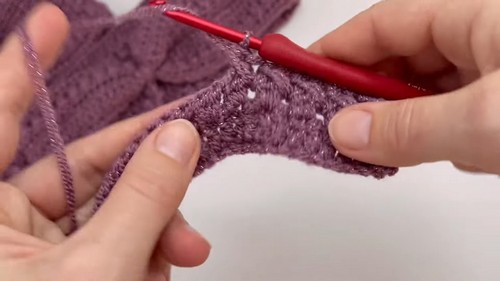
Fourth Row:
- Make one single crochet in the very first stitch and in each stitch across the entire row. This creates a clean edge for the headband. At the end of the row, chain two and turn your work.
Repeat:
- Repeat rows 1 to 4 until you reach the desired width of the headband. The example aims for a headband width of about 10 cm.
Joining Ends:
- Once you have the headband at your desired width, join the ends with slip stitches or sew them together if preferred. Ensure the joining is done on the wrong side for a cleaner look.
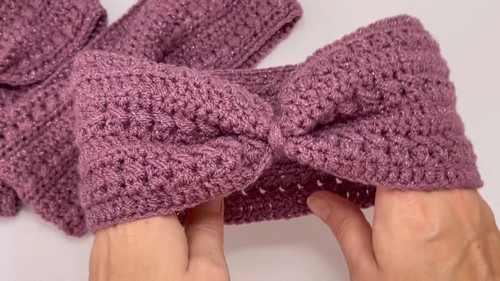
Finishing Touch:
- Wrap the remaining yarn around the middle of the headband where the join is to create a gathered look. Secure this by making a knot with the yarn ends. Tuck in and hide these ends within the headband.
Completion:
- Adjust the headband to ensure the seam and wrapped section are positioned as desired. Your headband is now ready to wear!