
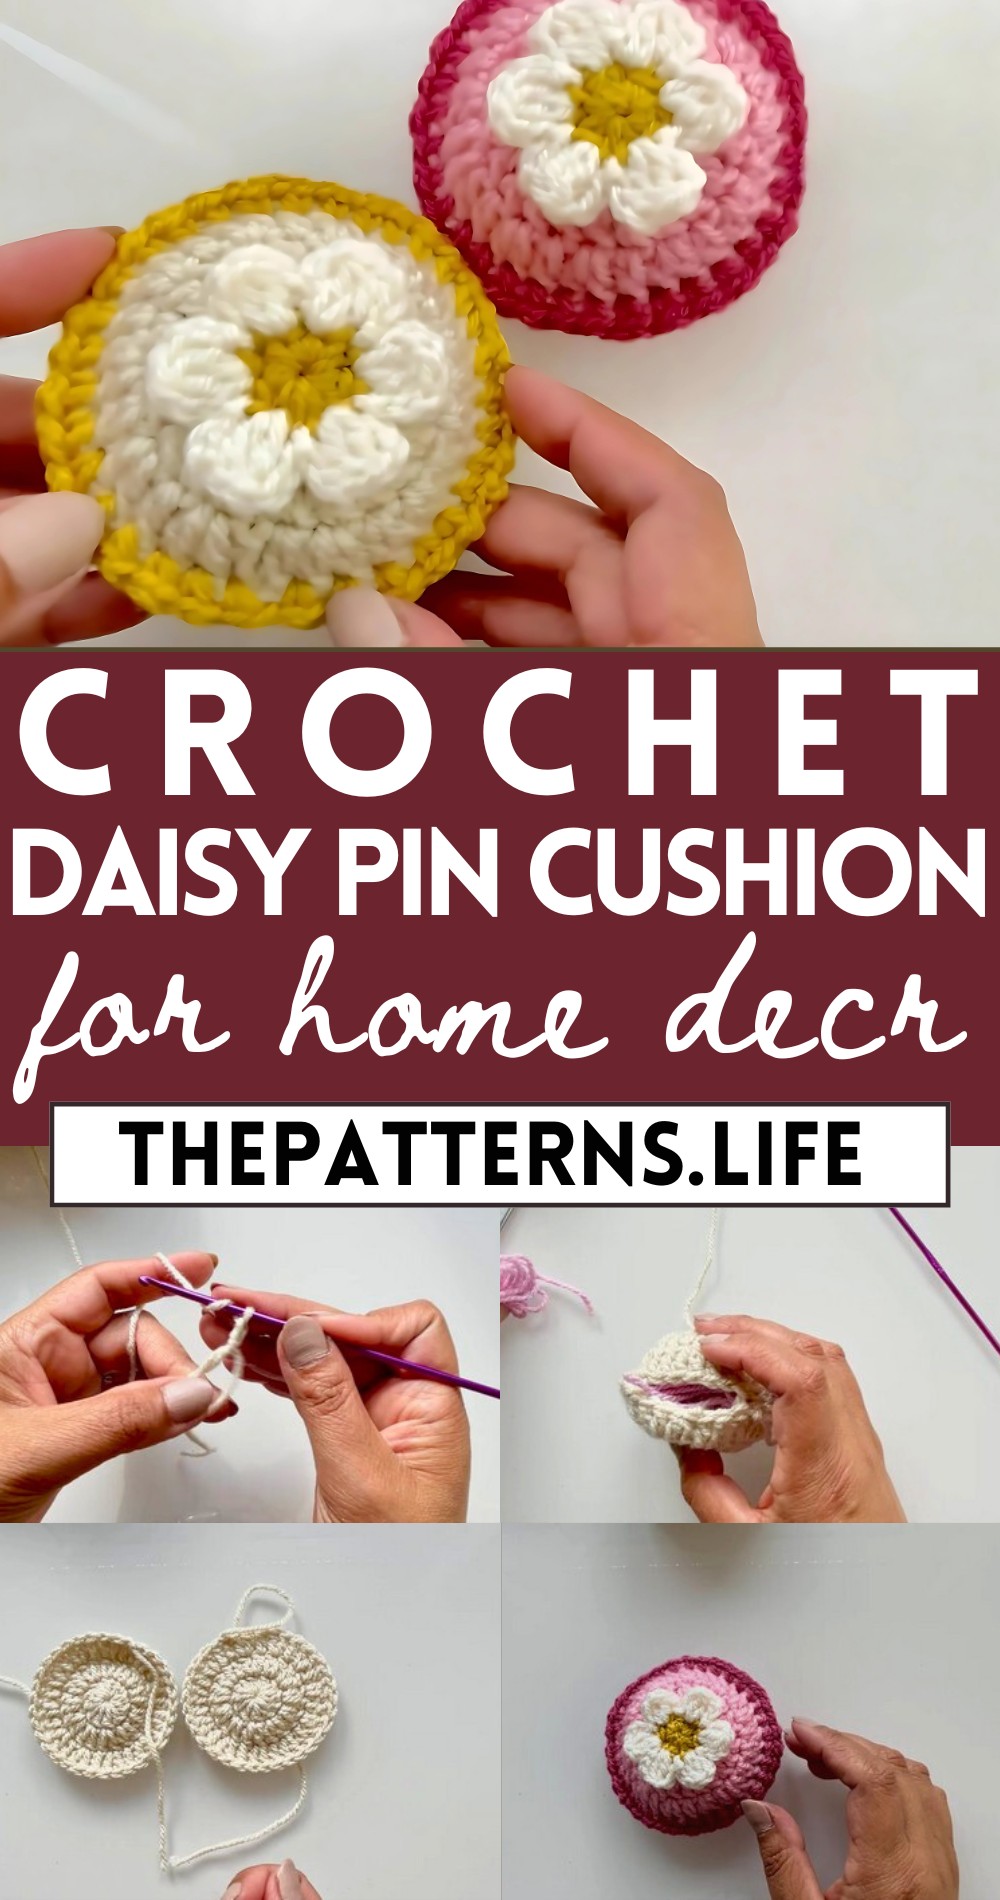
Crochet Cute Daisy Pin Cushion Pattern
Join us for a delightful session to your sewing collection with crochet daisy pin cushion pattern, combining flair and function seamlessly.
This project offers a delightful way to brighten up your sewing space. Creating this pin cushion involves simple crochet techniques that is Perfect for beginners. By using a combination of vibrant yarns, you’ll form a charming daisy design that is both practical and visually appealing.
Crochet Daisy Pin Cushion
This pin cushion not only keeps your pins and needles organized but also serves as a cute decorative piece for your workspace. The benefits of making this pin cushion are twofold: it enhances your crochet skills while providing a functional tool for your sewing projects. Plus, it makes for a thoughtful handmade gift.
Tip:
use a soft, durable yarn to maintain the shape of your daisy over time. This pattern is perfect for anyone looking to combine creativity with utility in their crafting endeavors. Enjoy the process and watch your pin cushion bloom!
Materials Required:
- 3mm crochet hook
- DK weight yarn, lightweight number 3
- Yarn needle
- Scissors
Instructions:

Start with a Magic Circle:
- Hold yarn and wrap the hook to create a magic circle.
- Chain 2 (this does NOT count as anything).
- Place 11 double crochets into the magic circle.
- Pull the tail to tighten the magic circle.
- Slip stitch to the top of the first double crochet (ignoring chain 2).
First Round Expansion:

- Chain 2 and go back into the same space you slip stitched into.
- Do 2 double crochets in each stitch around.
- You should have a total of 22 double crochets at the end of this round.
- Slip stitch into the top of the first double crochet, ignoring the chain 2.
Second Round Expansion:
- Chain 2 and make one double crochet into the same space as slip stitch.
- Place two double crochets into the next space, then one double crochet in the following space, and continue this pattern around.
- You should finish with 33 stitches.
- Slip stitch to the first double crochet to join the round.
- Chain 1 and cut yarn.

Making the Pin Cushion Body:
- Make two of these circles for the top and bottom of the pin cushion.
- With wrong sides together, line up the stitches of both pieces.
- Work in the back loops only of the top circle and the front loops only of the bottom circle, slip stitch around to join both pieces.
- When you have a few stitches left, stuff the cushion with scrap yarn or stuffing.
- Finish joining with slip stitches and cut yarn, leaving a long tail.
Edging:
- Use a contrast color for the edging if desired.
- Working into the space running along the side of the slip stitches, attach the yarn and chain one.
- Make a single crochet and then chain one, moving around the edge.
- Slip stitch to the first single crochet of this round.
- Weave in the end.
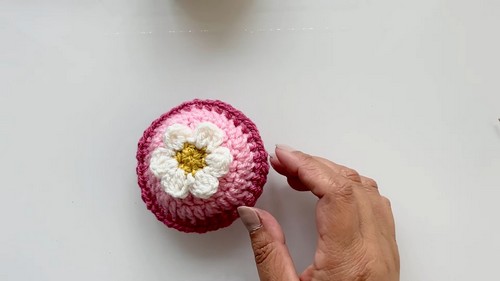
Attaching the Flower:
- The video does not provide the tutorial for the flower as it’s available in another tutorial but suggests leaving a long tail on the flower for sewing it onto the cushion.
- Use the yarn tail to attach the flower to the center of the top circle of the pin cushion.
- Weave in the ends.


