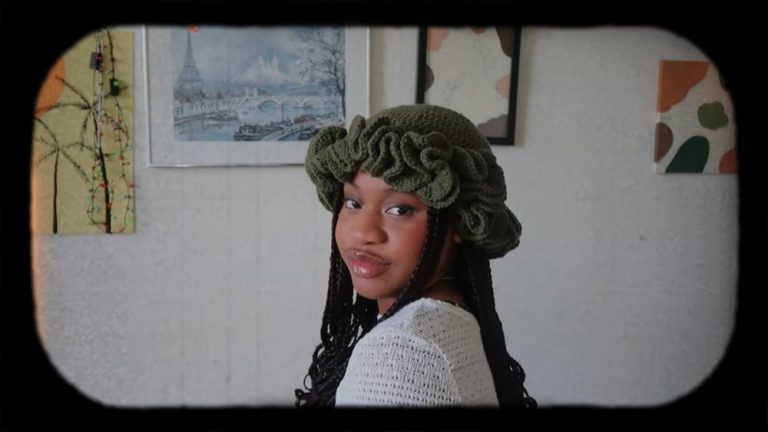
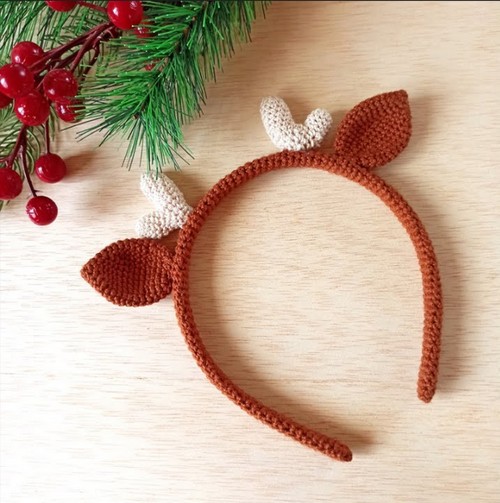
Simple & Easy Crochet Reindeer Ears Headband Pattern
Make holiday moments memorable with this free crochet reindeer ears headband pattern, perfect for festive decor and gifts for loved ones.
It is a delightful project to make your holiday season truly magical. This pattern guides you to create an adorable headband featuring charming reindeer ears, perfect for the holiday season, this project lets you make a charming headband that adds a sprinkle of cheer wherever you go. The instructions are straightforward, making it an enjoyable experience for both beginners and seasoned enthusiasts.
Crochet Reindeer Ears Headband Pattern

You’ll need basic materials like yarn, a crochet hook, and a plain headband to start. The reindeer ears can be customized in different colors to match your festive outfit or theme. This project is not only fun to make but also a unique, heartfelt gift idea for friends and family, spreading cheer and joy wherever it goes.
Tip:
To add extra holiday sparkle, sew a tiny bell or ribbon onto each ear.
Materials Needed:
- Super fine cotton yarn in brown and beige
- 2.5mm crochet hook
- Scissors
- Needle
- Plastic headband (1cm width)
- Stuffing for the antlers
Pattern:
Headband Cover:
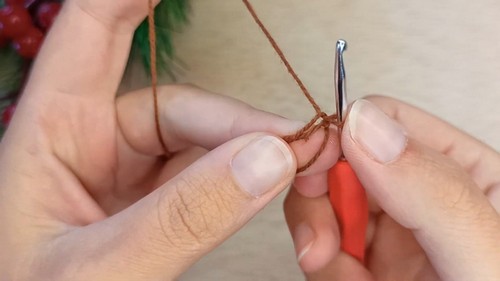
- Start with brown yarn.
- Make a magic ring and crochet 4 single crochets (sc) inside the ring.
- Close the ring and increase in each stitch around by making 2 double crochets (dc) in each stitch for a total of 8 stitches.
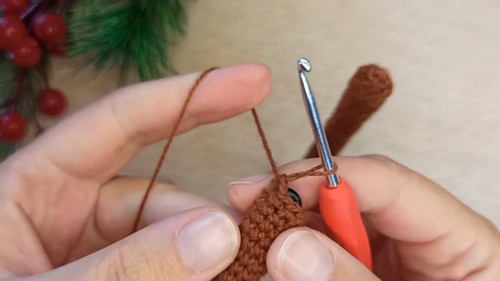
Continue adding 1 sc in each stitch around until you have a piece long enough to cover the headband.
- Insert the headband and close it with four decreases. Remove the headband if needed to continue adding length, then reinsert and close.
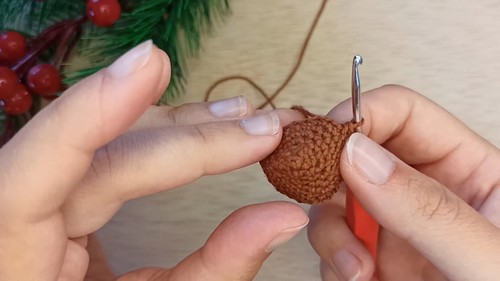
- Cut the yarn, and with a needle, weave in the end to close the hole.
Ears (Make 2):
Make a magic ring with brown yarn.
- Crochet 4 sc in the ring and increase in the same pattern explained above, gradually increasing the number of sc between each increase by one on each subsequent round.
- Continue increasing every other stitch until round 8, where you should have 24 stitches.
- Crochet 24 sc for rounds 9 through 13 without increasing.
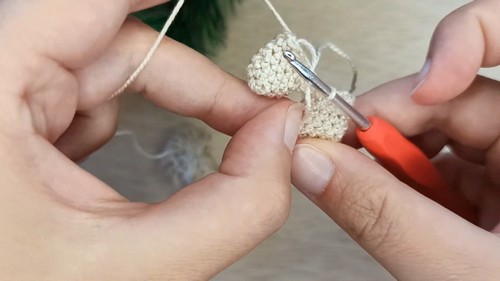
Decrease by doing two sc and then a sc decrease (sc two together) around for round 14.
- For rounds 15-16, crochet 18 sc around without decreasing.
- For the final round (round 17), do one sc and one decrease (sc two together) around until you have 12 stitches left. Slip stitch, cut the yarn leaving a long tail for sewing, and bind off.
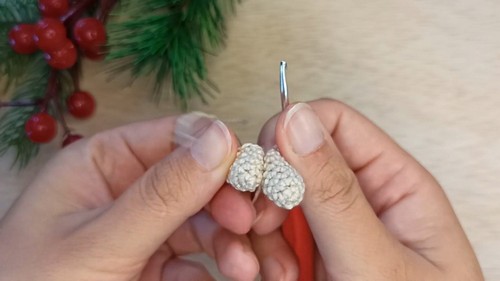
Antlers (Make 2):
Make a magic ring with beige yarn.
- Crochet 5 sc in the ring and increase to 10 sc.
- For the next few rounds, keep crocheting 10 sc—this will create one section of the antler.
- Create a second, longer section by repeating the steps above but continue for more rounds than the first section.
Join the two sections with a slip stitch and continue crocheting around both parts to form the base of the antler.
Start decreasing to shape the antler, adding stuffing as you go.
- Continue decreasing until you have 8 stitches left for the final round, crochet 8 sc around.
- Cut the yarn leaving a long tail for sewing, and bind off. Stuff the antler fully.
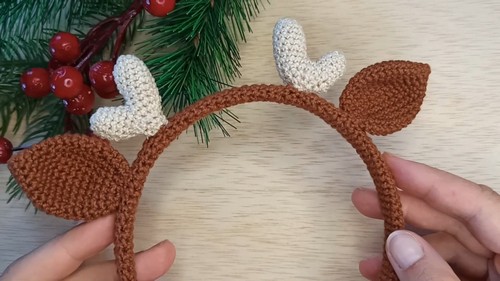
Assembly:
- Sew the ears and antlers to the covered headband with the yarn tails, making sure to position them correctly with the antlers on the reverse sides.
- Weave in any remaining ends.
Final Touches:
- Check the positioning of the ears and antlers for symmetry and secure them firmly to the headband.
- Adjust the stuffing as needed for the antlers to give them the right shape.