
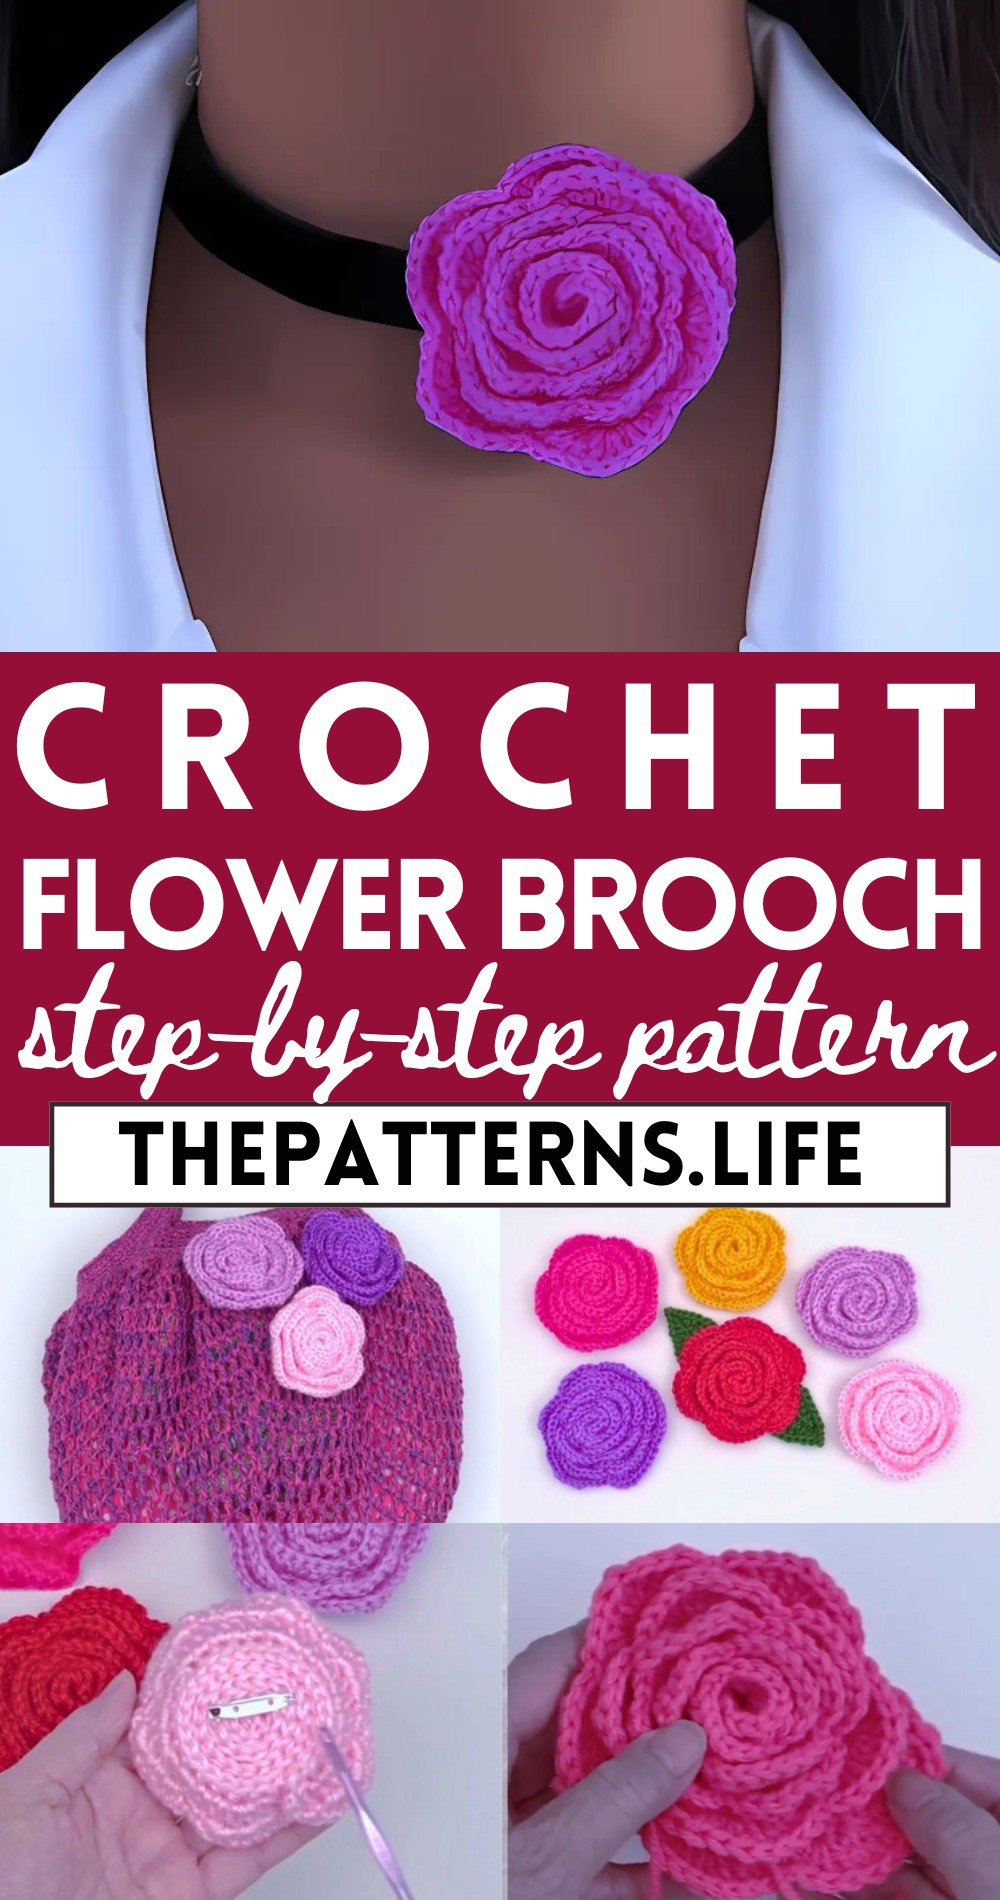
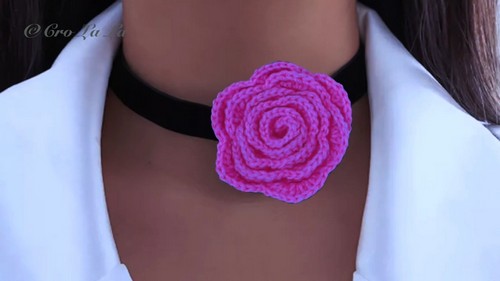
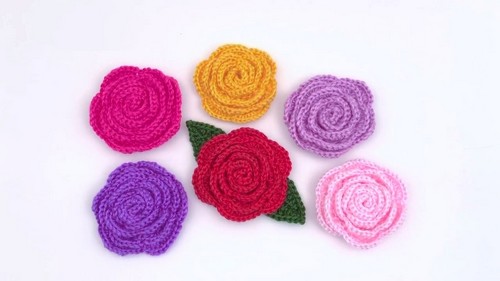
Elegant Crochet Rose & Flower Brooch Free Unique Pattern
Infuse your outfits with a unique touch of beauty and sophistication using our free crochet rose and flower brooch pattern.
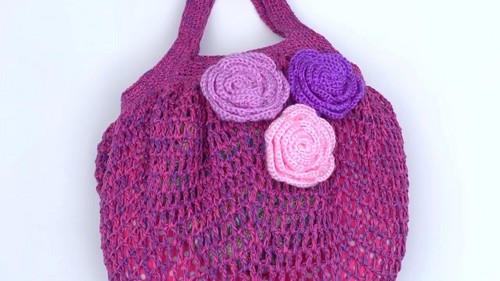
This pattern offers a charming way to add a personalized touch to your attire with intricate floral designs. It can guides you in the creation of elegant brooches, with roses and other blooms that can adorn anything from a cozy scarf to a sophisticated handbag. With clear and concise instructions, this pattern caters to both beginners and seasoned crochet enthusiasts, ensuring that each stitch contributes to a delicate and stunning floral masterpiece.
Crochet Rose & Flower Brooch Tutorial
The versatility of the pattern allows for experimentation with colors and yarn types, providing endless possibilities for customization. Through patient attention to detail, the process of bringing these flowers to life becomes a meditative practice, resulting in a unique accessory that exudes warmth and creativity.
Tip:
To give your brooch a firm structure, consider using a starch spray or fabric stiffener on the finished piece, ensuring it holds its shape beautifully.
Materials Needed:
- Yarn of your choice
- Crochet hook suitable for the yarn you are using
- Scissors
- Yarn needle
Crochet Rose Pattern:
Row 1:
- Tie a slip knot and chain 81.
- Chain 1 (turning chain), skip the first chain from the hook, then do a single crochet in the next chain.
- Single crochet in each chain across.
Row 2:
- Turn the piece over. (If you didn’t work into the back bumps initially, now switch so that the top of the stitches are at the bottom for a thicker and nicer look.)
- Chain 1 and slip stitch into the first stitch.
- Start by chaining 3 (counts as a double crochet).
- Double crochet in the next stitch.
- Increase by putting two double crochets in the next stitch.
- Follow this pattern across: one double crochet in each of the next two stitches, then two double crochets in the next stitch, repeatedly.
- By the end, your piece should curve like a semicircle.
For Row 3:
- Turn the piece over to create the rose petals using the shell motif pattern.
- Chain 1, skip one stitch and put 4 half double crochets into the next stitch to create half of a petal.
- Repeat the 4 half double crochets in the following stitch (completing the petal).
- Skip one stitch and secure with a single crochet in the next stitch (one petal completed).
- Skip one stitch, then make 4 half double crochets in the next stitch for the first half of the next petal, followed by 4 half double crochets in the subsequent stitch for the second half, skip one stitch and secure with a single crochet.
- After making two half double crochet petals, increase the height of petals by using double crochet instead of half double crochet for the next petals.
- Skip one stitch, then make 4 double crochets in the next stitch, and so on, as you have been doing with the half double crochets. Secure each petal with a single crochet after skipping a stitch.
- Continue with 8 double crochet petals.
Row 4:
- After the midpoint, start increasing the size of the petals for the outer part of the rose.
- Skip one stitch, then make 3 double crochets, followed by 3 extended double crochets, and another 3 double crochets in the next stitch.
- To make an extended double crochet: yarn over, insert the hook into the stitch, pull up a loop (three loops on hook), yarn over and pull through one loop (the extended loop), then complete as you would a regular double crochet.
- Skip one stitch and secure the extended petal with a single crochet.
- Repeat this sequence around.
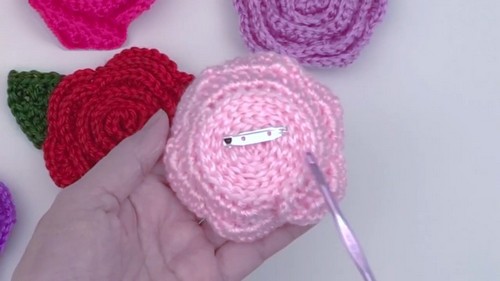
Finishing:
- After completing the last petal, slip stitch along the edges to the bottom of the flower.
- Fasten off, leaving about 20 inches of yarn for sewing.
- Wrap the front end and roll the strip inwards to form the rose. It should be tight and closed together.
- Stitch the bottom together, securing with pins as necessary.
- Secure the end to the second layer and weave in the ends to tighten the construction.
- Do additional runs with the needle around the bottom to ensure its stability.
- Finish off and weave in any remaining ends.


