How To Crochet Granny Square Bag – Free Pattern
Vibrant and stylish, the Free Crochet Granny Square Bag Pattern helps you create a chic and functional bag, adding a touch of retro flair to any outfit.
This engaging and versatile project guides you through a step-by-step process to create a charming bag using classic granny squares, renowned for their vibrant colors and intricate designs. Perfect for both beginners and seasoned crochet enthusiasts, the pattern is easy to follow, ensuring a rewarding experience as you watch your bag come to life.
Crochet Granny Square Bag
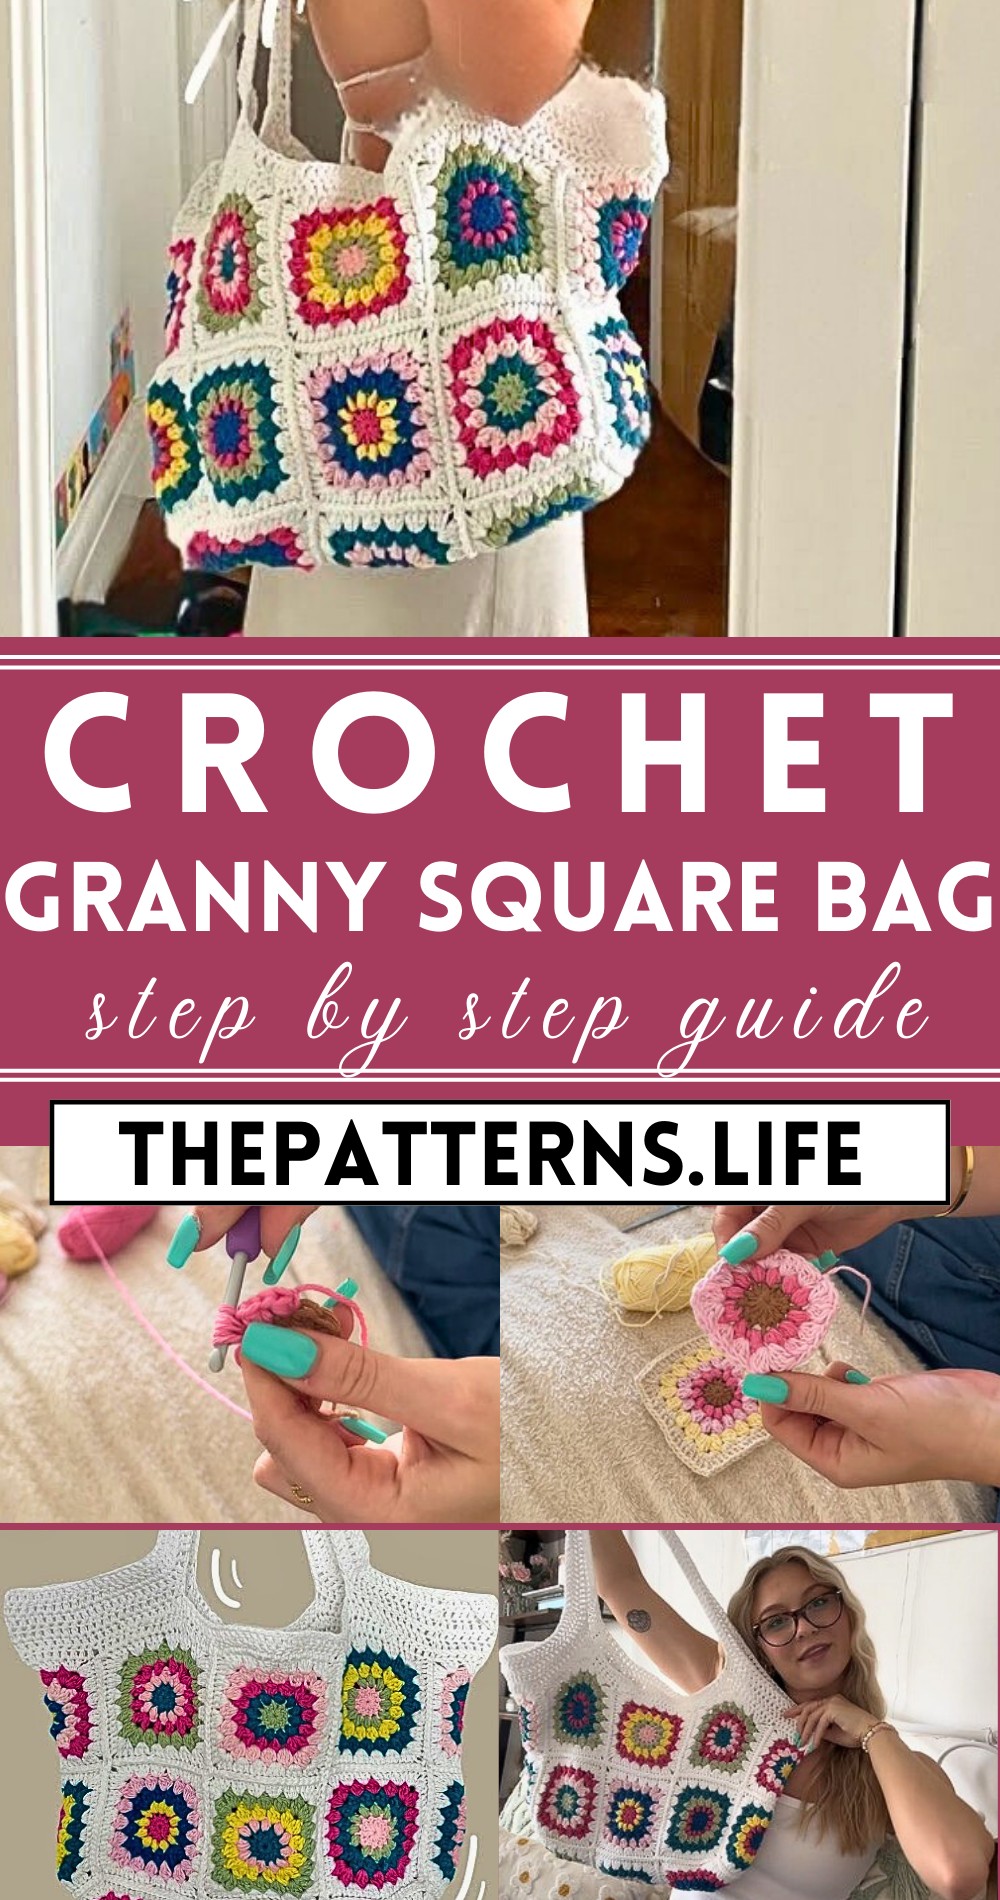
The design is not only stylish but also highly functional, offering ample space to carry your essentials while making a bold fashion statement. The unique blend of traditional and contemporary styles allows this bag to complement various outfits, making it a must-have for anyone looking to add some flair to their everyday look.
Tip:
Experiment with different color combinations for each square to make your bag uniquely yours and to match different wardrobe pieces.
Materials Needed:
- Yarn in various colors (specifically, Paint Box Cotton Aran color soft fudge for centers, Drops Paris for clusters and edging, and Geral King Cotton 100g for white parts)
- Crochet hook size 4.5mm
- Scissors
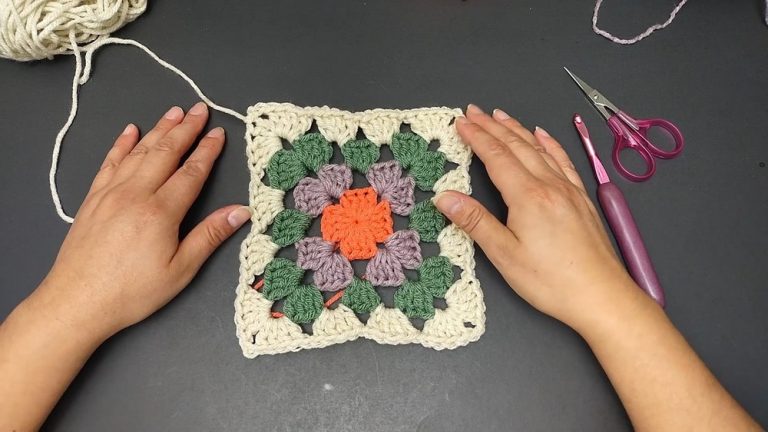
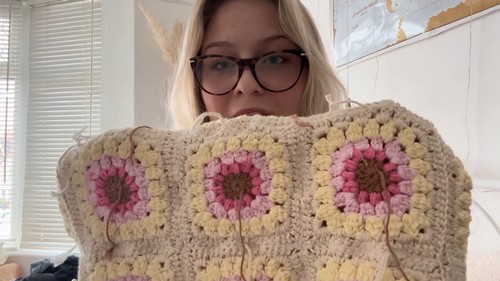
Granny Square Pattern (Starburst Granny Square):
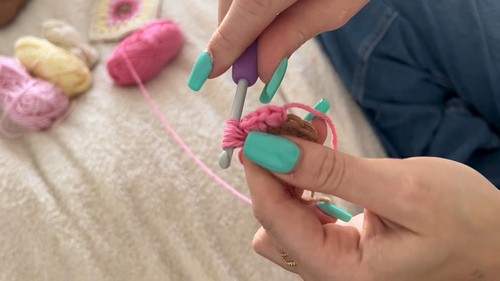
Start with a Magic Circle:
- Wrap yarn around your fingers to create a loop, insert the hook, and pull up a loop. Chain one to secure.
First Round:
- Work 12 double crochets (DC) into the ring. Pull the tail to tighten the circle, then slip stitch into the first DC to join.

Second Round (Bobble Stitch Round):
- For each bobble stitch, yarn over, insert the hook into the specified space, yarn over, and pull up a loop to the height of a DC. Repeat this 3 more times in the same space (4 loops pulled up in total), yarn over, and pull through all loops on the hook. Chain 1. Repeat around, resulting in 12 bobble stitches. Slip stitch into the first bobble stitch to join.

Third Round (Creating the Square Shape):
- Start in any chain-1 space. [Chain 3 (counts as the first DC), work 2 DCs, chain 2, work 3 more DCs] in the same space to form the first corner. Chain 1, work 3 DCs in the next chain-1 space, chain 1 repeat from to until you reach a corner space. In each corner space: 3 DC, chain 2, 3 DC. Repeat around and join with a slip stitch to the top of the chain 3.
Fourth Round:
- Chain 3 (counts as DC), make 2 DCs in the same space, then make 3 DCs in each chain-1 space around. In corners, work [3 DC, chain 2, 3 DC]. Finish the round, slip stitch to join.
Edging:
- Switch to your border color yarn. Work a round of DCs in each stitch around the square, with [3 DC, chain 2, 3 DC] in each corner space. Finish off by slip stitching to the beginning of the round.
Constructing the Bag:
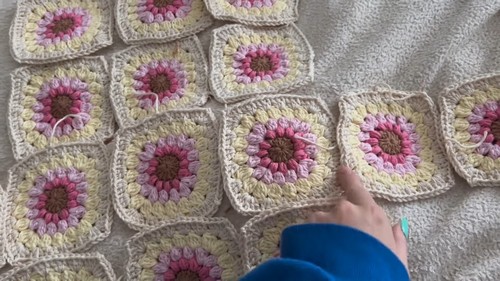
Assemble Squares:
You’ll need 19 squares in total. Arrange them with 6 on each side, 3 on the bottom, and 2 on each remaining side to create a bag shape.
Joining Squares:
Whip stitch or slip stitch the squares together according to your layout. You can create a stronger bond by sewing with a needle and thread if preferred.

Creating the Body:
- Once all squares are joined, the bag will form a pouch.
Top Edging and Straps:
- Pick up stitches around the top edge of the bag and crochet in rounds to create a sturdy top edge. For the straps, chain a long length (75 to 80 chains recommended), skip the equivalent number of stitches on the bag’s top edge, and attach the chain at another point to form the strap. Complete the same on the other side to create two straps.