
Step By Step Pattern Crochet Pumpkin Mini Pie Keychain
Celebrate the spirit of fall with this delightful free crochet mini pumpkin pie keychain pattern, perfect for adding a cozy touch to your accessories.
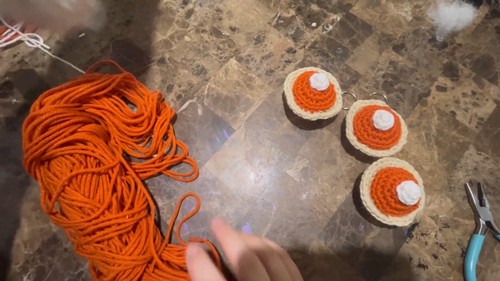
This delightful pattern is perfect for capturing the warm and festive spirit of fall, featuring a realistic mini pumpkin pie complete with a textured crust and a dollop of whipped cream. The intricate details make this keychain not only adorable but also a charming conversation starter.
Crochet Pumpkin Mini Pie Keychain Tutorial

Ideal for attaching to keys, bags, or even gifting to friends, this pattern combines creativity with practicality. You can customize the colors to match your personal style or keep it classic with traditional pumpkin pie hues of orange, beige, and white.
Tip:
To achieve a more realistic whipped cream effect, use a fluffy yarn for the topping.
Materials Needed:
- Orange, white, and beige yarn
- Sewing needle
- Jewelry pliers (if making a keychain)
- Keychain materials
- Polyfill
- 4.25 mm crochet hook (adjust according to your crochet tension)
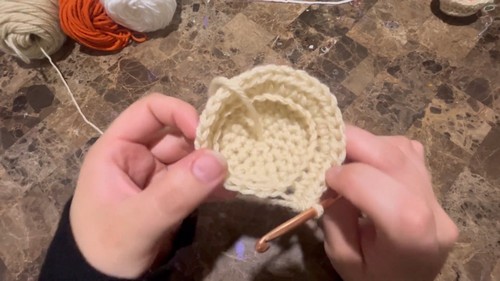
Pumpkin Pie Crust (Beige Part):
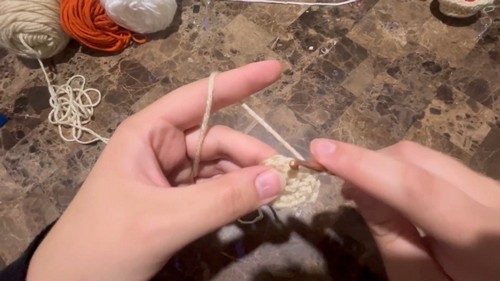
- Start with a magic circle.
Round 1:
- 6 single crochets (sc) into the magic circle.
In Round 2:
- Increase (2 sc in each stitch) in each stitch around (12 stitches).
Round 3:
- 1 sc in the next stitch, 2 sc in the next stitch; repeat from to around (18 stitches).
Round 4:
- 1 sc in each of the next 2 stitches, 2 sc in the next stitch; repeat from to around (24 stitches).
In Round 5:
- Single crochet in the back loops only all around (24 stitches).
Round 6:
- Increase round with half double crochets (hdc); 1 hdc in the front loop only of the next 3 stitches, 2 hdc in the front loop only of the next stitch; repeat from to around (30 stitches). Leave a long tail for sewing, cut the yarn, and fasten off.
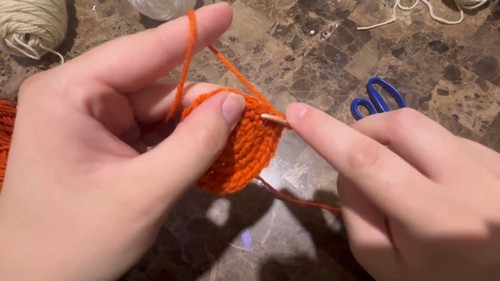
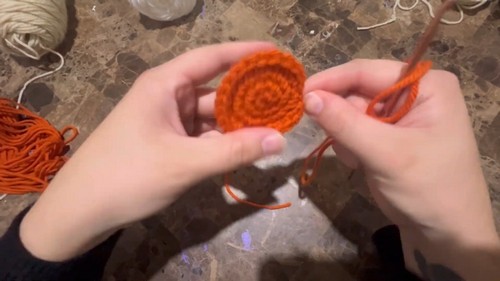
Pumpkin Filling (Orange Part):
- Start with a magic circle.
Round 1:
- 6 sc into the magic circle.
Round 2:
- Increase (2 sc in each stitch) in each stitch around (12 stitches).
In Round 3:
- 1 sc in the next stitch, 2 sc in the next stitch; repeat from to around (18 stitches).
Round 4:
- 1 sc in each of the next 2 stitches, 2 sc in the next stitch; repeat from to around (24 stitches). Slip stitch to join, leave a long tail for sewing, and fasten off.
Whipped Cream (White Part):
- Start with a magic circle.
- 6 sc into the magic circle.
- 1 sc in each stitch around (no increase round).
- Slip stitch to join, leave a long tail for sewing, and fasten off. Turn the piece inside out.
Assembly:

Sewing:
- Use the tails from the white part to sew the whipped cream to the center of the orange part.
Pie Crust and Filling:
- Sew the orange part onto the beige crust, matching up the stitches. Add a bit of polyfill before completely sewing it closed.
Extra Stability for Crust:
- Using the long tail left from the beginning, sew around the edge of the crust to cinch and secure it.
Keychain Option:
- Attach the keychain materials as desired, possibly through the whipped cream dollop for a horizontal orientation or along the edges.
Finishing Touches:
- Make sure all loose ends are weaved in securely.
- If desired, use this pattern to create multiple pieces and sew them together for a pumpkin pie garland.


