
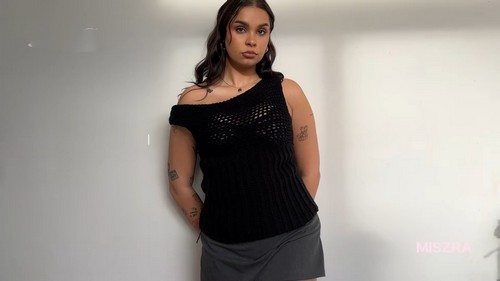
Simple & Adorable Crochet Cool Girl Asymmetrical Top Tutorial
Groove into summer with the Free Crochet Cool Girl Asymmetrical Top Pattern – a fun and easy project for crocheters of all levels!
This free and fabulous pattern is your ticket to creating a head-turning, chic piece that screams style and fun. Whether you’re new to crochet or a seasoned pro, this pattern is perfect for you. It features a playful diagonal hem and a breezy, comfortable fit that’s ideal for warm days and cool adventures. Using lightweight yarn, you can tailor this top to fit perfectly and choose your favorite colors to make it uniquely yours.
Crochet Cool Girl Asymmetrical Top
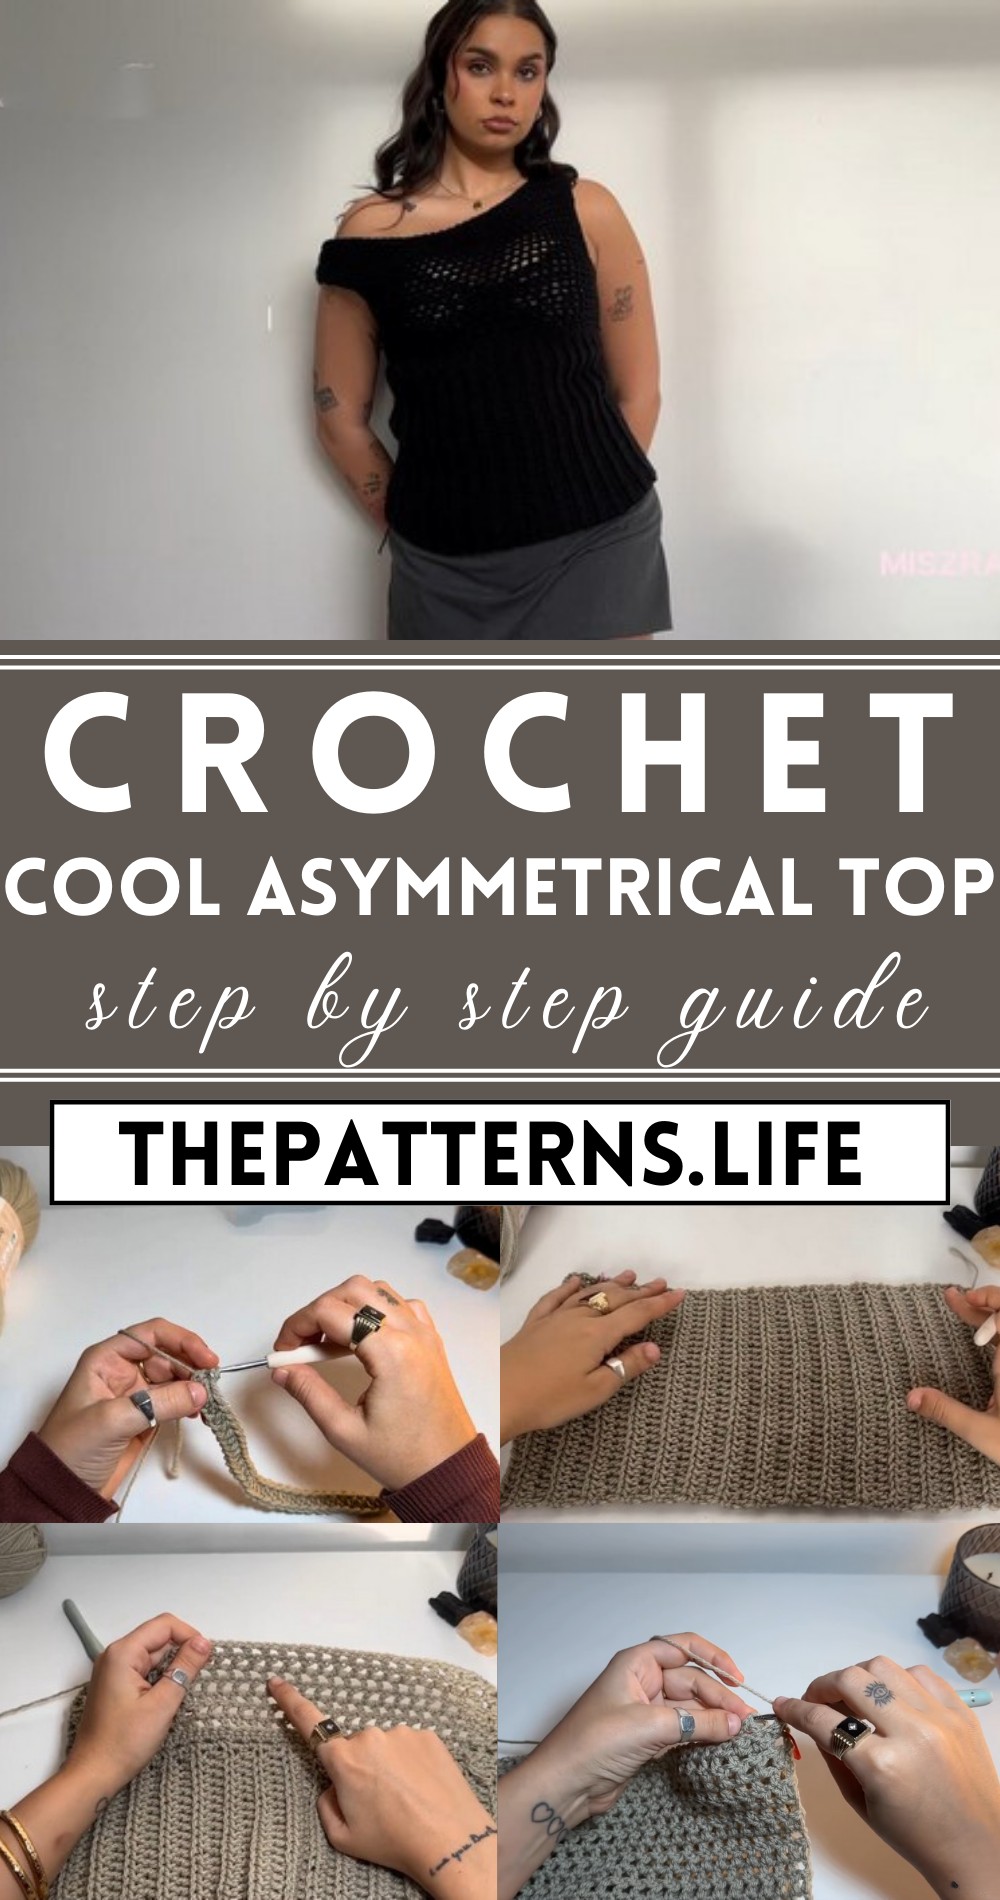
The asymmetrical design adds a trendy twist that will have all eyes on you, whether you’re at a beach bonfire, music festival, or casual brunch. Available in various sizes, this top is easily customizable to suit your style and flair. With this pattern, you’ll not only enhance your wardrobe but also develop your crochet skills and enjoy the creative process.
Tip:
Experiment with different yarn textures and colors for a funky, personalized touch that makes your top truly one-of-a-kind.
Materials Needed:
- 150 to 200 g of medium weight (8 ply) yarn (or 10 ply for the bottom panel if desired a thicker feel)
- 4 mm crochet hook
- 5 mm crochet hook
- Stitch markers
- Measuring tape
Bottom Panel (Make 2):
Start with a slip knot and a 5 mm hook.
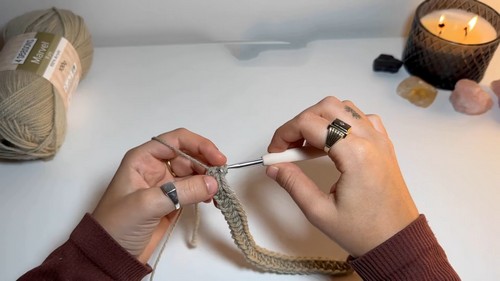
- Chain any number to your desired length measurement, then add two chains for your turning chain.
- Half double crochet into the third chain from the hook.
- Place a stitch marker in the first stitch to keep track.
- Half double crochet in every chain until the end.
- Chain two for the turn, then turn the work.
- Half double crochet in the first stitch, then half double crochet back loop only in each stitch until the last one.
- Normal half double crochet in the final stitch, chain two, turn.
- Repeat the process for the entire panel until it is as wide as half of your waist measurement.
Joining Panels:
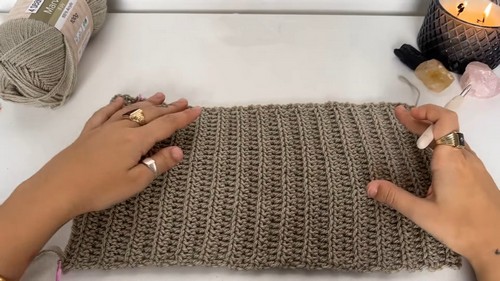
Place the two panels side by side and use a single crochet seam along the edges of both panels to join them.
- Rejoin yarn at the starting point, chain one, and single crochet along both edges of the panels.
- Continue until you reach the end, chain one, and fasten off.
- Repeat this process on the opposite side but do not fasten off; keep the yarn attached for the next step.
Top Panel:
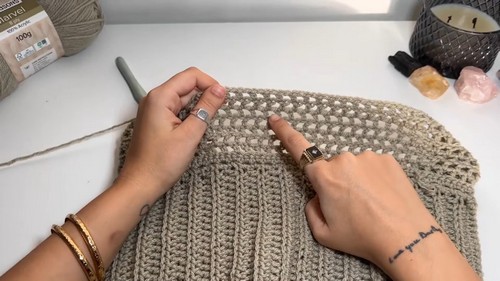
With yarn still attached, single crochet along the top perimeter of the joined bottom panels, maintaining an uneven number of stitches.
- Once the perimeter is set with single crochets, switch to a 4 mm hook.
- If needed, adjust by adding two single crochets per stitch to fit around the bust.
- Begin the mesh stitch: chain three, turn work, half double crochet into second stitch skipping one stitch, chain one, continue the pattern to the end.
- Count and note half double crochets to plan front and back panels.
- Split the count evenly for the front and back, mark the end for each side with a stitch marker, and then work the mesh stitch evenly without any increases for three rows.
Shaping and Finishing:
For shaping the top, start with an increase by chaining three, then half double crochet into the same stitch.
- Follow the mesh stitch pattern until two stitches before the stitch marker, then perform a decrease (combine two stitches into one).
- For subsequent rows, reverse the process: start with a decrease and end with an increase on the off-shoulder side for a total of six rows, adding more for the larger bust if necessary.
- Once shaping is complete, work five regular mesh stitch rows without increases or decreases.
- Repeat the same process for the back panel, ensuring to mirror the shape of the front.
- Join the panels with slip stitches where required, at the sides for the back, and along the armholes for asymmetrical sides.
- After seaming, weave in all the loose ends, and your asymmetrical top is ready to wear.
Reminder:
- If you’re unsure about gauge, there’s a video linked in the description of the original YouTube video for how to do a gauge swatch. Also, if you encounter any issues, you are encouraged to leave a comment below the video for further assistance.


