
Fishnet Crochet Top Pattern For Beginner Crocheters
Illuminate your summer wardrobe with our Free Crochet Fishnet Top Pattern, perfect for adding a breezy, chic touch to any outfit.
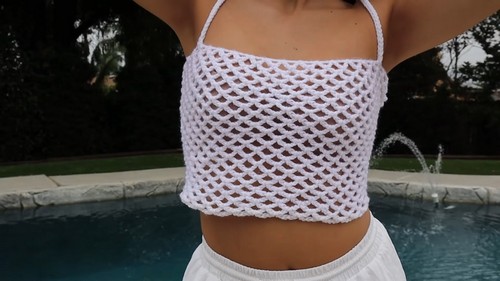
A versatile and stylish addition to any wardrobe from this inner fashionista. This engaging pattern offers a beach-worthy garment, making it ideal for layering over tank tops, swimsuits, or dresses, adding a touch of effortless elegance to your look. Its open-weave mesh design keeps you cool and comfortable, perfect for sunny beach days or casual summer outings.
Fishnet Crochet Top Tutorial

The simplicity of the fishnet stitch pattern makes it beginner-friendly, while its customizable nature allows you to experiment with various yarns and colors, ensuring your creation is one-of-a-kind. In addition to enhancing your style, this crochet top can be worn from season to season by pairing it with different layers, maximizing its use throughout the year.
Tip:
For a modern twist, choose a metallic or sparkly yarn to add an extra shimmer to your top, making it perfect for transitioning from day to night looks.
Materials
- Yarn: Size 4, brand Red Heart, 100% acrylic. (You can use any color or type you prefer.)
- Crochet Hook: Size 5 mm.
Basic Steps
Beginning
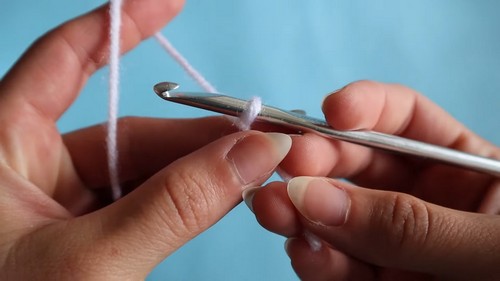
Start with creating a slip knot.
- If new to crochet, refer to a beginner’s guide for basic stitches.
- Chain a length long enough to wrap around the largest part of your chest/torso for a comfortable fit. Example chain is 115 stitches, but adjust based on personal measurement.
Starting the Fishnet
- Chain 5, then slip stitch into the base chain to form the first loop of the fishnet pattern.
- Continue this pattern (chain 5, skip a stitch, slip stitch in the next) along the chain base.
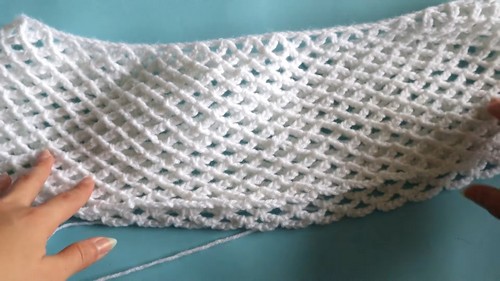
Creating the Fishnet Mesh
- Once the first row is complete, start on making subsequent fishnet rows by chaining 5 and slip stitching into the open loop of the previous row’s fishnet stitch.
- Keep building layers by following the same pattern to desired length. Each layer starts with chaining 5 and slip stitching into the loop of the below layer’s fishnet stitch.
Forming the Top into a Circular Piece
- After a few rows, you can close the project into a circular top by slip stitching ends together. Make sure the joining is seamless.
- Continue layering the fishnet pattern in a circular manner for uniform coverage.
Determining the Length
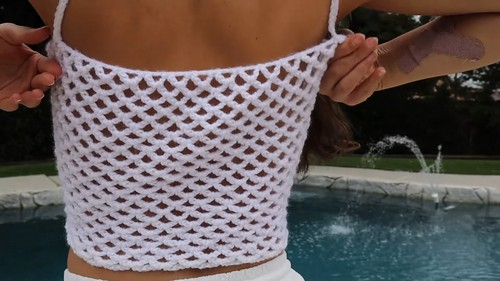
Try on the piece to decide on the length. For a crop top, you may stop when it reaches just below your chest or keep adding rows for a longer top.
Finishing the Body
- Once happy with the length, cut the yarn, thread it through the last loop, and secure it.
Adding Straps
- Decide on the placement of the straps while trying on the top.
- Reattach yarn at the chosen points and chain to the desired length for straps. Example given is 55 chains for each strap.
- To make the straps thicker and more comfortable, slip stitch back along the chain you made for each strap.
- Attach the straps to the opposite side ensuring they are evenly placed.
Final Touches
- Secure all loose ends and trim any excess yarn.
Notes
- The project is simple but can be time-consuming due to the repetitive nature of the stitches.
- Feel free to customize the size, color, and length of the top according to your preferences.
- The pattern mainly relies on creating a series of chain loops and slip stitches to form the fishnet design.
Conclusion
Enjoy wearing your crochet fishnet top! This project is excellent for those who have grasped basic crochet stitches and want to try their hand at creating wearable items. Remember to check out more crochet tutorials and ideas if you’re keen on expanding your crafting skills.


