
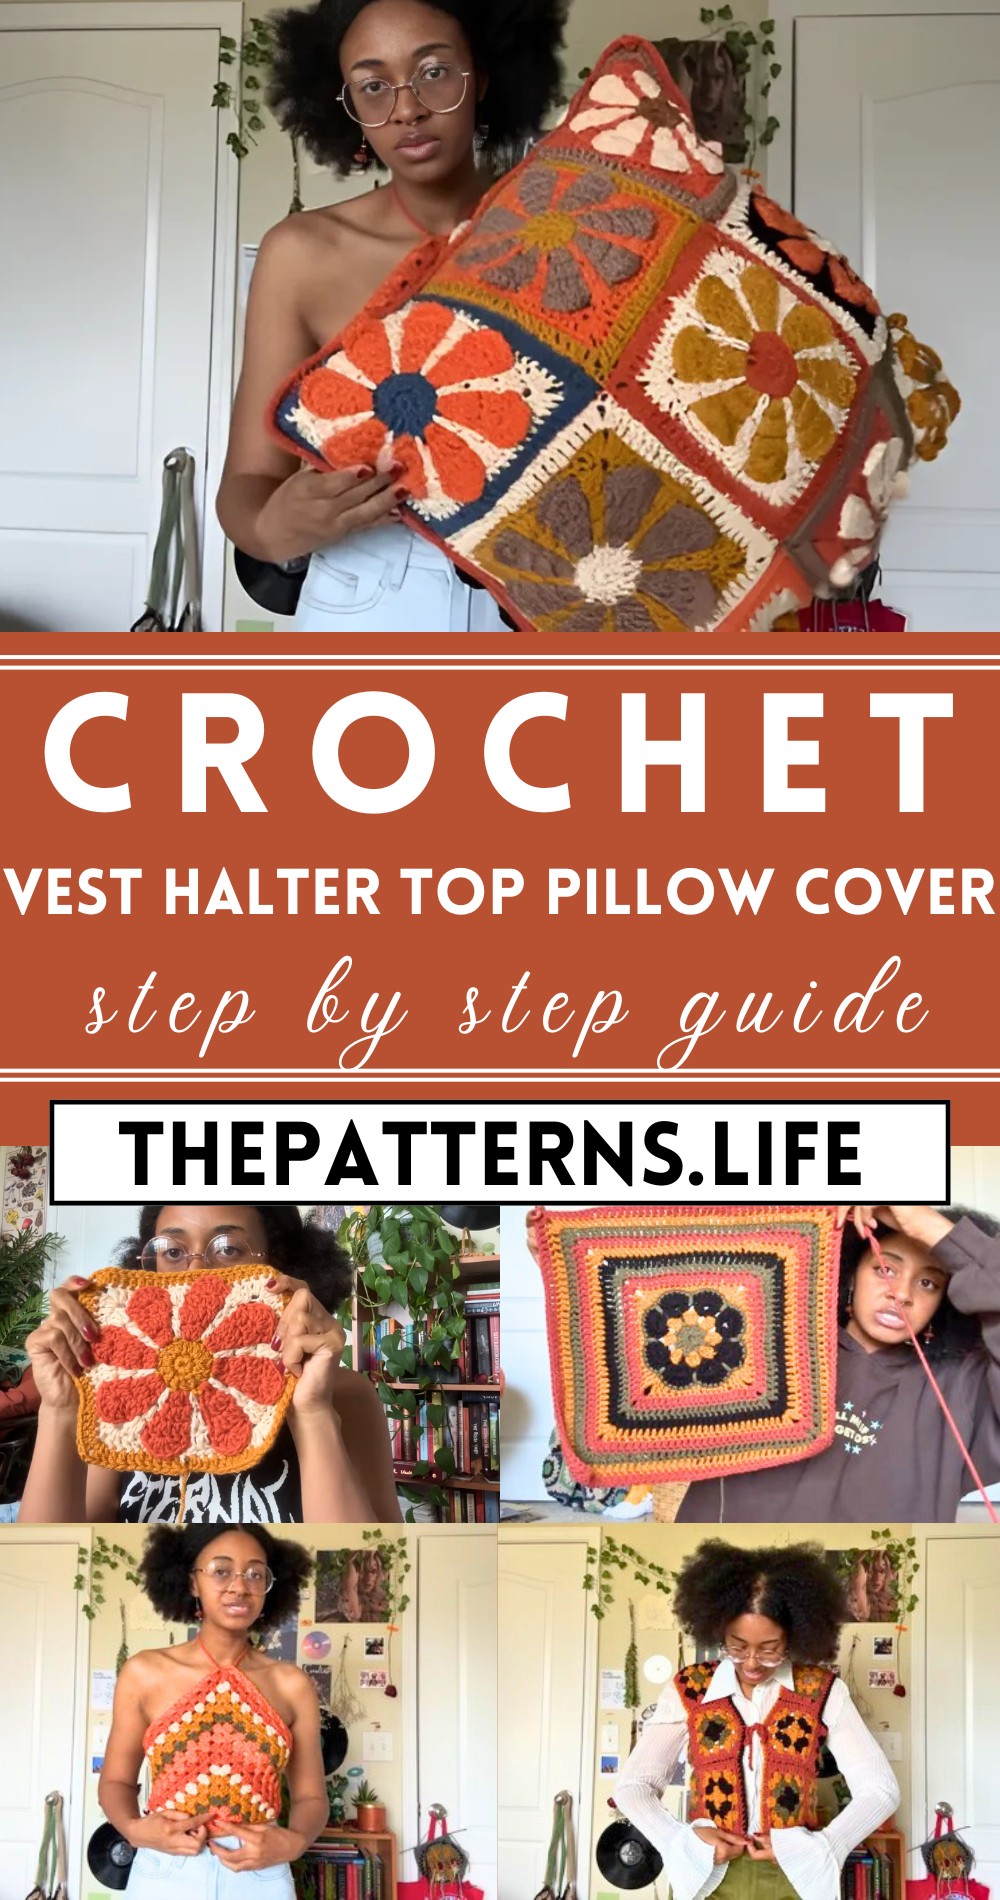
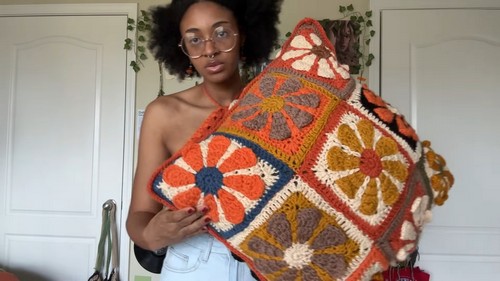
Crochet Orange Vest Halter Top Pillow Cover With Easy Pattern
Spice up your style and home with the Free Crochet Orange Vest Halter Top Pillow Cover Pattern—it’s vibrant, versatile, and a whole lot of fun!
This versatile gem lets you whip up a stylish vest or a trendy halter top, perfect for adding a sunny splash to your wardrobe. But that’s not all—change those same skills into a vibrant pillow cover that can brighten any room in your home. It can presents a charming orange vest with a touch of retro flair, a fashionable halter top ideal for warm weather, and a decorative pillow cover to add a cheerful accent to your home decor.
Orange Crochet Vest Halter Top Pillow Cover
With easy-to-follow instructions, this pattern is a joy for both beginners and seasoned individuals. Crocheted with soft, breathable yarn, your finished pieces will be comfy and durable, ready to impress in any season. Get ready to turn heads and add a burst of color to your life!
Tip:
Opt for high-quality yarn in a zesty orange to make your fashion and home accents truly stand out!
Materials:
- Various shades of orange yarn, brown, green, beige, and black.
- African flower granny square pattern and a basic granny square pattern.
- Tapestry needle for stitching.
Steps:

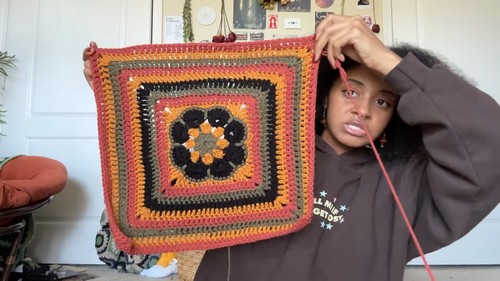
Plan & Draw: Sketch the vest to plan the placement of granny squares.
Granny Squares: Use three orange tones and other colors to create basic and African flower granny squares.
Construct Back Panel:
- Start with an African flower granny square for the back.
- Add rows until it reaches the desired size (17×17 inches), adjusting with additional rows to match the length you aim for the vest.
Construct Front Panels:
- Use the basic granny square pattern.
- Make four squares for each front panel and two for underarms.
Assemble the Vest:
- Stitch granny squares together with a tapestry needle, joining the wrong sides with front loops.
- Attach the front, underarm, and back panels.
Border & Finishing:
- Add borders by single crocheting around the armholes, the front, and the bottom.
- Add a tie or button based on fitting.
Halter Top
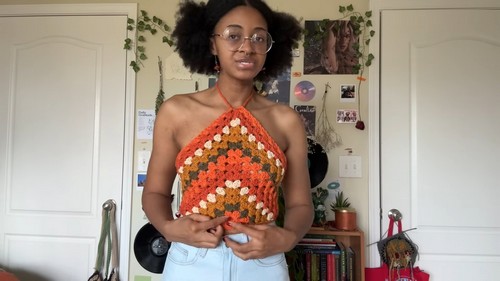
Materials:
- Orange, purple, beige yarns
- Crochet hook suitable for yarn weight
Steps:
Start: Create a slipknot and chain four, connect the chain with a slip stitch.
Row Construction:
- Chain four (counts as a double crochet and chain), work double crochets, and chain spaces as established in the pattern.
- Continue expanding the fabric by adding rows, maintaining increases at the row ends and the middle for flare.
Color Transitions: Add new colors at the beginning of rows for visual interest and design.
Final Rows & Ties:
- Work the final rows until the piece is large enough for the torso.
- Add drawstrings at the neck and back for securing the top.
Pillow Cover
Materials:
- Scrap orange yarn and other complementary colors
- Tapestry needle
Steps:
Granny Squares:
- Make granny squares using mixed yarn colors. Each square should be consistent in size.
Assemble the Squares:
- Arrange 9 squares per side for the pillow.
- Stitch squares together in rows and columns.
Join the Panels:
- Place panels on either side of the pillow.
- Crochet around using a slip stitch or single crochet to join panels, leaving an opening for the pillow.
Finishing:
- Insert the pillow into the cover.
- Secure the final opening with crochet stitches.
Optional: Add a border for a neat finish and better structure.
These steps recreate the beautiful items described in your text, guiding you from the initial planning stages to the assembly and finishing touches. Enjoy your crafting!


