
Crochet Chunky Hat Free Pattern For Winter Time
Get ready to cozy up with the Crochet Chunky Hat Pattern—create thick, trendy hats that turn chilly days into fun fashion statements!
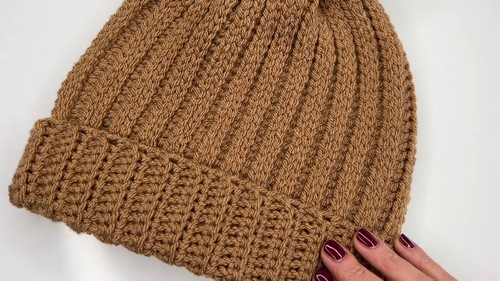
This pattern allows you to create stylish, thick hats that provide warmth and comfort during cold seasons. Using chunky yarn, you’ll find that these hats not only work up quickly but also add a trendy, textured look to your wardrobe. It is perfect for beginners and seasoned crocheters alike, this video guides you through making a snug, stylish hat that’s just right for chilly days.
Crochet Chunky Hat Tutorial

The easy-to-follow instructions ensure a smooth crocheting experience, making it a perfect gift-making endeavor for friends and family. Not only do these hats keep you cozy, but they also serve as a fashionable winter accessory that can be customized to match any outfit. Embrace the satisfaction of handmade chic with this versatile pattern.
Tip:
To add a personal touch, incorporate colorful pom-poms or buttons to your chunky hat creations.
Materials Needed:
- 6 mm crochet hook
- Scissors
- Darning needle
- Stitch marker
- Pom pom (optional, you can buy or make one)
- Paintbox Yarns Simply Chunky (1 and a half skein) or any chunky yarn
Hat Size:
- Adult Size
Pattern:
Starting the Hat:
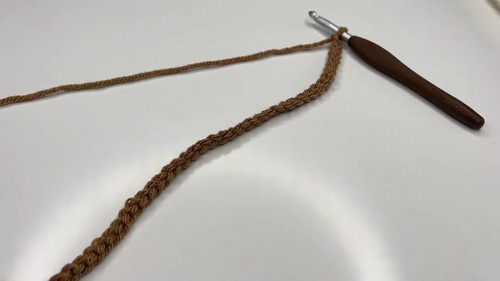
- Make a slip knot.
- Chain 48. (Adjust the number of chains based on the size of the head; it should match the length of a beanie that fits comfortably.)
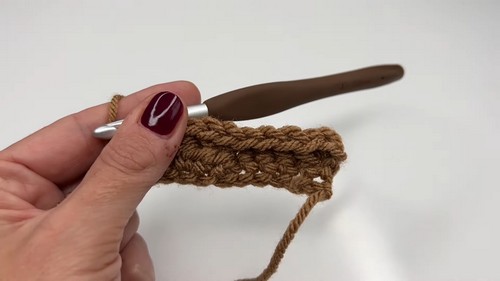
First Row:
- Start in the second stitch from the hook, and work 12 single crochets for the brim.
- Mark the end of the brim with a marker.
- Then work 25 double crochets.
- Add 5 half double crochets.
- Finish with 5 single crochets + 1 turning chain.
- You should have a total of 47 stitches in the first row.
Second Row (Pattern Repeat Starts):
- Chain 1, turn your work around.
- Insert hook into the very first stitch, and work a single crochet, then a slip stitch in the next, by pulling up a loop in the same stitch again, and another loop in the next stitch, then slip stitch.
- Continue this pattern up to the marked stitch (this forms a texture with what looks like chains next to each other).
- Work in back loops only when reaching the brim, 12 single crochets.
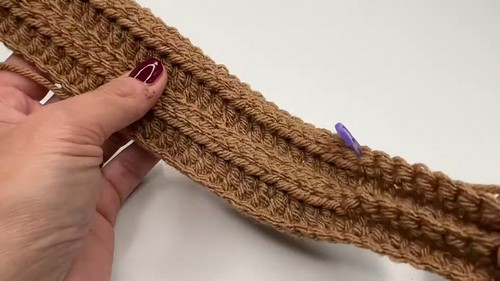
Third Row (Pattern Repeat Continues):
- Chain 1, turn your work around.
- Work the brim first, with 12 single crochets in the back loops only.
- Continue with 25 double crochets, in the back loops only.
- Add 5 half double crochets in the back loops only.
- Finish with 5 single crochets in the back loops only.
Fourth Row (Pattern Repeat Continues):
- Chain 1, turn your work around, and start the slip stitch pattern through both loops until you reach the brim marker.
- Work the brim with 12 single crochets in the back loops only.
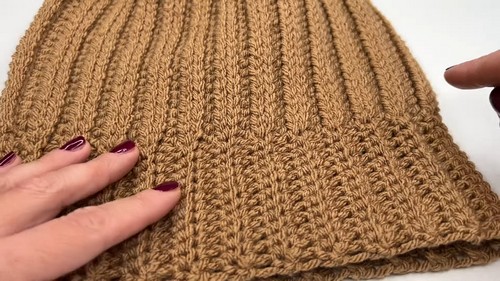
Continue the Pattern:
- Repeat the third and fourth rows (the two-row pattern repeat) until the hat reaches the desired length.
Finishing the Hat:
- Fold the hat in half and slip stitch both sides together up to the brim.
- For the brim, slip stitch through the front loops only to maintain the pattern.
- Chain one and fasten off.
Closing the Top:
- Thread yarn through darning needle, and weave through the top row of slip stitches.
- Pull tight to close the top of the hat, and secure with a knot.
- Sew any small opening that remains at the top.
Finishing Touches:
- Attach a pom pom to the top of the hat if desired.
- Weave in all yarn ends.


