
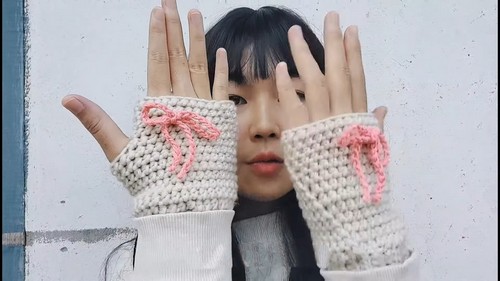
Cute Crochet Fingerless Gloves With Bow Pattern For Wintry Weather
Flaunting a chic accessory that keeps your hands warm while leaving your fingers free for activities—introducing the Crochet Fingerless Gloves With Bow Pattern!
These gloves are ideal for anyone who loves both style and functionality. Perfect for typing, texting, or simply showcasing your freshly painted nails, these fingerless gloves feature a delightful bow detail, adding a playful touch to any outfit. The pattern is beginner-friendly yet stylish enough to capture the attention of seasoned crochet enthusiasts.
Crochet Fingerless Gloves
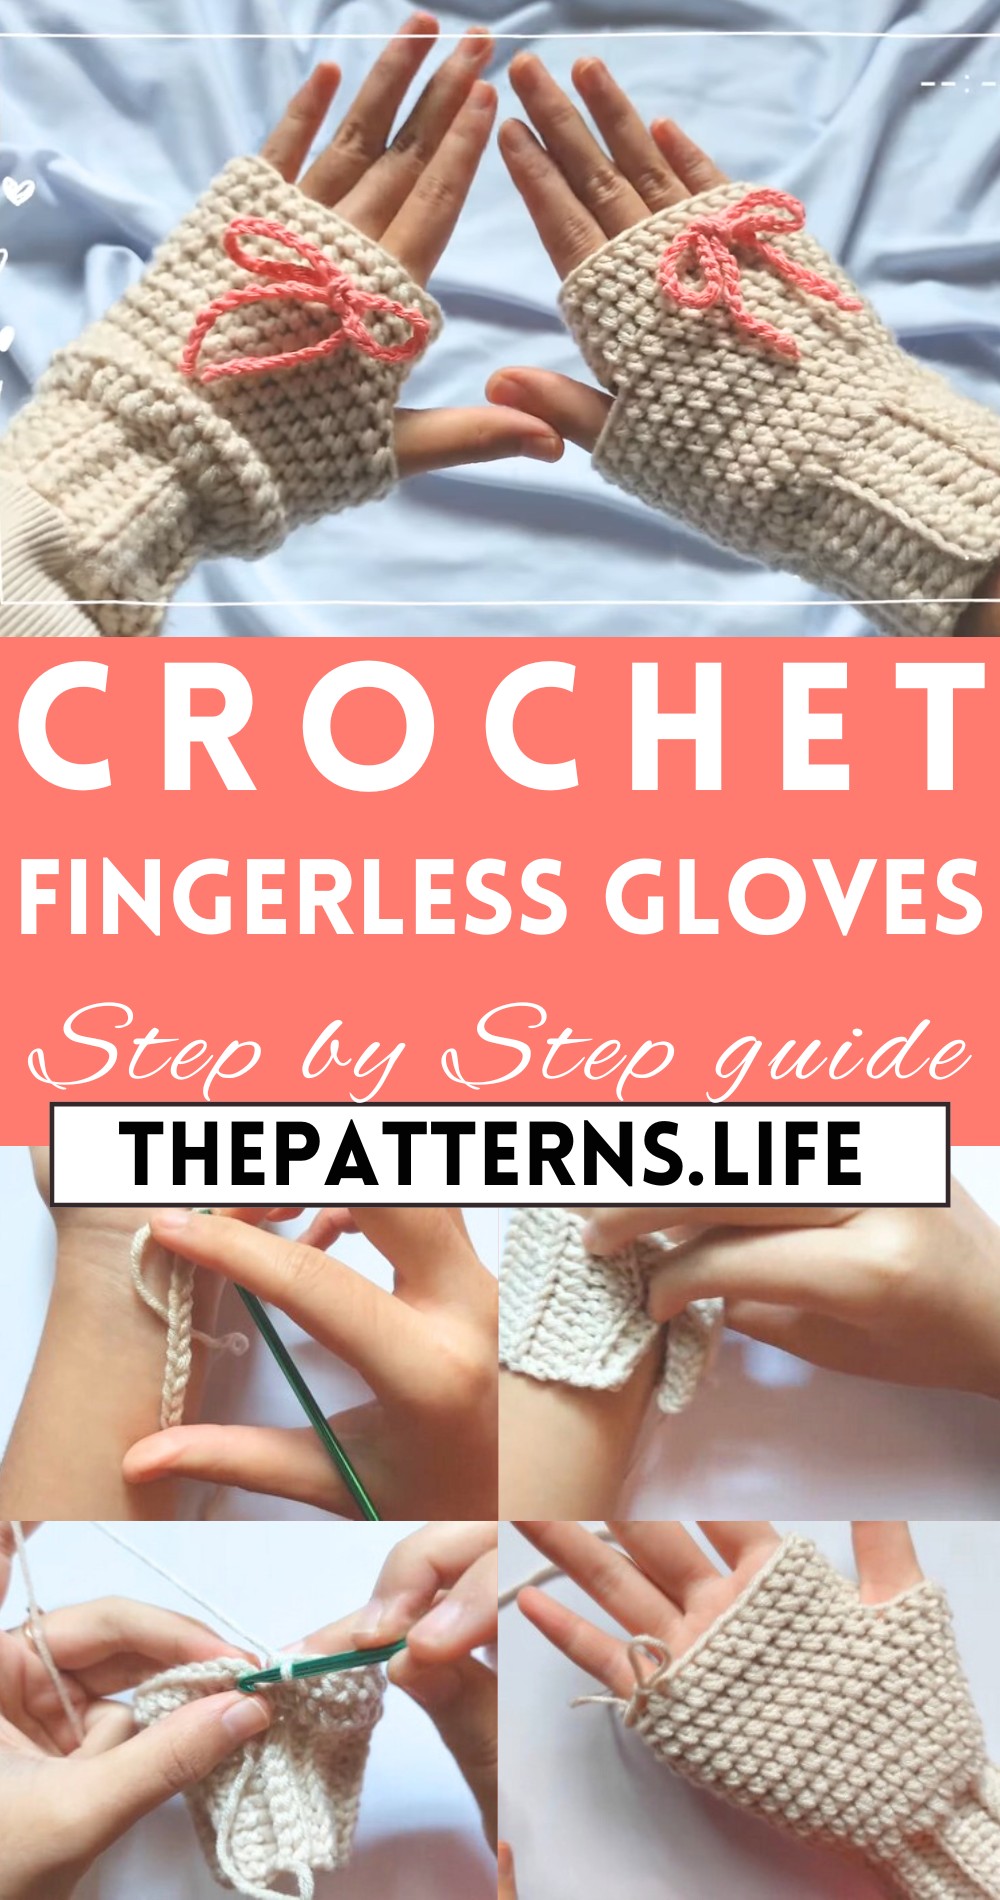
With the opportunity to customize colors, these gloves can be tailored to match your wardrobe. Made with soft and warm yarn, they provide comfort during colder months without sacrificing mobility. Plus, they make thoughtful, handmade gifts that friends and family will cherish.
Tip:
To ensure a snug fit, measure your hand circumference and adjust the stitch count in the pattern accordingly.
Materials Needed:
- A ball of cotton yarn in beige and pink color (or any color of your choice)
- A 4mm crochet hook
- Scissors
- Yarning needle
Pattern Steps:
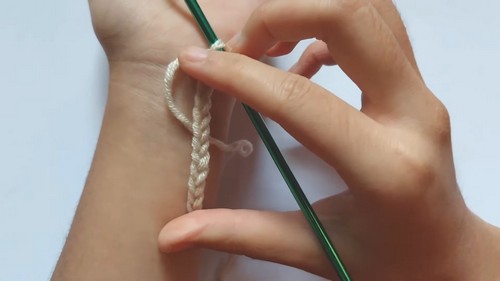
Start with the Wrist Ribbon:
Make a Slip Knot:
- Wrap the yarn around your fingers, remove the loop, place the yarn down, pull the yarn up, insert your hook into the loop.
Chain 12:
- For a longer ribbon, add more chains as desired.
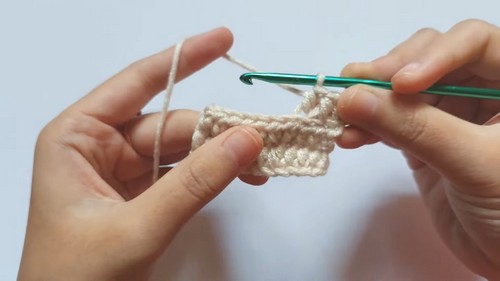
First Row:
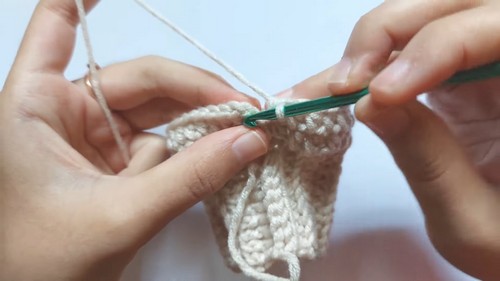
- Skip two chains, make a half-double crochet into the third chain.
- To make a half-double crochet: Yarn over, insert your hook into the third chain, pull the yarn through (you now have three loops on the hook), yarn over again and pull through all three loops on your hook.
Continue:
- Repeat making half-double crochet in each chain to complete the row.
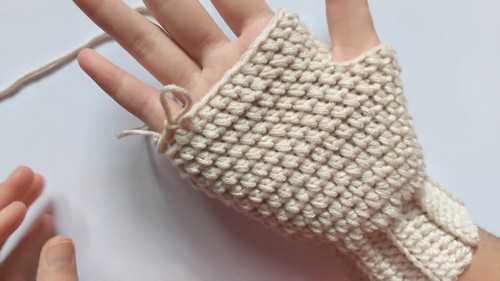
Main Glove:
Second Row:
- Chain two and turn your work. Make back loop only half-double crochet in each stitch across.
- Insert your hook into the back loop of the stitch only, then complete the half-double crochet as before.
Repeat:
- Continue the pattern of chaining two, turning your work, and doing back loop only half-double crochet in every row until the ribbon part can wrap comfortably around your wrist. (The example made 15 rows total.)
Joining the Wrist Part:
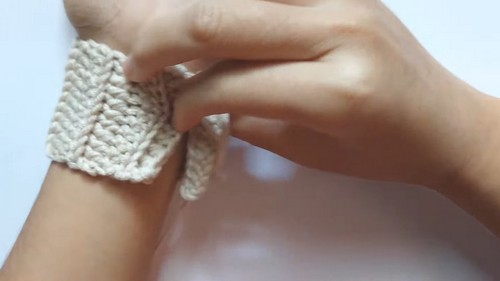
Join Edges:
- Match the two edges to form a tube and use slip stitches to join them together by inserting the hook into both sides and making slip stitches across.
Continuing with the Hand:
- Chain 2, then make half-double crochet into every available space around the top of the wrist part. When you reach the start, make a slip stitch to join the round.
Additional Rounds:
- Chain two to start a new row, then continue to make half-double crochet in each stitch around. Repeat this for eight total rows above the ribbon part.
Shaping the Thumb Opening:
Creating Thumb Space:
- After the eighth row, continue making half-double crochet until you’re just before where the thumb hole should be. Chain three, skip about six stitches (adjust for size), and resume half-double crochet to create a loop for the thumb.
Continue Crocheting:
- Around the thumb space, ensuring to half-double crochet into each of the three chains when you get to the thumb space chain in the following round.
Finishing:
End with 13 Rows:
- After completing the desired length above the thumb hole, chain one and cut the yarn, weaving in any loose ends with a yarning needle.
Ribbon Addition:
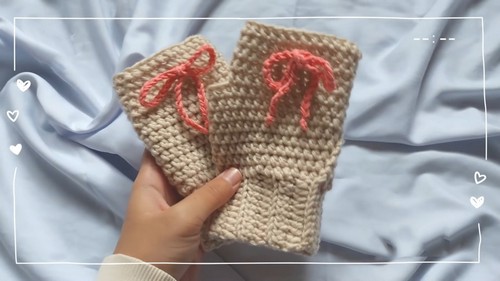
Make a Slip Knot:
- Then chain 60 (or desired length for the ribbon), cut the yarn, and make a knot at each end.
Attach Ribbon:
- Use the crochet hook to weave the ribbon through the wrist part of the gloves, tying it for decorative and adjustment purposes.
Final Touches:
- Trim any yarn ends and ensure the ribbon is secured neatly through the wrist part of the gloves.


