
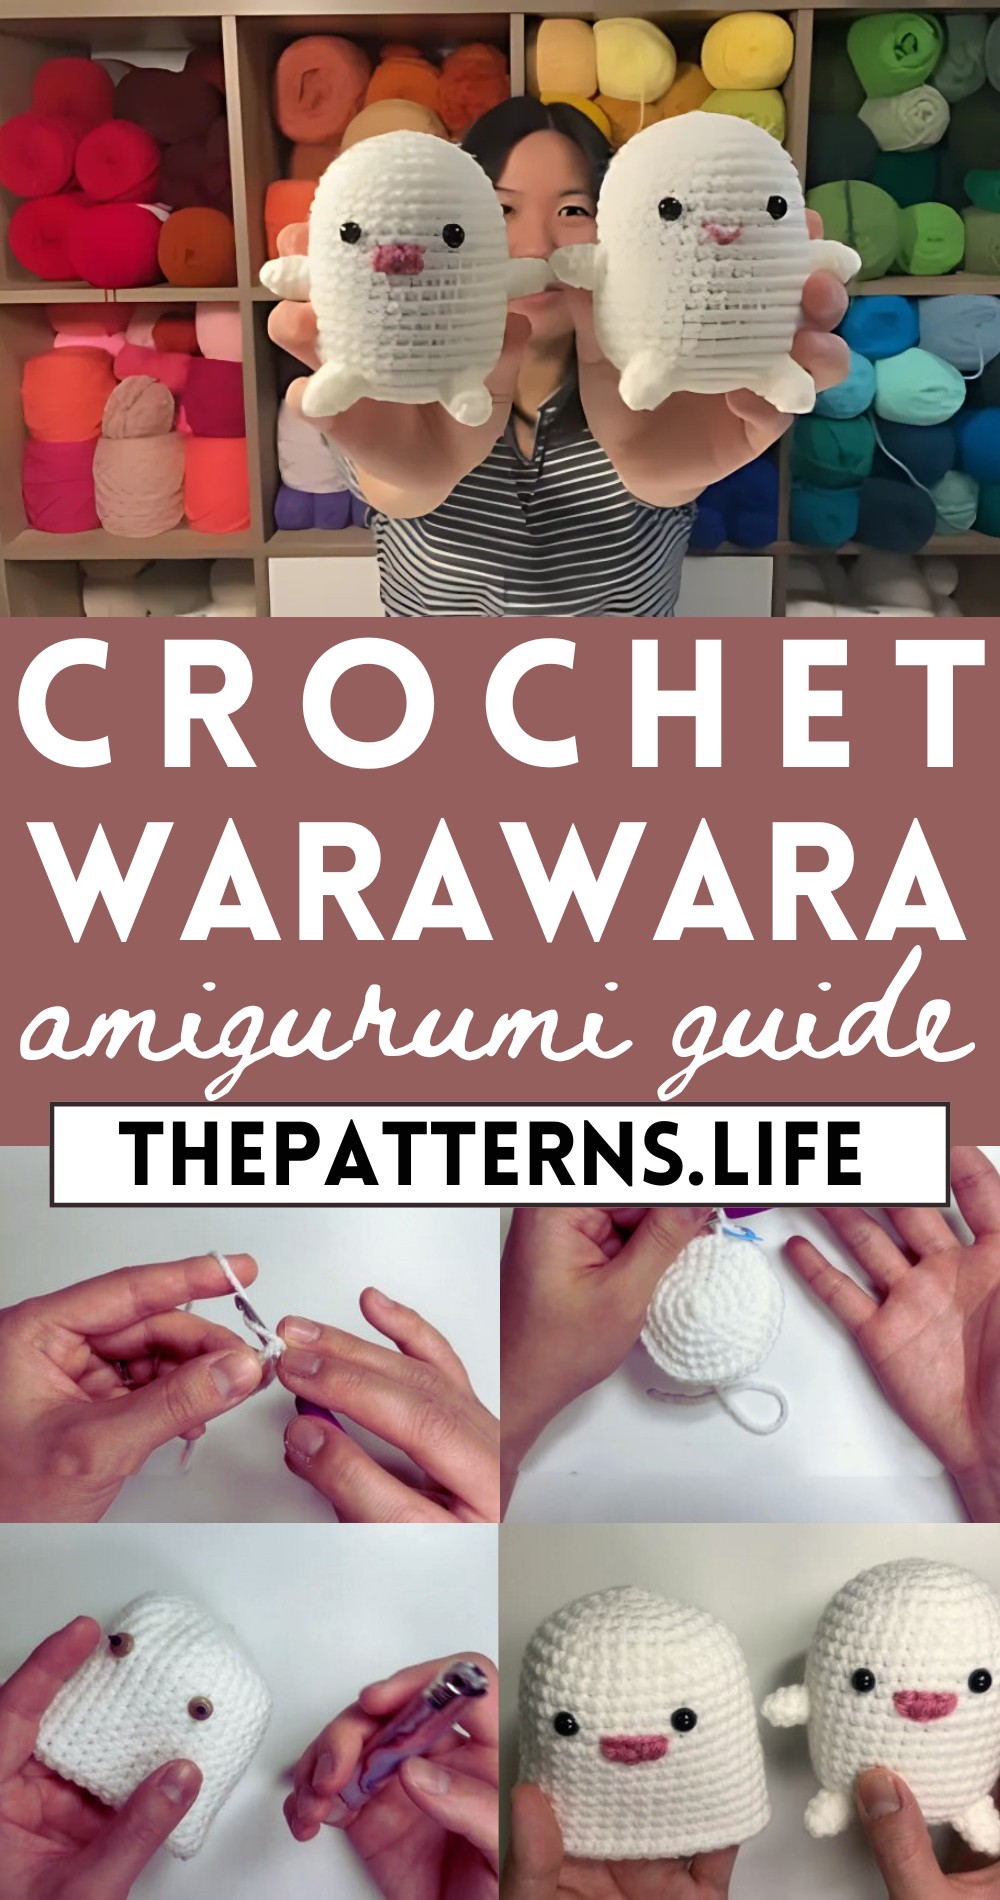
To Spread Joy Around Crochet Cute Warawara Amigurumi Pattern
Get your crochet hooks ready for the Cute Warawara Amigurumi Pattern—finally, a tiny monster that won’t raid your fridge at midnight!
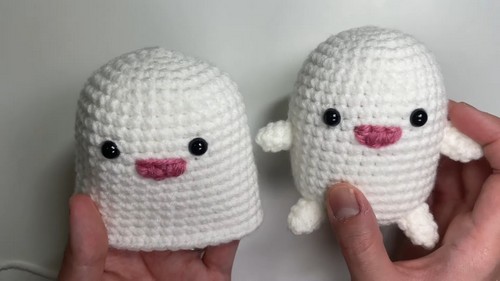
This pattern features step-by-step instructions to create your very own tiny Warawara monster, perfect as a Halloween decoration, a unique gift, or a delightful companion for children and adults alike. Each Warawara boasts expressive eyes, quirky limbs, and a playful smile, making it an irresistibly adorable creation.
Crochet Warawara Amigurumi
What sets this pattern apart are its customizable features; choose your favorite yarn colors and embellishments to give your creature a distinct personality. Ideal for both beginners and experienced crocheters, the pattern combines simplicity with a touch of intricate detailing, ensuring a fun and rewarding crocheting experience.
Tip:
Add a small loop on top to easily transform your Warawara into a keychain or bag charm!
Materials Needed:
- White yarn (about 30-35g) – Premier Basics, size 4 medium worsted weight yarn recommended
- Crochet hook, size 4 mm (or size that matches your yarn)
- Yarn needle to sew the parts
- Scissors
- A pair of 8mm safety eyes
- A lighter (optional) to secure the safety eyes
- Pink or black embroidery thread or yarn for facial features
- Polyester stuffing (less than 100g)
Body Pattern:
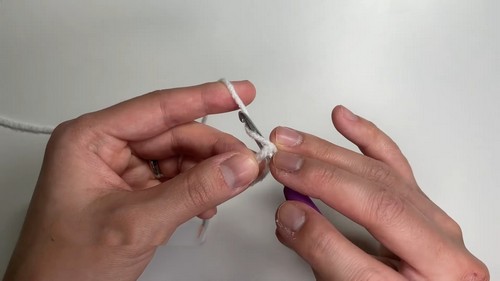
Round 1:
- Create a magic ring.
- Work 6 single crochets (sc) into the magic ring.
- Pull the ring closed.
Round 2:
- Work 6 increases around (each increase is 2 sc in one stitch).
- You will have 12 stitches in total.
For Round 3:
- (1 sc, increase) repeat six times.
- You should have 18 stitches by the end of this round.
Round 4:
- (2 sc, increase) repeat six times.
- You should have 24 stitches by the end of this round.
After Round 5:
- (3 sc, increase) repeat six times.
- You should have 30 stitches by the end of this round.
Round 6:
- (4 sc, increase) repeat six times.
- You should have 36 stitches by the end of this round.
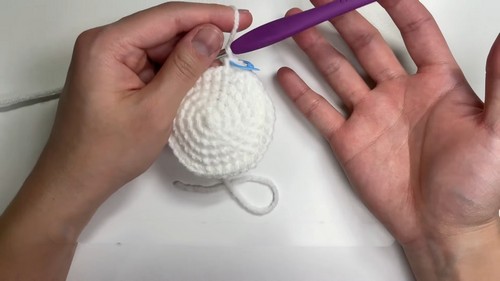
Rounds 7-20:
- Work 1 sc in each stitch for 14 rounds.
- Each of these rounds should still have 36 stitches.

Eye Placement:
- Between rounds 10 and 11, with 5 stitches between the eyes, attach the safety eyes.
Mouth Embroidery:
- Embroider the mouth with either black or pink thread as per your design choice.

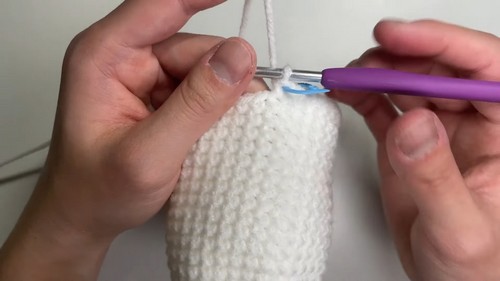
In Round 21:
- (4 sc, invisible decrease) repeat six times.
- You should have 30 stitches by the end of this round.
Round 22:
- (3 sc, invisible decrease) repeat six times.
- You should have 24 stitches by the end of this round.
Round 23:
- (2 sc, invisible decrease) repeat six times.
- You should have 18 stitches by the end of this round.
Stuff the body at this point.
Round 24:
- (1 sc, invisible decrease) repeat six times.
- You should have 12 stitches by the end of this round.
Round 25:
- Perform 6 invisible decreases.
- Close the hole by weaving the end in and out of the front loops of the remaining stitches and pull tight.
Arms and Feet Pattern (Make 4):

For Round 1:
- Create a magic ring.
- Work 4 sc into the magic ring.
- Pull the ring closed.
Round 2:
- (1 sc, increase) repeat twice.
- You will have 6 stitches in total.

Round 3-4:
- Work 1 sc in each stitch for 2 rounds.
- Each of these rounds should have 6 stitches.
Sewing:
- Sew the arms and feet onto the body between the indicated rows.


