
Cute & Smiley Crochet Charlie Brown Pattern For Bag Charm
“Get nostalgic with the free Crochet Charlie Brown Pattern, perfect for crocheting a fun and handmade tribute to your favorite Peanuts character!”
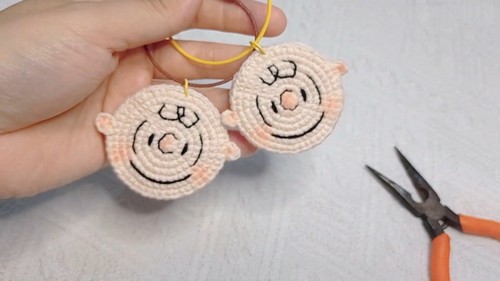
From this project you can give the life to beloved peanuts character! This engaging project features clear, easy-to-follow instructions, making it ideal for both beginners and seasoned enthusiasts. The pattern captures Charlie Brown’s endearing characteristics, from his signature zigzag shirt to his forever-squiggled hair.
Crochet Charlie Brown
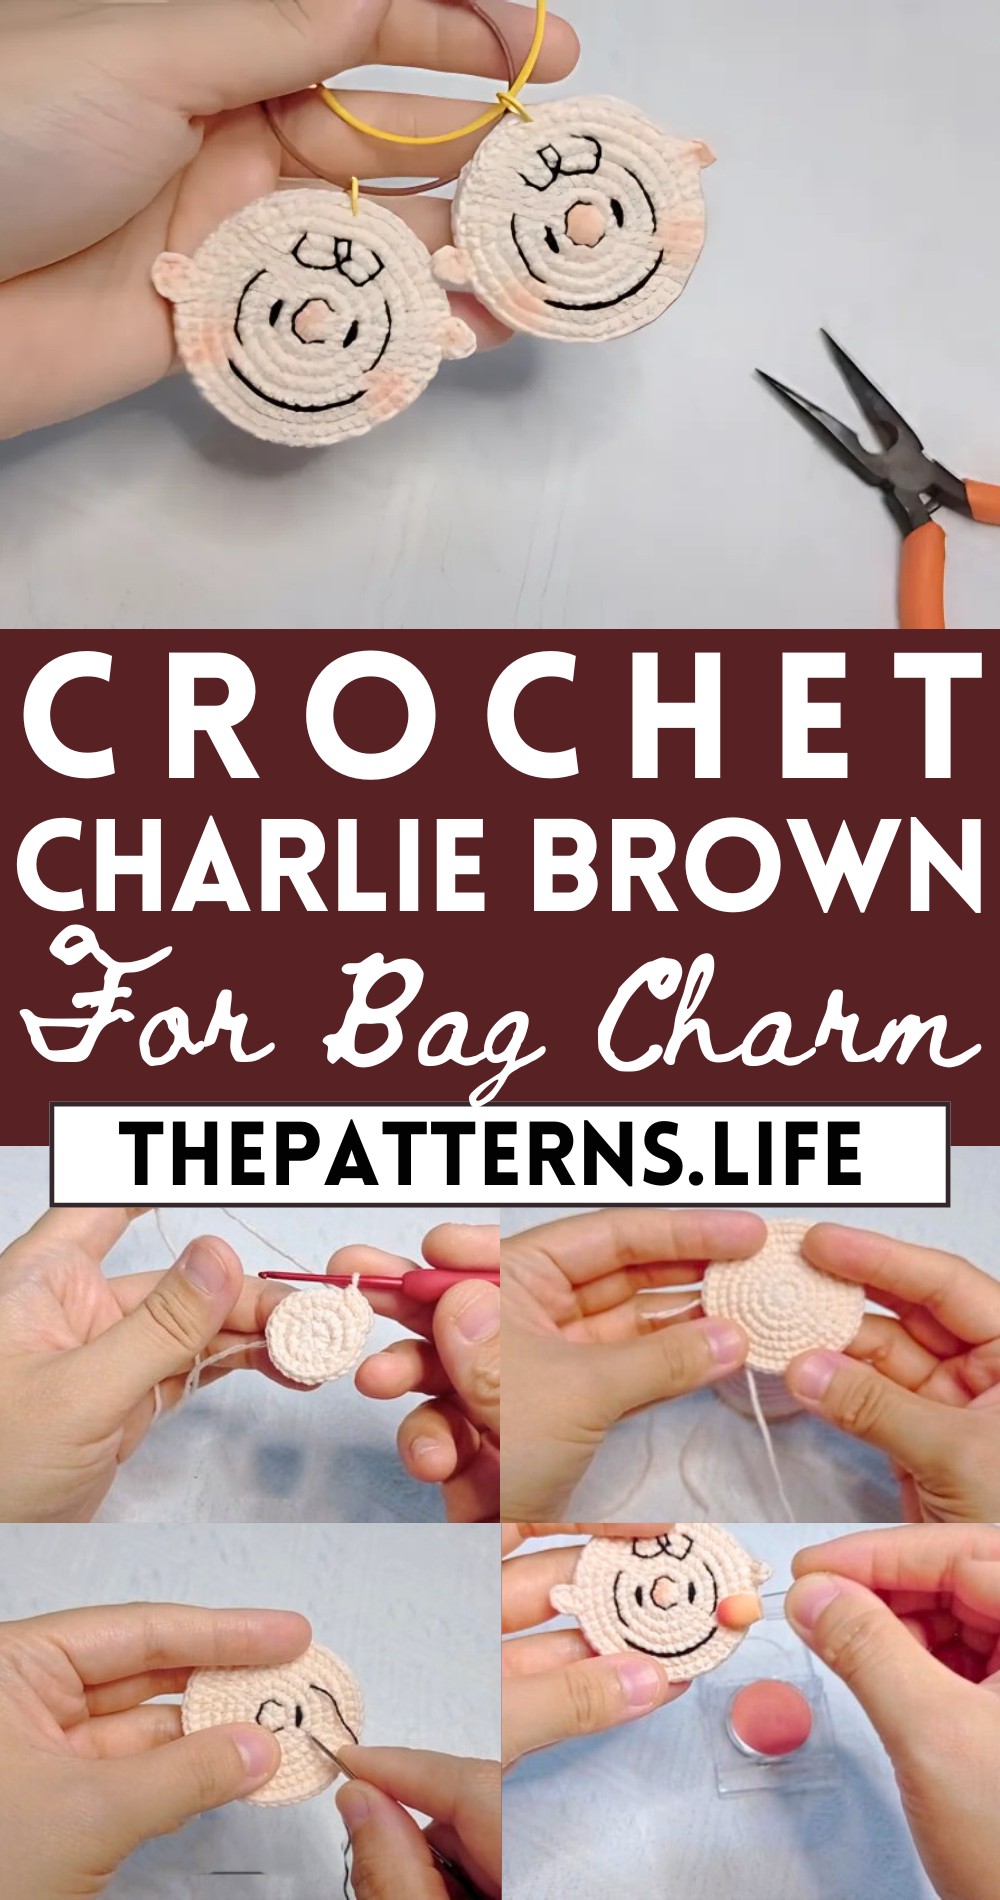
Perfect as a heartfelt gift or a nostalgic keepsake, this charming crochet pattern adds a whimsical touch to any collection. The finish of this iconic little project stands out with its detailed stitching and thoughtful design, ensuring it resonates with Peanuts fans of all ages.
Tip:
For extra durability and a polished finish, use a fine yarn needle to weave in loose ends securely and consider lightly stuffing the figure for sturdiness.
Materials Needed:
- 4ply yarn (skin color)
- 2.0mm crochet hook
Pattern:
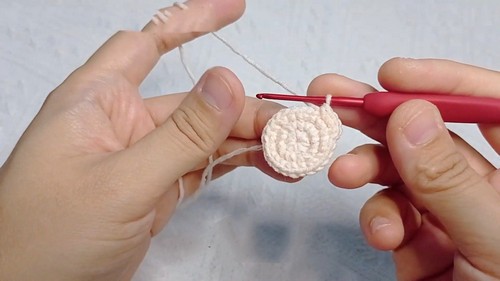
Head (make two):
Round 1:
- Make a magic ring (MR), then crochet 8 single crochets (sc) into the ring. Close MR with a slip stitch (sl st) to complete the round. [8 stitches]
Round 2:
- Increase (inc) in each stitch around by crocheting 2 sc in each stitch from the previous round. Complete 16 stitches and sl st to finish the round. [16 stitches]

After Round 3:
- Single crochet (sc), then increase (inc) in the next stitch. Repeat to around the circle 8 times. [24 stitches]
Round 4:
- (Sc, inc, sc). Repeat to around 8 times. [32 stitches]
Round 5:
- (3 sc, inc). Repeat to around 8 times. [40 stitches]
In Round 6
- (2 sc, inc, 2 sc). Repeat to around 8 times. [48 stitches]
Round 7:
- Crochet 48sc around. [48 stitches]For a cleaner finish, use an alternative slip stitch method that leaves no visible slip stitch trace.
Assembly:
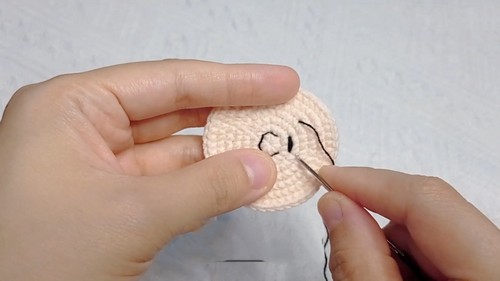
- Make one circle with a short tail and one with a long tail. The piece with the long tail will be used for the face details.
- Use the piece with the long thread to embroider Charlie Brown’s facial expressions onto one of the circles.
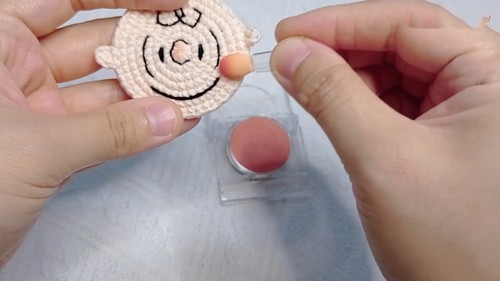
Finishing:
- Place the two circles wrong sides together. Use the tails to sew around the edges, joining the two pieces. Be sure to align the stitches to ensure a neat finish.
- Tuck in any remaining ends.


