Simple Crochet Bucket & Luffy Straw Hat Pattern For Cuteness
“Sail with the Free Crochet Bucket & Luffy Straw Hat Pattern—create your own adventure-ready hats with a splash of style and character!”
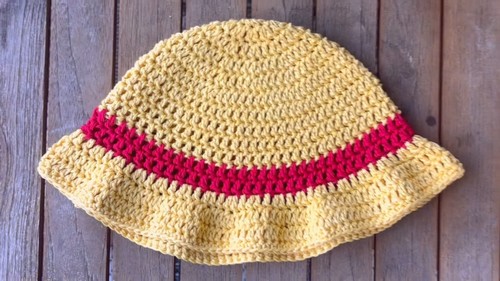
This pattern provides step-by-step guidance to create two distinct, playful hats—one replicating iconic straw hat and the other a trendy bucket hat. Each offers a fun and engaging project, suitable for beginners and experienced crocheters. Embark on a crochet adventure with this Hat Pattern, perfect for anime fans and sun-loving crocheters alike.
Crochet Bucket & Luffy Straw Hat

With clear instructions and versatile design options, these hats are ideal for cosplay, beach days, or simply adding a unique flair to your outfit. Enjoy the process and show off your handiwork with pride!
Tip:
For a more durable finish, use a sturdy yarn that holds its shape well.
Material Needed:
- Yellow Yarn
- Red Yarn
- Crochet Hook (5 mm size)
- Scissors
- Yarn Needle
Pattern Instructions:
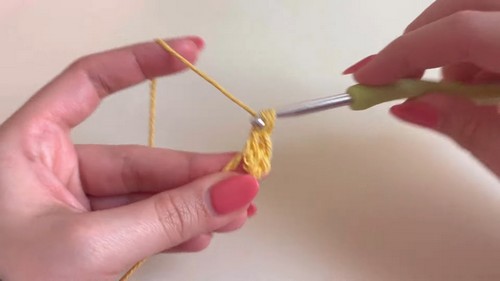
Start with a magic ring
- Start with a magic ring using yellow yarn and a 5 mm crochet hook.
- Chain one (this does not count as a stitch), then chain one more for a total chain of two.
- Work 12 double crochet into the magic ring.
- Tug lightly on the tail to tighten the magic ring.
- Slip stitch to the top of the first double crochet to join the round.

Round 2:
- Chain two (does not count as a stitch), then work two double crochet (increase) into the same stitch.
- Work an increase into each stitch around, for a total of 24 stitches.
In Round 3:
- Chain two, then double crochet into the same stitch.
- Double crochet in the next stitch, then increase in the following stitch.
- Repeat this pattern (one double crochet, then an increase in the next stitch) around for a total of 36 stitches.

Round 4:
- Chain two, and double crochet into the same stitch.
- Double crochet in each of the next two stitches, then do an increase in the third stitch.
- Repeat this pattern around (two double crochet, then an increase) for a total of 48 stitches.

Round 5:
- Chain two, then double crochet into the same stitch.
- Double crochet in each of the next three stitches, then do an increase in the fourth stitch.
- Repeat this pattern around for a total of 60 stitches.
For Round 6 (last round of increases):
- Chain two, then double crochet into the same stitch.
- Double crochet in the next nine stitches, then make an increase in the 10th stitch.
- Repeat this pattern around for a total of 66 stitches.

Round 7 through Round 10:
- Chain two, then make one double crochet in each stitch around.
- Repeat for four rounds.
Color change to red:
- After completing round 10, chain one and snip the yellow yarn.
- Attach the red yarn by tying a knot, weaving in the ends as you continue.
- Chain two with the red yarn and make one double crochet in each stitch around for two rounds for a total of 12 rounds.
Begin the brim:
- Chain two, and work into the front loops only.
- Make one double crochet in the first front loop, then make an increase in the next front loop.
- Repeat this pattern around (one double crochet, then an increase in the next front loop).
Finalize the brim:
- Chain two, and then work back into both loops of each stitch.
- Double crochet in the first stitch, double crochet in the next, then increase in the third stitch.
- Repeat this pattern all the way around.
- For the next row, make one double crochet in each stitch around.
- For the final row, add a row of single crochet stitches in each stitch around.

Finishing the hat:
- Slip stitch to the first single crochet to join the round.
- Chain one, snip the yarn, and weave in the ends,
- Flip the hat inside out to finish off the work neatly.