Super Cute Crochet Submarine Amigurumi Pattern Step By Step Guide
“Set sail on a crochet adventure with the Free Crochet Submarine Pattern—craft a whimsical, colorful submarine that’s perfect for playful imaginations!”
This engaging pattern guides you in creating a charming, colorful submarine, perfect for adding a playful touch to any space or sparking imaginative play for kids. Designed to be approachable for both beginners and experienced crocheters. The project is a fast and satisfying make for those familiar with amigurumi techniques, producing a toy about 12 inches long and 9 inches tall.
Submarine Free Crochet Pattern
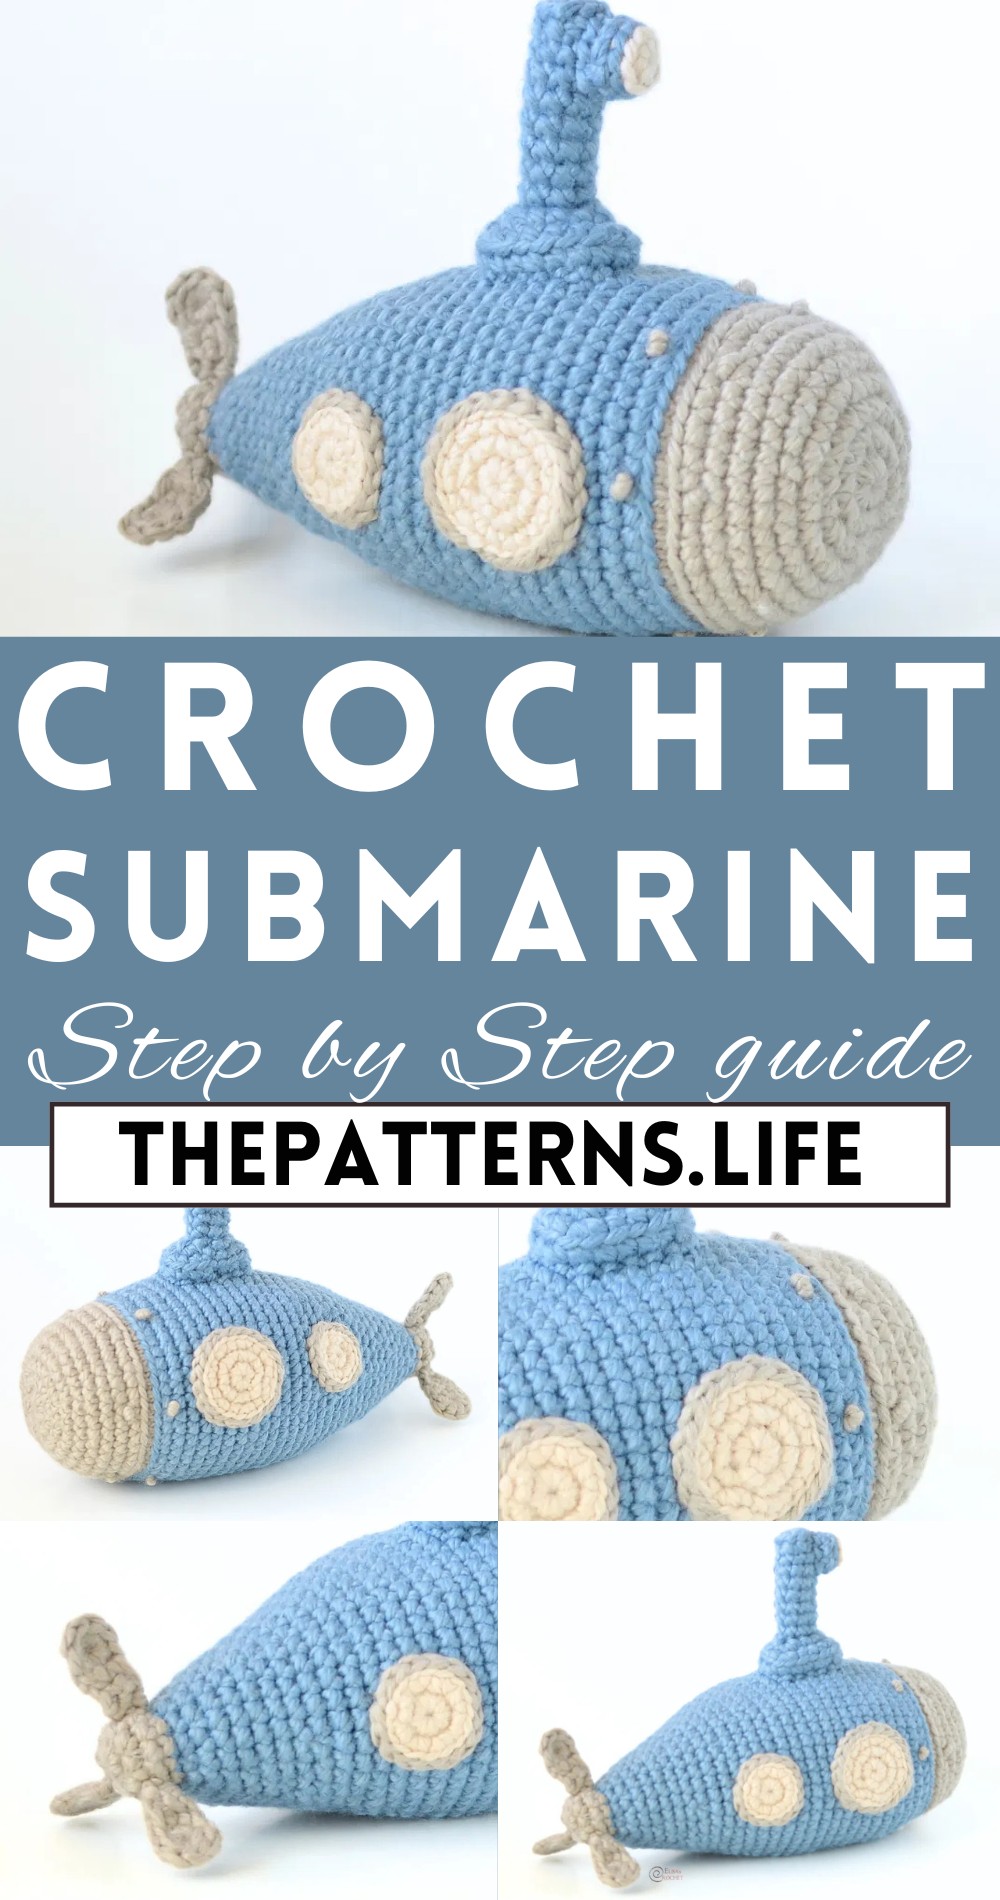
As you work through this project, you’ll enhance your crochet skills while producing a unique handmade toy that’s sure to bring joy and creativity into any environment. The finished submarine can be used as a delightful decor piece, a thoughtful gift, or a fun playtime accessory, highlighting your handcrafted expertise and attention to detail.
Tip:
Use a variety of bright yarn colors to make your submarine visually appealing and extra engaging for young children.
Materials Needed:
- Lion Brand® Re-SPUN THICK & QUICK® yarn in Silver (A), Faded Denim (B), and Whipped Cream (C)
- Large-eyed blunt needle
- Crochet hook size J-6 mm
- Fiberfill stuffing
Abbreviations:
- ch = chain
- rep = repeat
- rnd(s) = round(s)
- RS = right side
- WS = wrong side
- sc = single crochet
- hdc = half double crochet
- sl st = slip stitch
- st(s) = stitch(es)
MAIN STRUCTURE
Starting:
- With Yarn A, make a magic ring.
Rounds 1-8: Foundation and Increase
- Rnd 1: Work 8 sc in ring; invisible join with sl st in first sc.
- Rnd 2: Ch 1, 2 sc in each st around – 16 sc; invisible join with sl st in first sc.
- Rnd 3: Ch 1, * 1 sc in next st, 2 sc in next st; rep from * around – 24 sc; invisible join with sl st in first sc.
- Rnd 4: Ch 1, * 1 sc in next 2 sts, 2 sc in next st; rep from * around – 32 sc; invisible join with sl st in first sc.
- Rnd 5: Ch 1, sc in each st around – 32 sc; invisible join with sl st in first sc.
- Rnd 6: Ch 1, * 1 sc in next 3 sts, 2 sc in next st; rep from * around – 40 sc; invisible join with sl st in first sc.
- Rnds 7-8: Ch 1, sc in each st around – 40 sc; invisible join with sl st in first sc.
Rounds 9-11: Increased Circumference
- Rnd 9: Ch 1, * 1 sc in next 4 sts, 2 sc in next st; rep from * around – 48 sc; invisible join with sl st in first sc.
- Rnd 10: Ch 1, work in back loop, sc in each st around – 48 sc; invisible join with sl st in first sc. (Work this Rnd with the Half Color Change technique.)
- Rnd 11: Ch 1, work in front loop, sc in each st around – 48 sc; invisible join with sl st in first sc.
For Rounds 12-40: Shaping the Structure
- Rnds 12-24: Ch 1, sc in each st around – 48 sc; invisible join with sl st in first sc.
- Rnd 25: Begin stuffing and continue until piece is completed.
[Additional rounds (Rnds 26-40) follow, each detailed with either consistent stitching, decreasing, or special loops to shape the submarine. Includes instructions for final stuffing and ending the piece.]
PERISCOPE
Lens Part:
- With Yarn C, make a magic ring.
- Rnd 1: Work 8 sc in ring; invisible join with sl st in first sc.
- Rnd 2: With Yarn B, ch 1, work in back loop, sc in each st around – 8 sc; invisible join with sl st in first sc.
- Fasten off, leaving a long tail. Stuff the Lens.
Tube Part:
- With Yarn B, make a magic ring.
- Rnd 1-11: Starting with 8 sc in ring, various rounds introduce increasing and working in different loops to form the tube.
[Final steps include attaching the lens to the tube and attaching the completed periscope to the submarine.]
PORTHOLES
- Large (make two): Beginning with Yarn C, through rounds of increasing and joining, form the larger portholes, finishing with a slip stitch in the back loop with Yarn A.
- Small (make two): Similarly start with Yarn C and follow steps to create smaller portholes, also finishing with Yarn A.
[Final assembly instructs sewing portholes to the submarine.]
PROPELLERS (MAKE THREE)
- With Yarn A, start with a magic ring and progress through rounds to shape the propellers.
- Finish with “Fasten off leaving a long tail.” to enable attaching the propellers to the submarine.
- Additionally, use the embroidery French Knot technique to add detail with bolts.
[These components culminate in a detailed and structured submarine crochet project.]