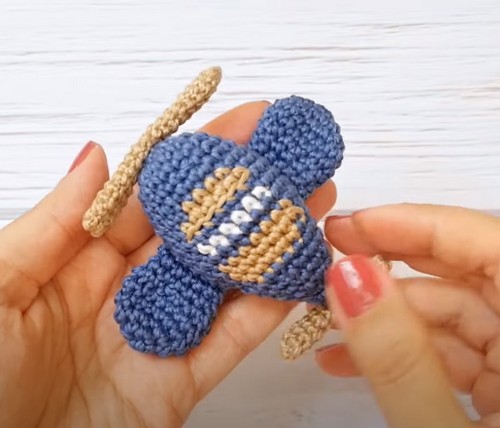
Crochet Simple Mini Airplane Amigurumi Pattern Step By Step
Zoom into fun with our free Simple Mini Airplane Amigurumi Pattern – crochet your own adorable, high-flying mini airplane!
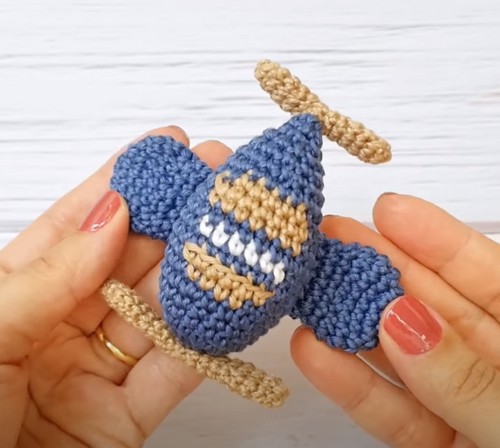
This pattern brings to life an adorable mini airplane, perfect in its charming design with cute wings and a tiny propeller. Whether destined to become a beloved toy for kids, a unique decoration for an aviation-themed room, or a thoughtful handmade gift, this mini airplane is sure to soar in popularity.
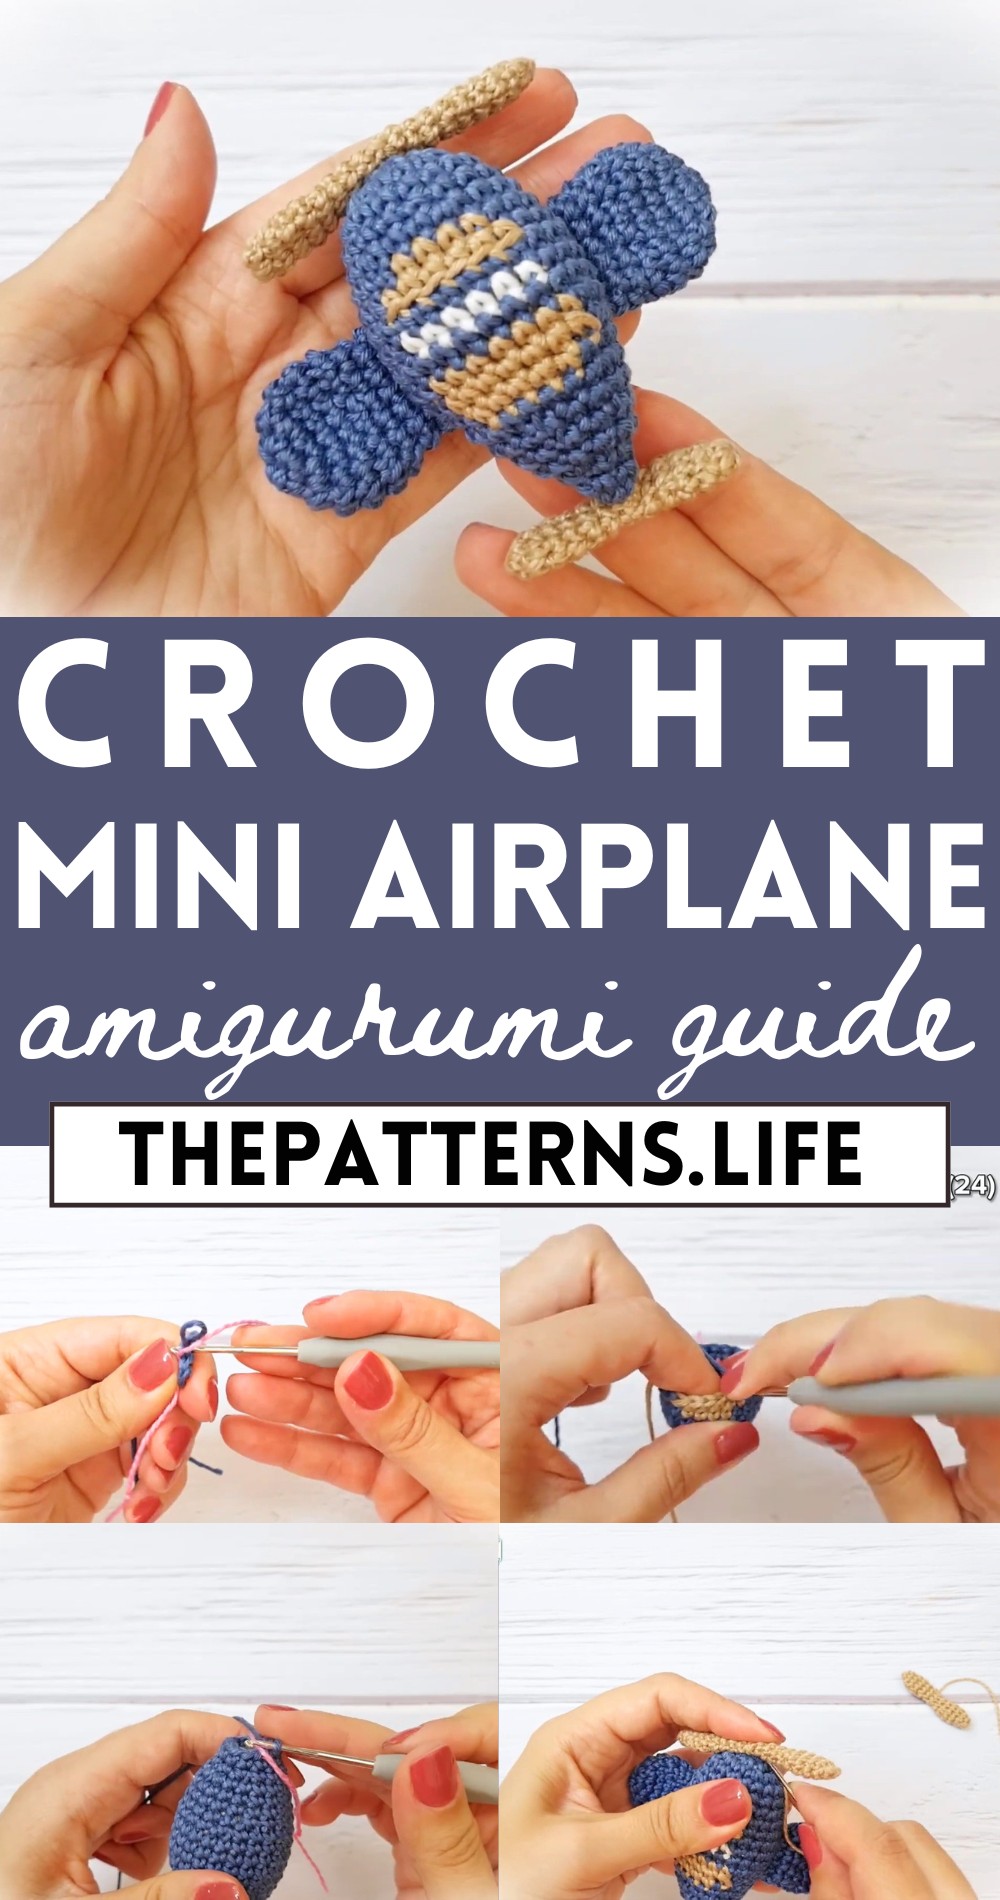
Its blue and almond color combination make it more attractive. The pattern is straightforward and easy to follow, making it a relaxing and rewarding activity. Completing this delightful airplane amigurumi not only provides a sense of accomplishment but also adds a touch of whimsical fun to your collection. Its compact size makes it perfect for small hands and big smiles, delivering endless joy wherever it lands.
Crochet Mini Airplane Amigurumi Tutorial
Materials Needed
- Amigurumi thread in three colors of your choice
- Thinner thread for the helix
- Crochet needles: 2mm and a smaller one for the thinner thread (1.5mm suggested)
- Filling material
- Yarn needle
- Scissors
- Stitch marker (a piece of yarn in a contrasting color can also work)
Plane Body
- Start with a magic ring in blue:
- Make 6 single crochets inside the ring.
- Row 2 (Increases):
- Make 2 single crochets in each stitch from the previous row (total 12 stitches).
- Row 3 (Increase + Single Crochet):
- Repeat [Increase, 1 single crochet] 6 times (total 18 stitches).
- Row 6 (Increase + Double Crochets):
- [Increase, 2 double crochets] repeated 6 times (total 24 stitches).
- First Color Change at Row 7:
- Do 10 double crochets, change color to brown. Continue with 4 single crochets in brown, then change back to blue.
- Continue Color Changes:
- Follow the pattern’s instructions for further rows, continuing with the alternating color stripes.
Wings (Make 2)
- Start with a blue magic ring:
- 6 single crochets in the ring.
- Row 2 (Increases):
- 2 single crochets in each stitch (total 12 stitches).
- Row 3 (Increase + Single Crochet):
- [Increase, 1 single crochet] repeated 6 times (total 18 stitches).
- Rows 4 and 5:
- Single crochet in each stitch (maintain 18 stitches).
- Row 6 (Decrease + Single Crochet):
- [Decrease, 1 single crochet] repeated 6 times (total 12 stitches).
Propellers (2 Big, 2 Small)
- With thinner thread and 1.5mm needle:
- Start with a magic ring and 6 single/double crochets (follow specific steps as propellers have different sizes).
- Correct row adjustments for size:
- Varying increases and decreases across rows to shape each propeller.
- Join two pieces of each size:
- Sew them together to form one big and one small propeller unit.
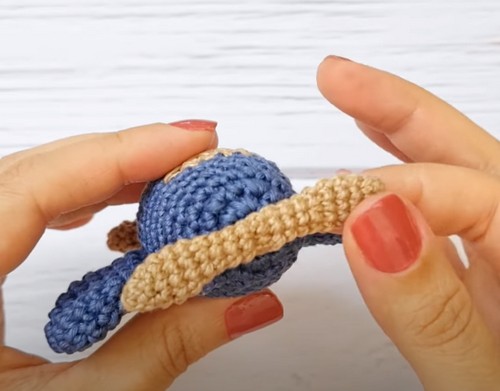
Assembly
- Sew the wings to each side of the plane body:
- Ensuring they are symmetric.
- Attach the propellers:
- The bigger one at the front, a smaller one at the plane’s rear.
Final Touches
- Add filling:
- Gradually fill the body as you close the piece.
- Close and Secure the Opening:
- Use a yarn needle to weave through the final row, pull tight to close, secure with a knot, and hide the yarn end inside the toy.
Tips
- Changing colors: Pull the new color through the last two loops of the last stitch of the old color to create a smooth color change.
- Keep tension consistent to ensure even stitches and color transitions.
- Adjust the filling as you close the piece to ensure a smooth, uniform shape.