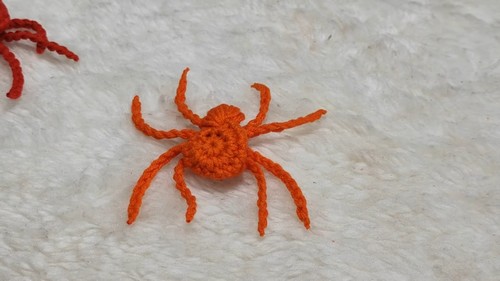
Crochet Spider with Easy And Simple Pattern – For Halloween
Entrancing your crochet project, our Spider pattern offers a blend of elegance and eerie spark for your collection.
Our exceptional project balances a touch of whimsy and seasonal spirit, perfect for Halloween decorations or adding a hint of spooky charm to your home decor year-round. With detailed instructions and innovative techniques, even beginners can enjoy making this charming arachnid. The pattern is versatile, allowing for different sizes and styles, suiting various uses, from playful keychains to elegant table centerpieces. .
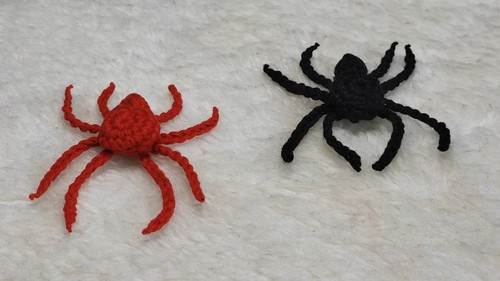
Crochet Spider
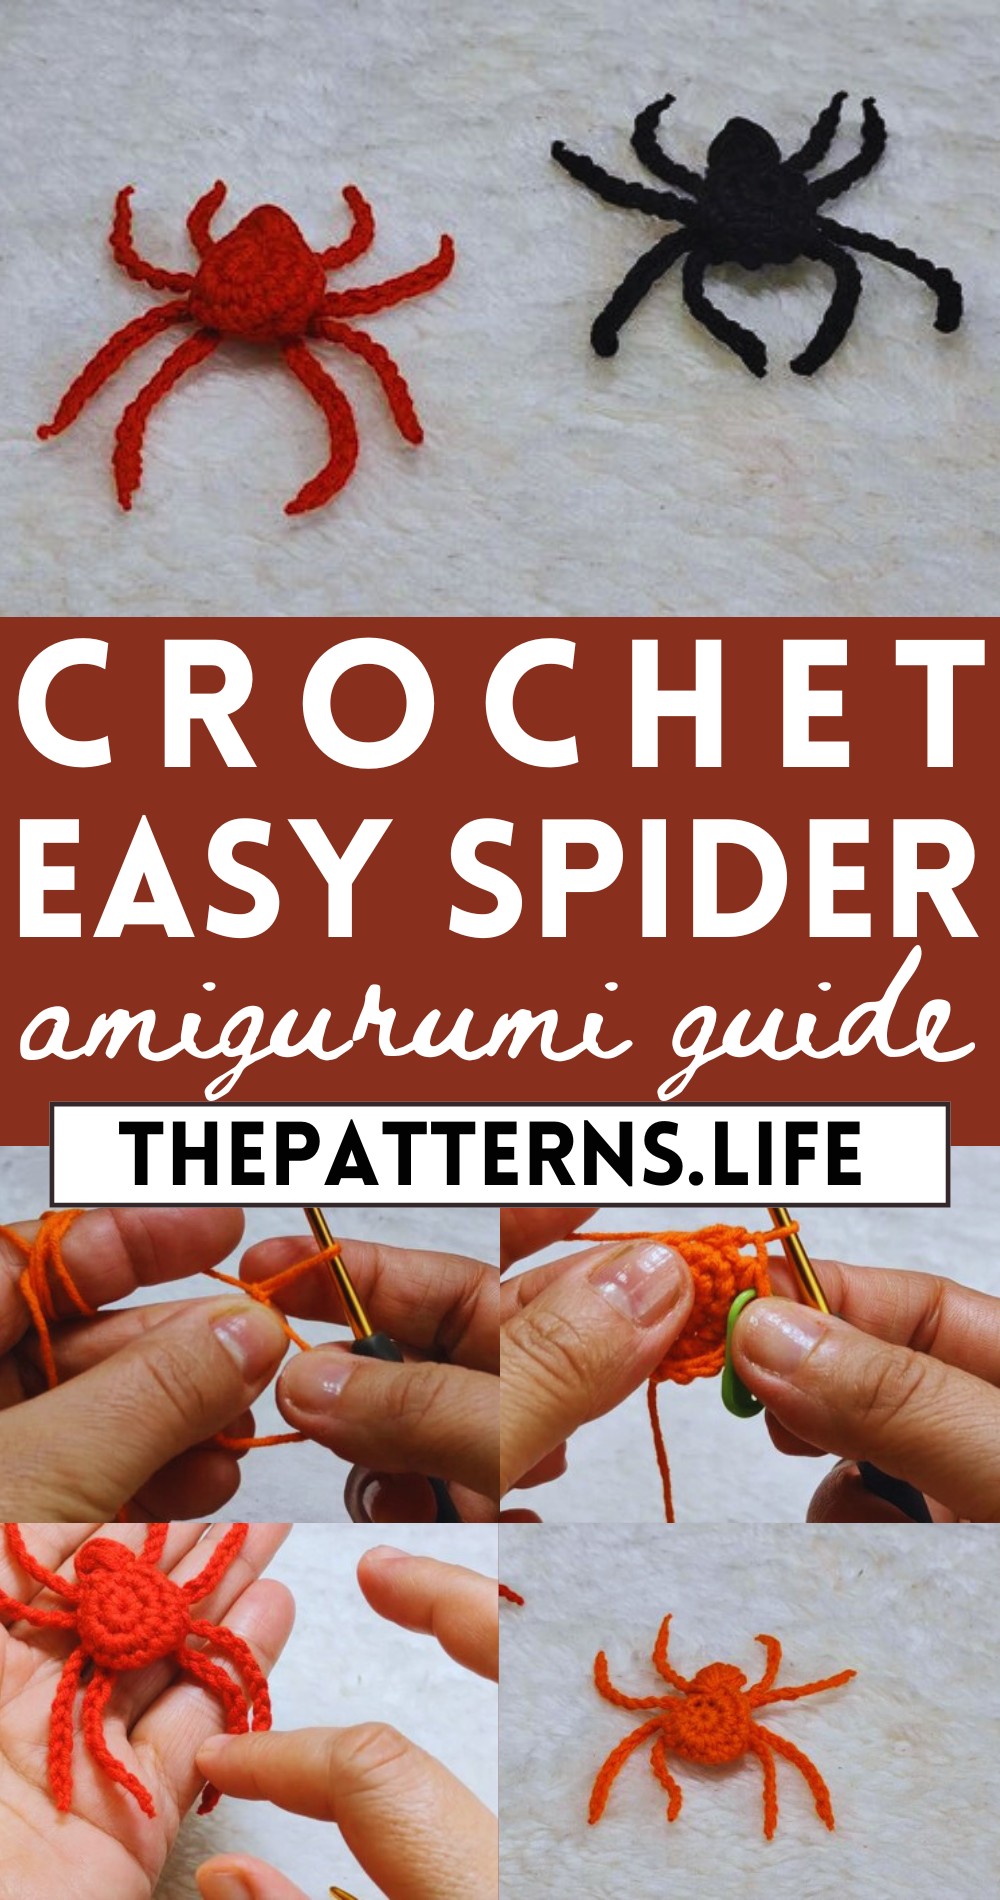
Benefits include not only the joy of crochet itself but also the ability to customize your own home accents or handmade gifts. Simple stitches marry in a design that’s both sophisticated and easy to follow. The end result is a delightful spider that can be used to decorate your living space, add flair to costumes, or serve as a conversation piece. Unleash your creativity with this engaging and delightful pattern
Materials:
- Small scrap yarn
- 3 mm crochet hook
- Cotton yarn (amigurumi cotton yarn recommended)
- Scissors
- Darning needle
- Stitch marker
Spider Body:
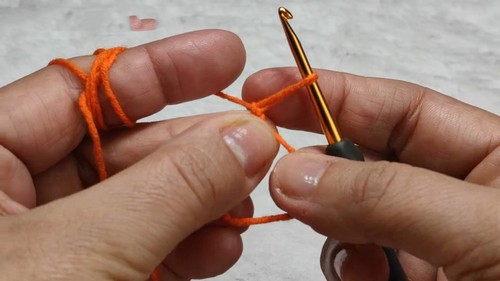
Start with a magic ring.
- Chain 1 (to secure the ring).
- Make 8 single crochets into the ring.
- Pull the yarn end to tighten the magic ring, creating a small circle.
Second Round:
Instead of joining with a slip stitch, make 2 single crochets in the first stitch of the previous round (consider this as the first increase).
- Place a stitch marker to mark the beginning of the round.
- Continue to make 2 single crochets in each stitch around.
- You will have a total of 16 single crochets by the end of this round.
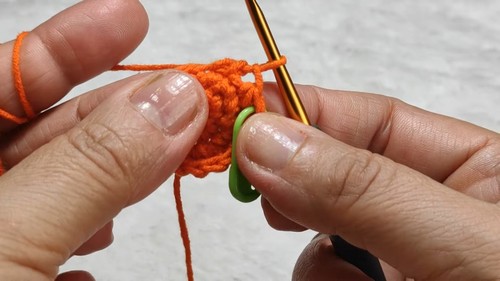
Third Round:
- Make one single crochet in each stitch around, maintaining the stitch count at 16.
- Use a stitch marker to indicate the beginning of the round.
Fourth Round (Decreasing to Shape the Body):
Start the round with a decrease: insert hook into the first stitch, yarn over, pull through, insert hook into the next stitch, yarn over, pull through, yarn over and pull through all three loops on the hook.
- Mark the beginning of this round with a stitch marker.
- Continue with the decrease method around until you have 8 stitches.
Finishing the Body:
- Make one slip stitch in each stitch around to tighten and close the body.
- Cut the yarn, leaving a long tail for sewing.
- Use a darning needle to close any opening by sewing through the front loops of the remaining stitches and pull tight.
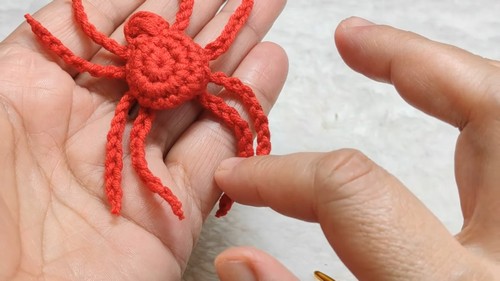
Spider Head:
- Attach yarn at the desired spot on the body for the head.
- Make a series of pull-throughs for the desired head size (usually fewer than for the body, about 6 pull-throughs recommended).
- Secure and fasten off.
Legs:
Make 4 chains with variable lengths to mimic the natural variation in a spider’s legs (e.g., 20, 22, 24, and 26 chains for each pair, thus creating 2 legs when folded in half).
- Leaving a tail at both ends of each chain for attaching to the body.
- Sew each pair to the body, arranging from shortest near the head to longest towards the rear.
Assembly:
- Adjust the length and positioning of legs as necessary for a natural spider appearance.
- Use the yarn tails to securely attach each leg to the body.
- Weave in any loose ends to tidy up your spider.