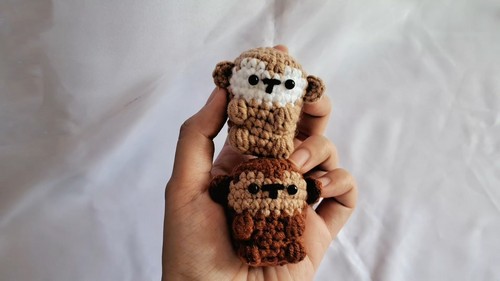
Cute and innocent Crochet Mini Monkey Pattern – for kids
Incorporate a touch of elegance into your crochet collection with this adorable mini monkey pattern, perfect for thoughtful gifts or charming home decor.
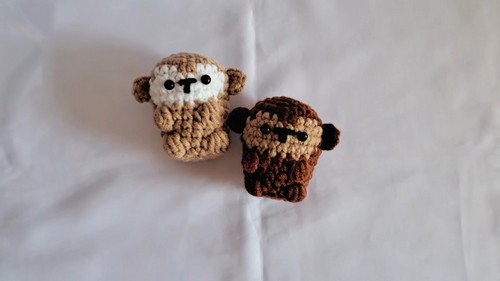
The charm and versatility of the Crochet Mini Monkey pattern promise endless smiles and satisfaction for all who try it. Perfect for beginners and seasoned pros alike, this pattern takes you on a delightful journey of creativity. Use your mini monkey as a playful gift, a quirky home décor piece, or even a funky accessory for kids. With easy-to-follow instructions and minimal materials, you’ll have fun bringing this adorable character to life.
Free Crochet Monkey Pattern
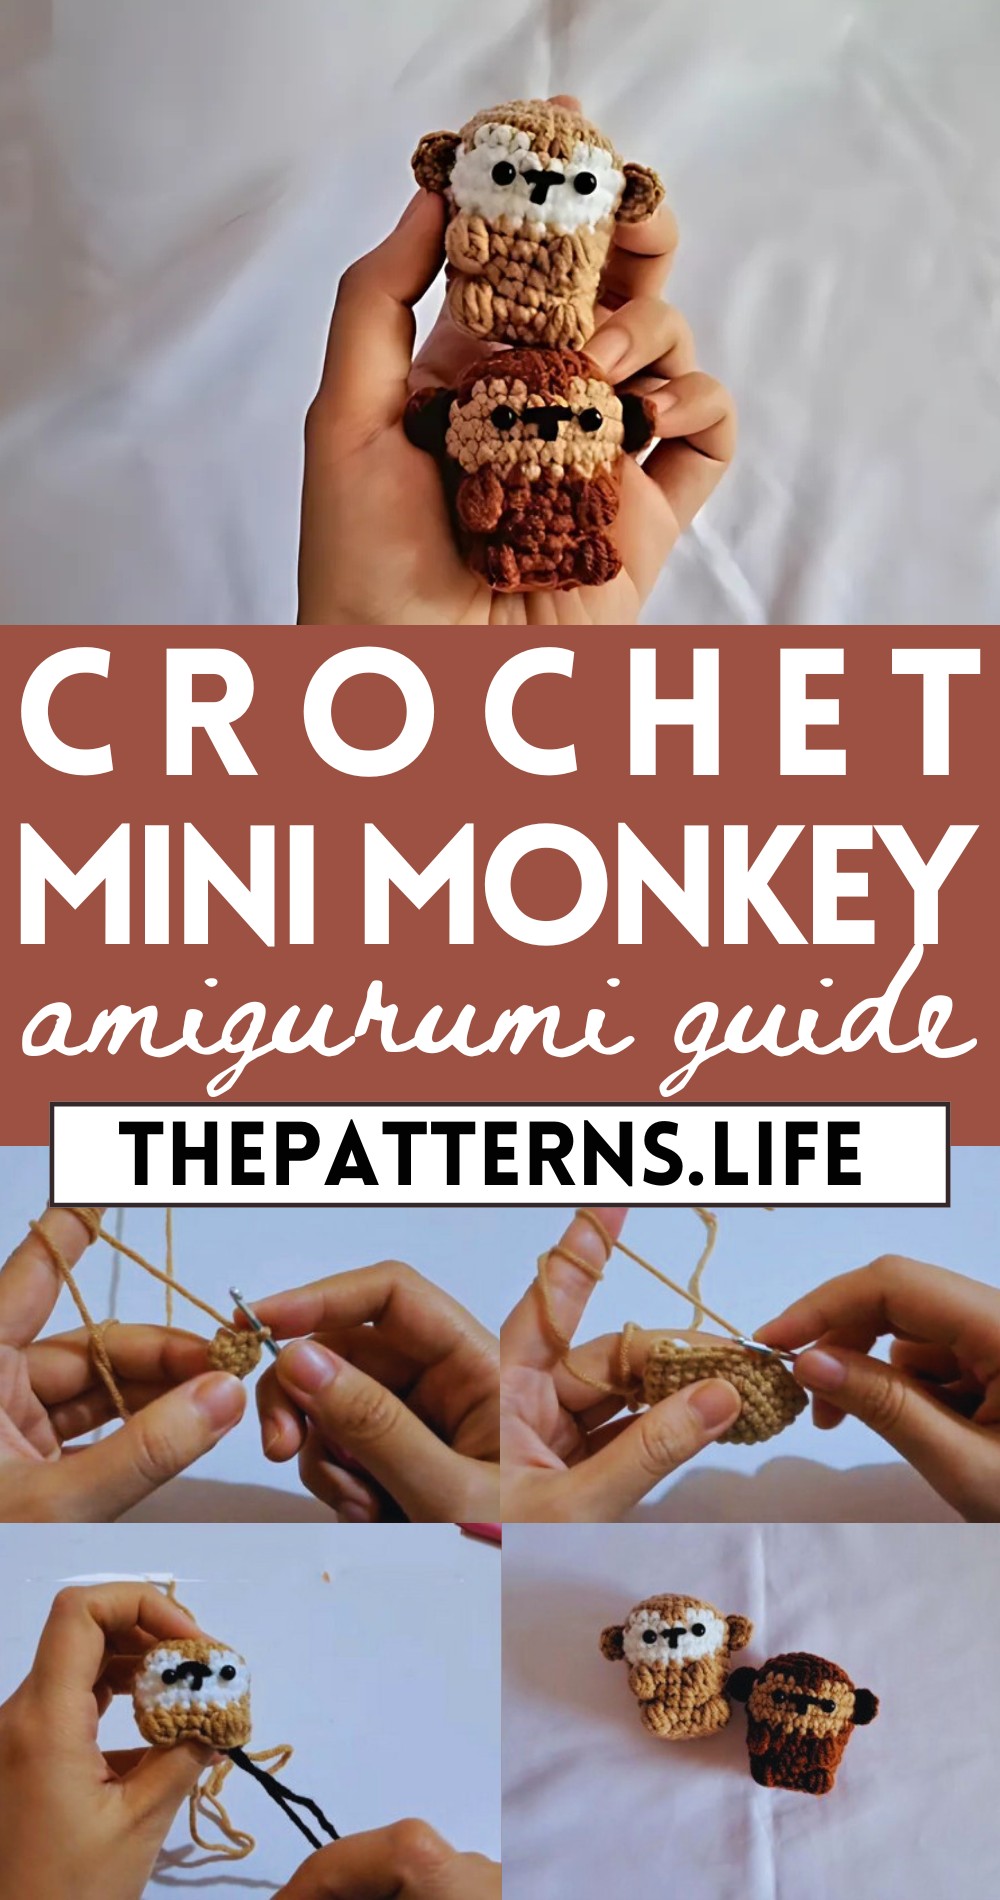
Ready for some crochet fun? The Mini Monkey pattern is here to add a splash of joy to your crafting adventures! Imagine stitching together a cute and cuddly little friend that everyone will adore. Plus, it’s a wonderful way to boost your fine motor skills and feel a sense of accomplishment.
Materials needed:
- Yarn in brown and white (or preferred monkey colors)
- Crochet hook (size not mentioned but choose one suitable for your yarn)
- Stitch markers
- Yarn needle
- Scissors
- Stuffing material
- Plastic safety eyes (5 mm recommended)
Pattern:
Body:
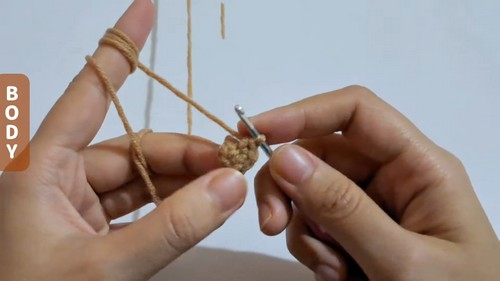
- Start with a magic ring.
- R1: 6 single crochet (sc) into the ring.
- R2: Increase (inc) in each stitch around (2 sc in each stitch around) [12 stitches].
- R3: 1 sc, 1 inc repeat around [18 stitches].
- R4: 2 sc, 1 inc repeat around [24 stitches].
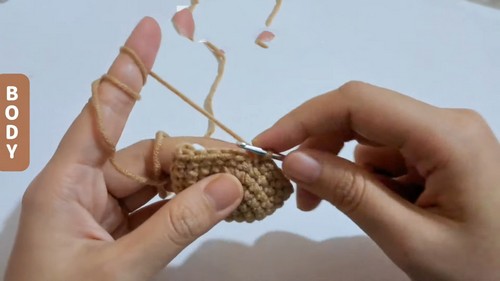
- R5: 8 sc in brown, change to white yarn to make 3 sc, change back to brown yarn for 2 sc, and again to white yarn for 3 sc, finishing with 8 sc in brown.
- R6-R7: 7 sc in brown, 10 sc in white, 7 sc in brown.
- R8: 8 sc in brown, 8 sc in white (cut off the white yarn after use), finish with 8 sc in brown.
- R9: 2 sc, then decrease (dec) repeat around [18 stitches].
- R10: Create hands by making 7 sc, 1 bobble stitch, 3 sc, 1 bobble stitch for the other hand, finish with 6 sc.
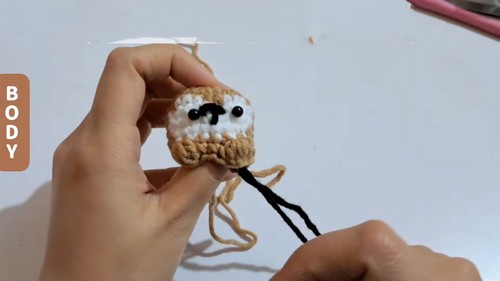
Insert eyes and nose:
- Insert 5 mm plastic safety eyes between R6 and R7, three stitches apart.
- Embroider a “T” shaped nose between the eyes using yarn.
Continue with the body:
R11-R12: Sc in each stitch around.
- R13: Make feet with 8 sc, bobble stitch, 3 sc, another bobble stitch, and finish with 5 sc.
- R14: Sc in each stitch around.
Closing and Finishing:
- Last Row: 1 sc, then dec repeat around until 12 stitches remain.
- Add stuffing, then close the bottom by pulling yarn through the front loops of each stitch tightly and weaving in the ends.
Ears (make 2):
- Start with a magic ring.
- 5 sc into the ring, pull to close.
- Leave a long tail for sewing.
- Sew the ears between R5-R8, secure the yarn, and weave in the ends.
Assembly:
- Attach the ears to the body at the indicated rounds.
- Finish stuffing the body if needed and secure the bottom closed.
- Weave in any loose ends.
Final Touches:
- Attach any additional features or embroidery as desired.