
Granny Square Top With Hanging Fringes Free Crochet Pattern
Get creative with our Free Crochet Granny Square Top with Hanging Fringes Pattern, perfect for adding a playful and boho-chic flair to your wardrobe!
This eye-catching design combines the classic charm of granny squares with playful fringes, creating a top that’s perfect for festivals, beach days, or casual outings. The pattern is simple to follow, making it a great project for both beginners and seasoned crocheters.
Crochet Granny Square Top Pattern With Fringes

You’ll love how the vibrant squares come together, accented by the flowing fringes that add a touch of whimsy to your look. The top is highly customizable; mix and match colors to suit your style and enjoy a unique, handmade addition to your wardrobe.
Tip:
For a neat finish, block your granny squares before joining them to ensure they align perfectly and maintain their shape.
Materials:
- Cotton-weight yarn in 4-5 colors (I used Sugar & Cream, but Red Heart Super Saver works too)
- 4.5 mm crochet hook
- Scissors
- Tapestry needle
Abbreviations:
- Ch: Chain
- St: Stitch
- Sc: Single crochet
- Dc: Double crochet
- Hdc: Half double crochet
- Sl st: Slip stitch
- Flo: Front loop only
- Blo: Back loop only
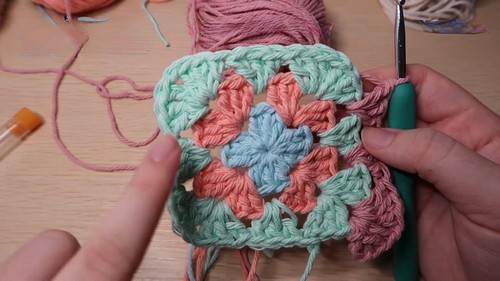
Granny Square Pattern:
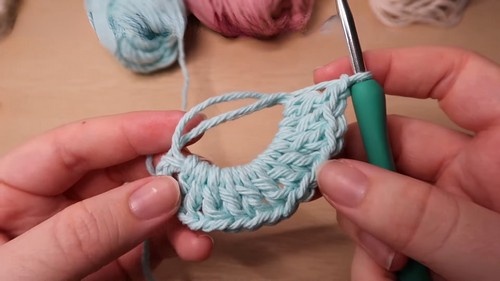
- Magic ring or Ch 4, sl st in first Ch (this creates a foundation ring)
- Ch 3 (counts as the first dc), 2 dc in the ring
- Ch 1, 3 dc in the same space (this creates a cluster)
- Repeat steps 3 and 4 three more times
- Ch 1, sl st in the top of the third Ch to join (this completes the first round)
- Ch 1, change colors, sc in the next st
- Ch 3 (counts as the first dc), 2 dc in the same space
- Ch 1, 3 dc in the same space
- Repeat steps 8 and 9 two more times
- Ch 1, sc in the next st
- Repeat steps 7-10 in the next two spaces
- Ch 1, sl st in the top of the third Ch to join (this completes the second round)
- Repeat rounds 2 and 3 until you have five granny squares
Joining the Granny Squares:
- Lay your granny squares face down, wrong side up
- Arrange the squares in a diamond shape, with two squares on top and three on the bottom
- Single crochet the squares together, starting from the top left corner
- Work your way across the top row, single crocheting the squares together in each corner
- When you reach the side, single crochet three times in the top of the corner stitch, then three times in the top of the next corner stitch
- Continue working around the square, single crocheting in each corner and side stitch
- When you reach the bottom, single crochet three times in the top of the corner stitch, then work your way back up the side, single crocheting in each corner and side stitch
- Repeat steps 5-7 for the other three sides of the top
- Weave in all ends

Straps and Tassels:
- Chain 70 for each strap
- Attach the straps to the top corners of the granny square top
- Cut and weave in the ends
- Make tassels by cutting two 12-inch strands of yarn
- Fold the strands in half and tie a knot in the loop
- Pull the strands through the loop and pull tight

Attach the tassels to the bottom corners of the granny square top, between the side straps
Weave in any remaining ends


