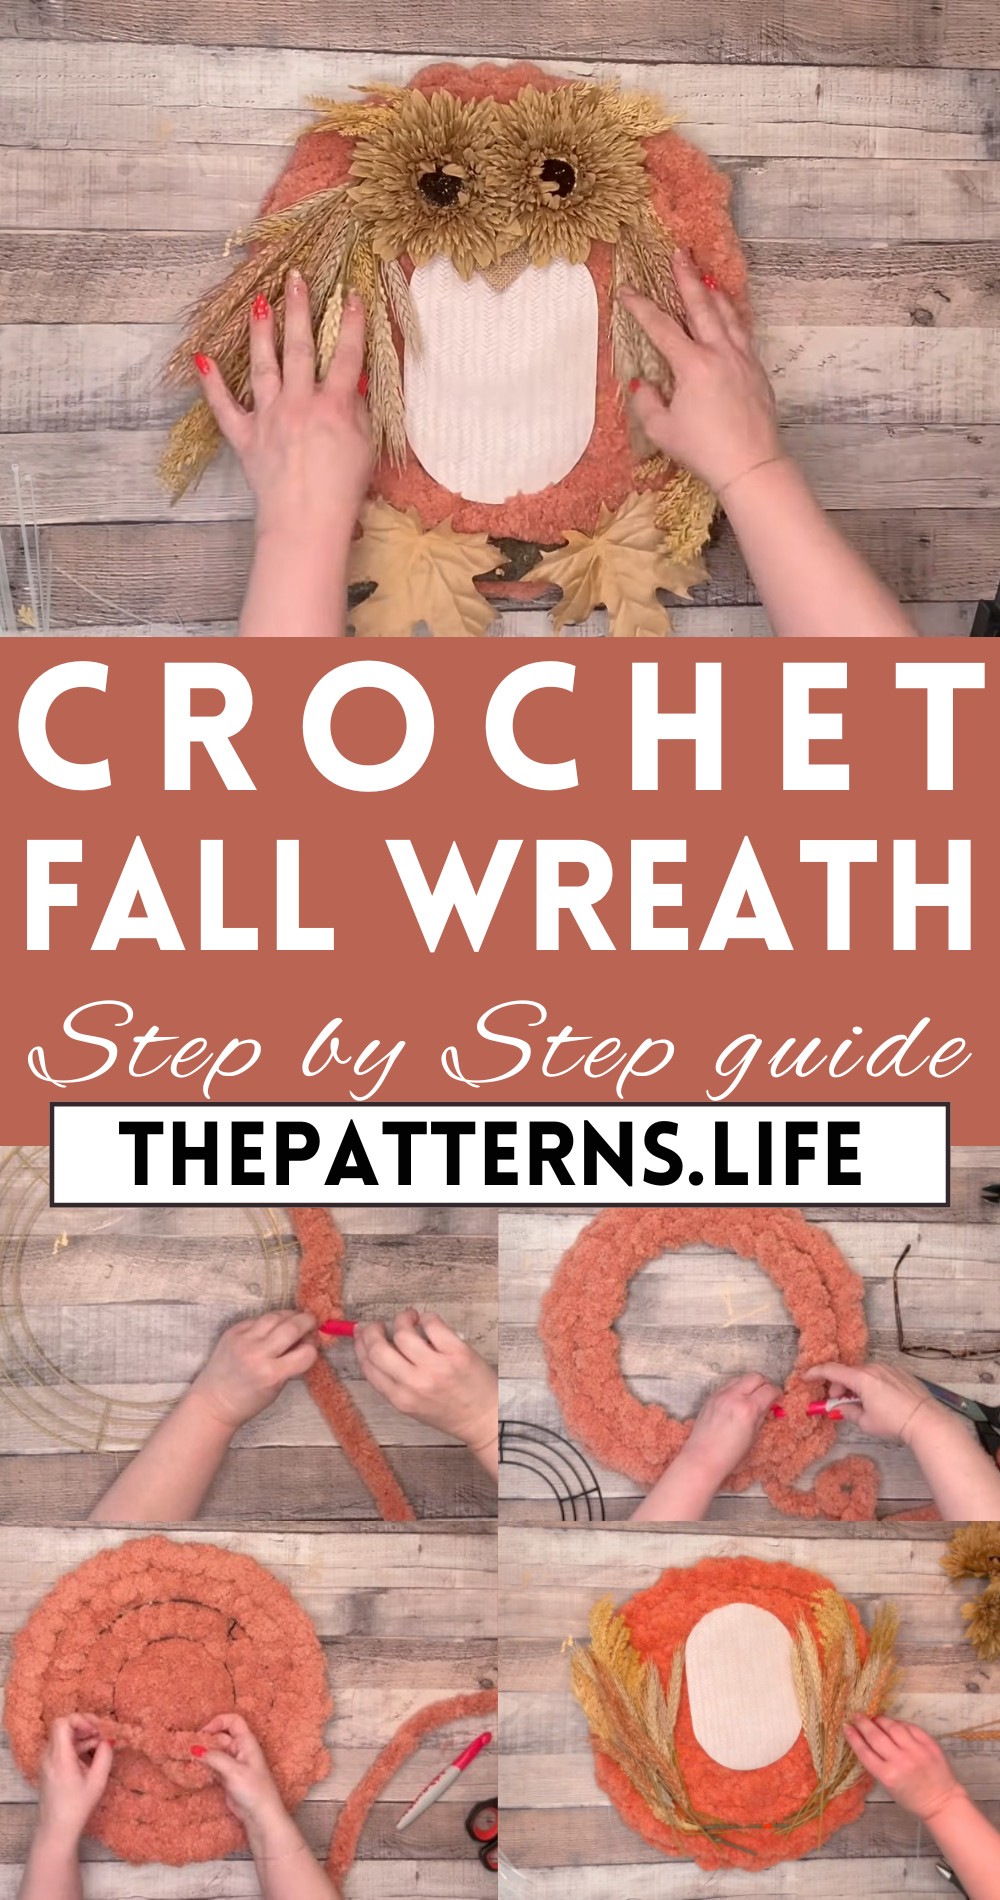
Easy And Simple Crochet Fall Wreath Pattern Step By Step
Cozy autumn atmosphere with our Free Crochet Fall Wreath Pattern, perfect for adding a touch of handmade charm to your seasonal decor.
A beautiful way to welcome autumn into your home with vibrant, hand-crocheted decorations. This pattern is perfect for creating a visually appealing wreath that captures the essence of fall with rich colors and intricate details. Ideal for hanging on your front door or adorning your living space, this wreath adds a warm, seasonal touch to any setting.
Crochet Fall Wreath
The pattern is beginner-friendly with clear instructions, making it accessible for all skill levels. Not only does it serve as a charming decorative piece, but it also provides a sense of accomplishment and a personal touch to your home decor. This crochet project can also be a thoughtful gift for friends and family during the fall season.
Tip:
To make your wreath more durable and long-lasting, consider using acrylic yarn, which is resistant to wear and tear from outdoor elements.
Material:
- Chunky Yarn, Ribbon, Jute, or Felt
- Dollar Tree Wreath Form
- Knitting Needles
- Zip Ties
- Hot Glue Gun
- Scissors
- Craft Leaves
- Vinyl
Abbreviations
- ch – chain
- st – stitch
- sl st – slip stitch
- hdc – half double crochet
- dc – double crochet
Instructions:

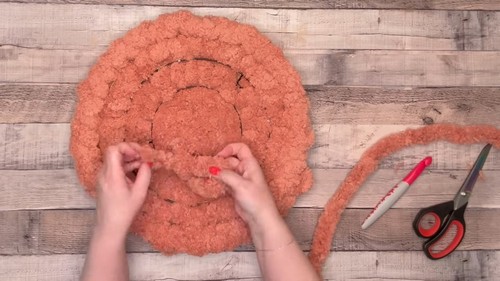
Start by shaping your Dollar Tree wreath form a bit more oblong.
- Securely knot a loop of chunky yarn at the wreath form’s top.
- Begin chain stitching by feeding your knitting needle through the yarn loop, guiding the yarn under the first section, and pulling through to continue.
- Keep creating chain stitches around the wreath, alternating between the wreath’s inner and outer edges.
- Should you spot any gaps, fill these in with additional chain stitches that loop through preceding stitches.
- After layer one of chain stitching, initiate a second layer by looping the yarn under the wreath frame.
- Employ a zigzag pattern through the wreath frame by weaving back and forth through previous stitch loops.
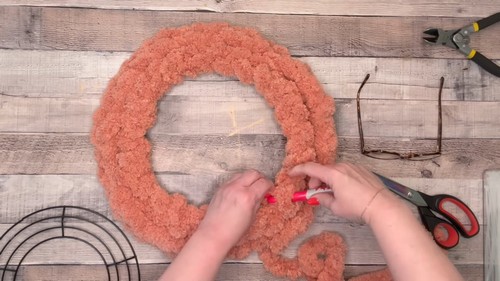
Repeat this process until the entire wreath form is cozily covered in yarn.
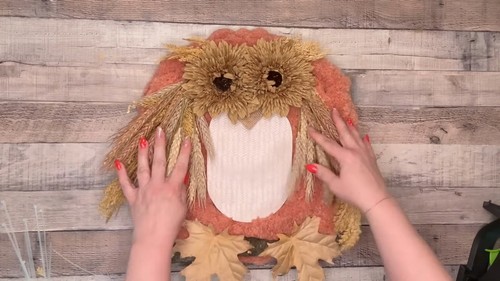
- For the owl’s body, affix a 10-inch wreath form behind the larger one with zip ties.
- Use steps 7 through 9 to envelop this smaller wreath form in chain stitches.
- Circle the wreath center with a chain of stitches to form the owl’s head.
- Fill this central area with half double crochet or double crochet stitches.
- Neatly secure your work by fastening off the yarn and tucking in any loose ends.
Fashion the owl’s eyes, stomach, and beak from vinyl or felt.
- Attach these pieces to the wreath using either glue or zip ties.
- Create the illusion of feet with craft leaves or branches, securing them at the wreath’s base.
- Finally, personalize your owl wreath with any additional embellishments, like feathers or bows.
Finishing:
Add any additional details, such as feathers or bows, to your owl wreath.
Hang your wreath on your door or another desired location.