Cute & Sweet Crochet Easy & Adorable Cat Paw Pouch
Delightful and practical cat paw pouch with this free crochet pattern, perfect for keeping small essentials organized in style.
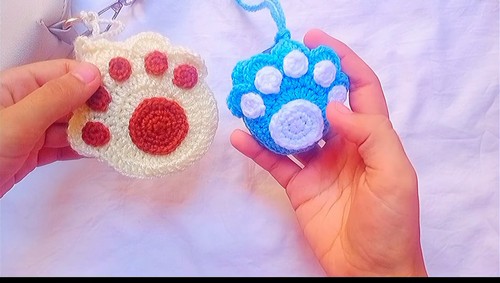
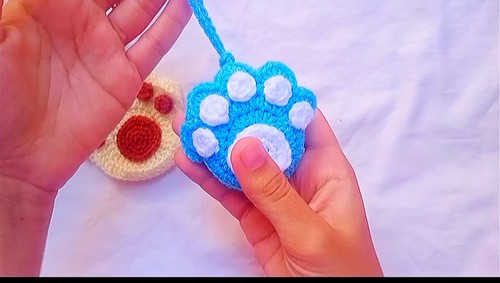
Designed to resemble a cute cat paw, this pattern is perfect for storing small essentials. The attention to detail in the design ensures that each paw pad and claw looks lifelike, adding a touch of whimsy to your accessories. The step-by-step instructions make it accessible for beginners while still engaging for more experienced crocheters seeking to enhance their skills.
Crochet Cat Paw Pouch

The pouch can be customized with different colors for a personal touch, making it a thoughtful gift for cat lovers. With its blend of practicality and charm, this cat paw pouch is sure to become a favorite item. Make a super soft, paw-shaped purse that’s not just a nod to your favorite feline friends but also the purr-fect spot to stash your goodies.
Tip:
Use a sturdy zipper to keep contents secure and provide easy access.
Materials:
- Yarn (color of your choice for the paw and a different, contrasting color for the pads)
- Crochet hook (size according to the yarn weight)
- A yarn needle
- Scissors
- Stitch markers (optional for marking the beginning of rounds)
Instructions:
- Base of the Pouch (Make 1 with each stitch type if desired):
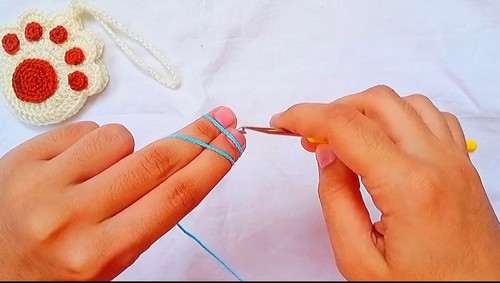
Magic Ring:
- Start with a magic ring.
Round 1:
- Chain 1 to close the magic ring.
- Crochet 11 stitches into the ring (use HDC or DC based on your choice).
- Pull the yarn to tighten the ring and close the hole.
- Slip stitch to the first stitch to join.
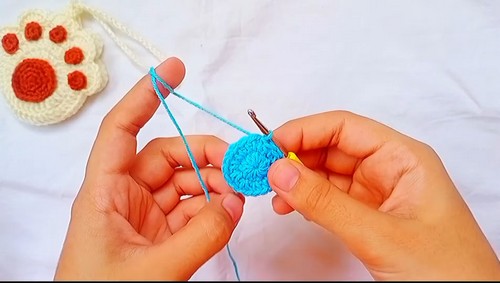
Round 2:
- Chain 1.
- Make 2 HDC or DC in each stitch around (total 22 stitches).
- Slip stitch to the first stitch to join.
For Round 3:
- Chain 1.
- (1 HDC or DC in next stitch, 2 HDC or DC in following stitch) repeat around (total 33 stitches).
- Slip stitch to the first stitch to join.
Round 4:
- Chain 1.
- (1 HDC or DC in each of the next 2 stitches, 2 HDC or DC in the next stitch) repeat around.
- Slip stitch to the first stitch to join.
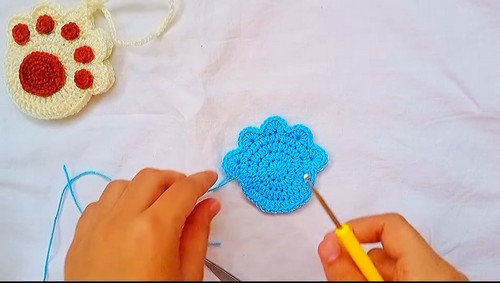
Paws (Make 2):
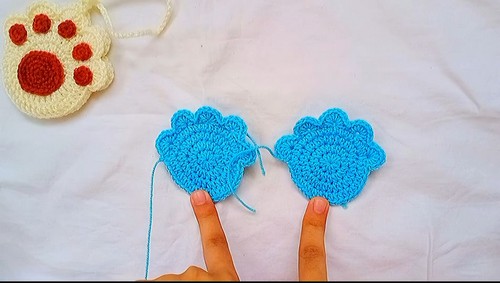
Forming a Paw:
- Skip 1 stitch, then crochet 7 HDC or DC into the next stitch.
- Skip 1 stitch, slip stitch into the next stitch.
- Repeat this pattern to form 5 or 6 “paw” bumps, depending on your preference.
Finish:
- Cut the yarn, leaving a tail. Pull through the loop to secure.
- One paw should have a longer tail for sewing it onto the main pouch.
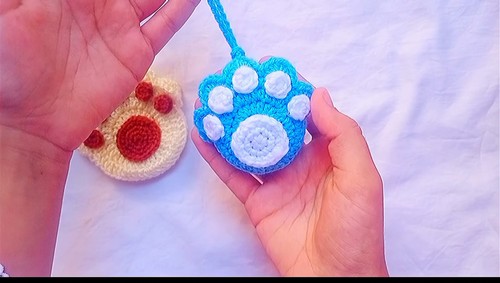
Paw Pads (Make as many as liked for decoration):
Magic Ring:
- Use contrasting color yarn.
- Crochet 6 single crochets (SC) into a magic ring.
- Slip stitch to the first SC to close.
- Cut yarn, secure and hide ends.
Assembly:
Attach Paw Pads:
- Position and sew the paw pads onto the paw bumps or attach using a hot glue gun.
Attach Paws to Main Pouch:
- Use the longer yarn tail to sew each paw onto the pouch.
Create a Strap (optional):
- Attach yarn to one side of the pouch.
- Chain a length sufficient to create a loop or strap.
- Attach the end of the chain back to the pouch with a slip stitch or sew in place.
Finishing Touches:
- Weave in any loose ends.
- Optionally line the pouch with fabric for extra durability and a professional finish.