
How To Crochet Aloe Vera Plant Step By Step Pattern
Everlasting green joy with this free Crochet Aloe Vera Plant Pattern, perfect for adding a touch of nature-inspired charm to any space.
A delightful way to bring a touch of greenery into your home without the need for watering or sunlight. This charming pattern allows you to create a lifelike aloe vera plant that stays vibrant year-round, making it an excellent addition to any room or workspace.
Crochet Aloe Vera Plant Tutorial
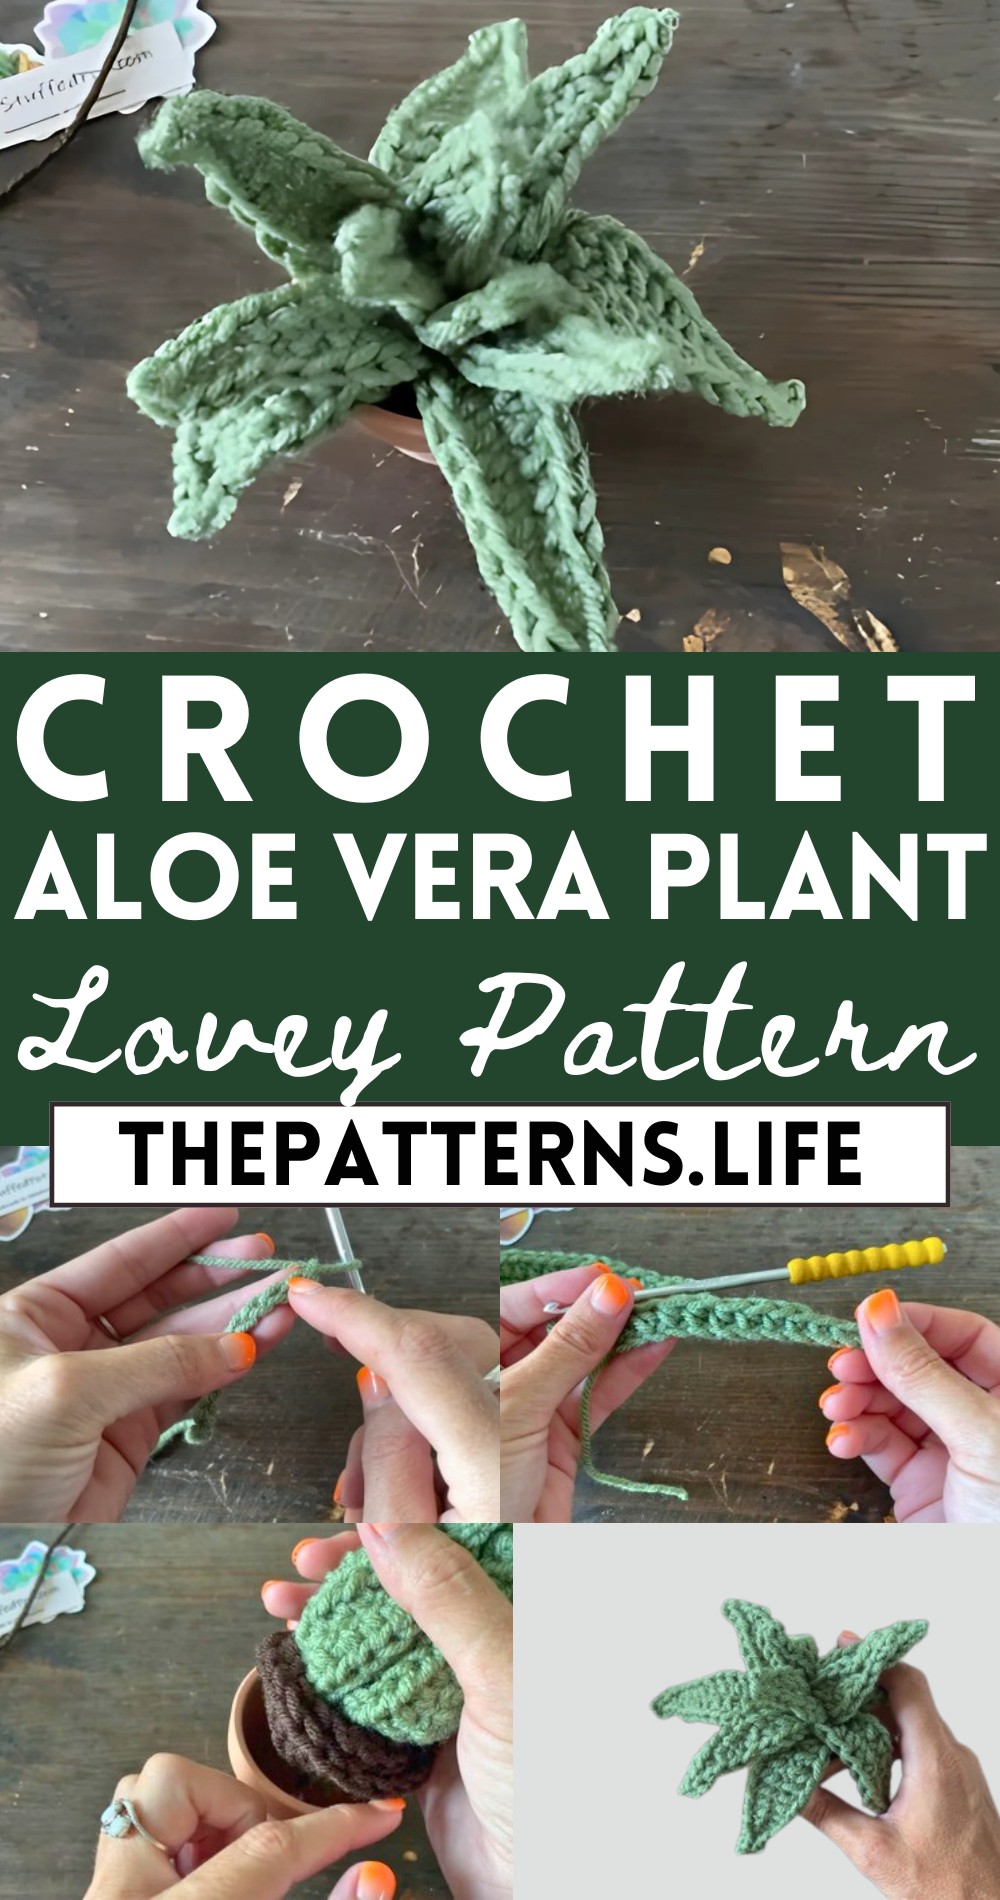
Its realistic design adds a pop of nature-inspired beauty and serenity to your surroundings, while also serving as a unique handmade gift for plant lovers. The pattern is easy to follow, making it suitable for both beginners and seasoned enthusiasts. The versatility of this crochet project means you can personalize the plant with different yarn colors and pot styles to match your decor.
Tip:
To keep your crochet aloe vera plant looking fresh, occasionally dust it gently with a soft brush or cloth to remove any accumulated dust.
Materials:
- Any type of yarn in two colors: one for the plant (recommended: light sage) and one for the soil (recommended: coffee)
- Crochet hook size G (4.25 mm)
- Yarn needle
- Hot glue gun (optional, for assembly)
- 3-inch pot (or a pot size of your choice)
Making the Aloe Vera Crochet Plant:
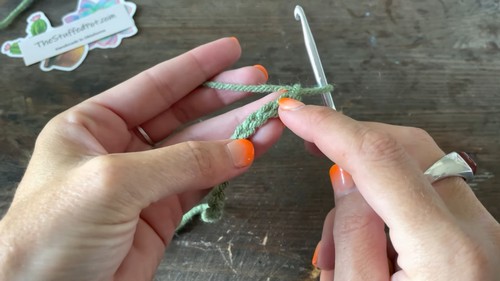
Slip Knot and Chains for Large Leaves:
- Start with a slip knot.
- Chain 15.
Working the Large Leaves:
Slip Stitches:
- Insert into the 14th, 13th, and 12th chains from the hook and make a slip stitch in each chain.
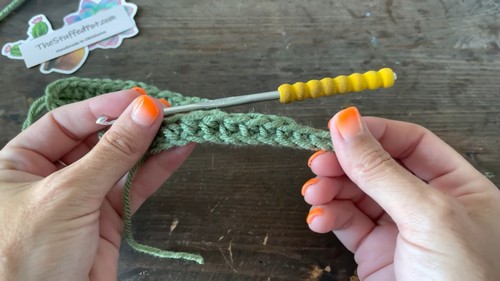
Single Crochets:
- In the 11th, 10th, and 9th chains, make a single crochet in each chain.
Half Double Crochets:
Continue with half double crochet stitches in the remaining chains to the end.
- Chain 2 to turn.
- Working on the opposite side of the chain, make half double crochets in the next 8 chains followed by single crochets in the next 3, and finally 3 slip stitches. Slip stitch into the last stitch for a nice point at the end of the leaf.
- Cut the yarn and use a yarn needle to weave in the ends.
- Repeat to make three more large leaves for a total of four.
Medium and Small Leaves:
- For medium leaves, follow the same pattern but start with a chain of 11; for small leaves, start with a chain of 8.
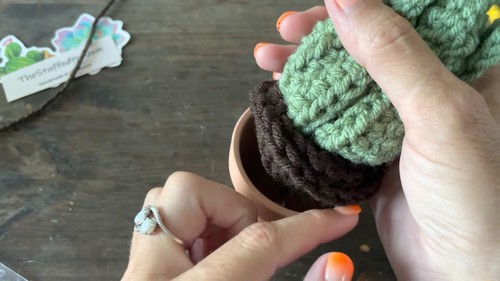
Making the Soil:
- Chain 45 (or adjust according to your pot size). Please note that you should start with a slip knot first.
- Half double crochet in each chain across to create a long ribbon.
Assembling the Plant:
- Using a hot glue gun or stitching, start bundling the leaves together, beginning with the small leaves at the center and moving outward to medium and larger leaves, ensuring they are evenly distributed.
- Once the bundle of leaves is assembled, use the soil ribbon to wrap around the base of the leaves, gluing or stitching as you go to secure it.
- Cut off excess yarn tails if necessary.
Finishing:
- If desired, secure the assembled plant into your pot using hot glue for a permanent fix or leave it unglued for a removable plant.
Additional Notes:
- The creator expresses that you can adjust the leaf pattern to make the leaves longer or more pointed to your liking.
- The pattern described is meant for a 3-inch pot, but adjustments can be made for different sizes.
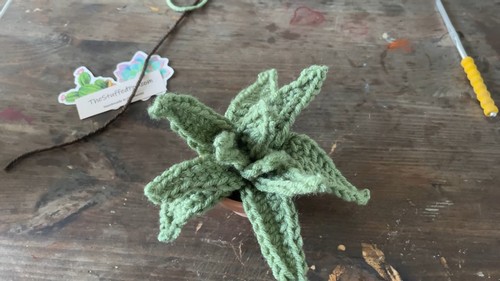
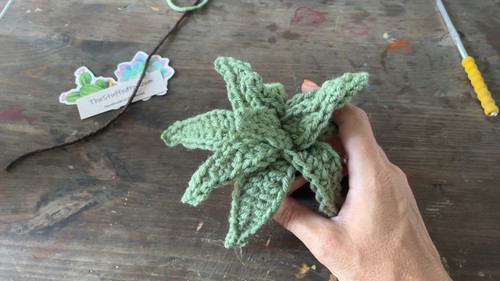
- Upon completion, arrange the leaves to resemble a natural aloe vera plant.


