
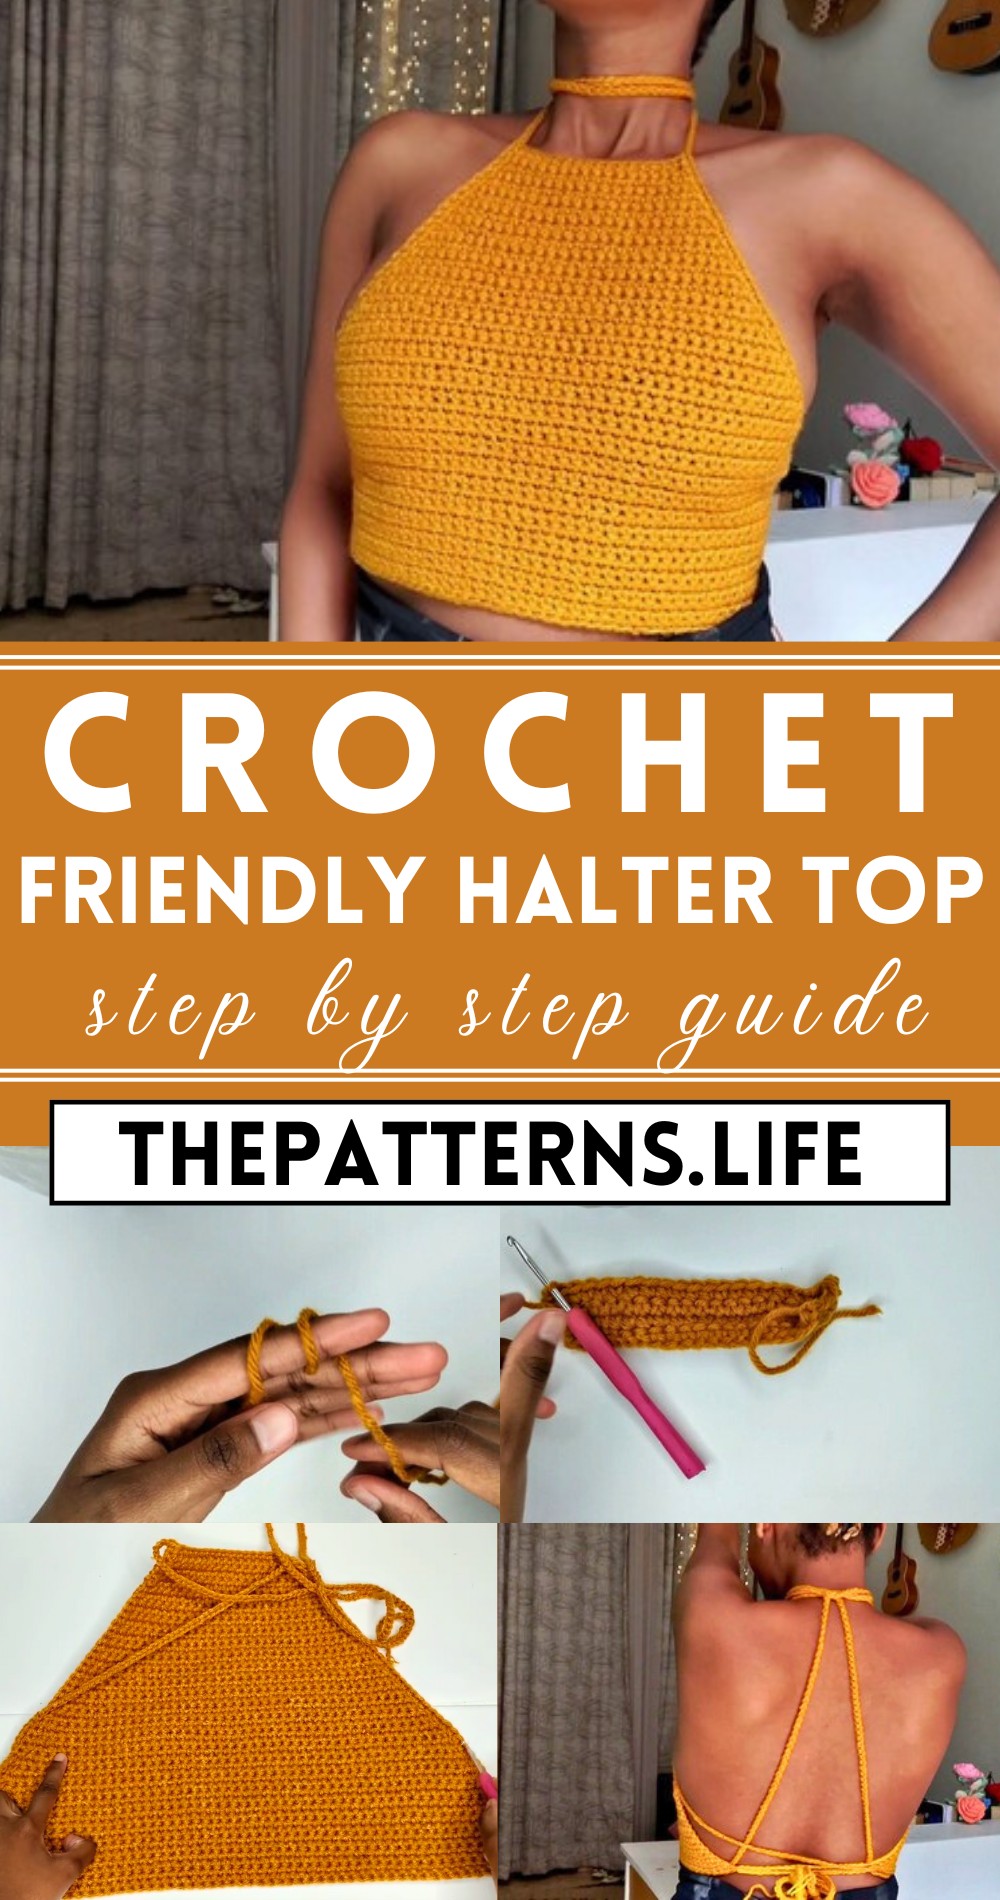
Crochet Halter Top Pattern For Summer Beginner Friendly Pattern
A stylish and breezy Free Crochet Halter Top Pattern, perfect for crocheting your own summer wardrobe essential.
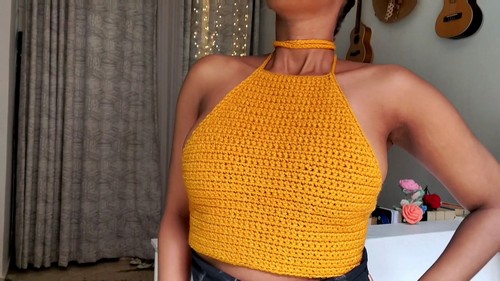
The pattern offers a charming and trendy option for those looking to create handmade summer apparel. Perfect for music festivals, or casual gatherings, this versatile pattern lets you design a stylish top tailored to your taste. Crocheted from lightweight yarn, it provides comfort even on the hottest days, and the halter neckline flatters various body types. Easy to customize with different colors and textures, this project suits both beginners and experienced crocheters.
Beginner Friendly Crochet Halter Top
One of the key benefits of a crochet halter top is its adaptability; it can be dressed up with a skirt for a chic look or paired with shorts for a relaxed vibe. Additionally, making your own clothing promotes sustainable fashion by reducing reliance on mass-produced garments.
Tip:
Use a cotton or bamboo yarn for a soft and cool finish, ensuring maximum comfort and breathability during warm weather.
Materials Needed:
- Chunky 4-ply yarn
- 3.5 mm crochet hook (recommended size 5 mm)
- Darning needle
- Scissors
Instructions:
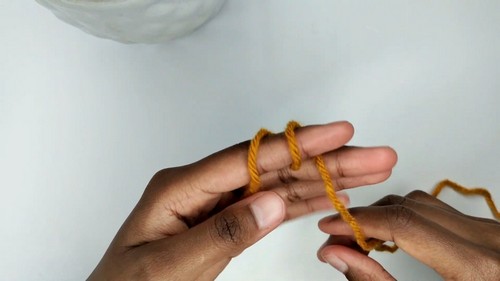
Foundation Chain
- Make a slip knot.
- Chain 20 stitches (or your desired length that sits across the neck below the collar bones). Non-stretched, this should measure approximately 4.5 inches; stretched, about 5.2 inches.
Row 1 (Single Crochet)
- Skip the first chain, insert the hook into the second chain.
- Pull the yarn through the chain (you’ll have two loops on the hook).
- Yarn over and pull through both loops on the hook.
- Repeat this process in each chain across. You will have 19 stitches at the end of this row.
Row 2
- Turn your work.
- Chain one (counts as the first stitch).
- Make a single crochet into the first stitch from the previous row.
- Continue with one single crochet in each stitch across the row. You will still have 20 stitches after this step.
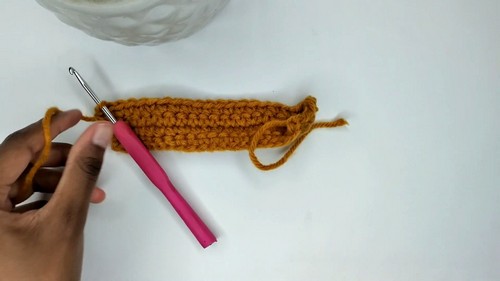
Subsequent Rows
- Continue to turn your work and chain one at the beginning of each row.
- Make one single crochet into each stitch across the row.
- Begin each new row by increasing one stitch at the beginning, continuing the pattern until the top is as wide as required for your size.
Building the Body
- Repeat the previous steps till the top measures your desired length (e.g., about 11.7 inches).
- Continue crocheting till you have about 67 stitches, adjusting the length and width to fit your preference.
Smoothing the Edge
- Chain one and work single crochets up the side of the piece, at points where rows meet.
- Estimate and place single crochets at intervals or as seems appropriately spaced.
Making the Straps

Chain 200 stitches (or your preferred length) for each strap.
- No need to go over the chains with additional stitches unless desired for strength or aesthetics.
- Attach the straps by creating a slip knot and securing them to each side of the top.
Finishing
- Weave in any loose ends with a darning needle.
- Tie the straps in a halter style around the neck and back.
Additional Advice
- Make sure to measure as you go to ensure the top fits your body comfortably.
- The use of chunky yarn and a suitable hook size will affect the final look and fit of the halter top.


