
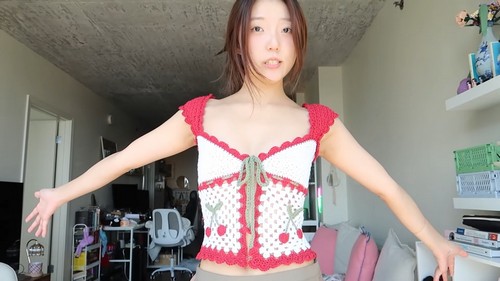
Setp By Step Guide Crochet Granny Galore Square Top Pattern
Turn heads this summer with Free Crochet Granny Galore Square Top Pattern, a fun and vibrant design that’s perfect for adding a playful touch to your wardrobe!
This is a delightful pattern that brings a burst of color and creativity to your summer wardrobe. This versatile top, made from classic granny squares, merges vintage charm with modern style. Its easy-to-follow instructions make it ideal for both beginners aiming to hone their crocheting skills and seasoned pros seeking a quick and gratifying project.
Crochet Granny Galore Square Top
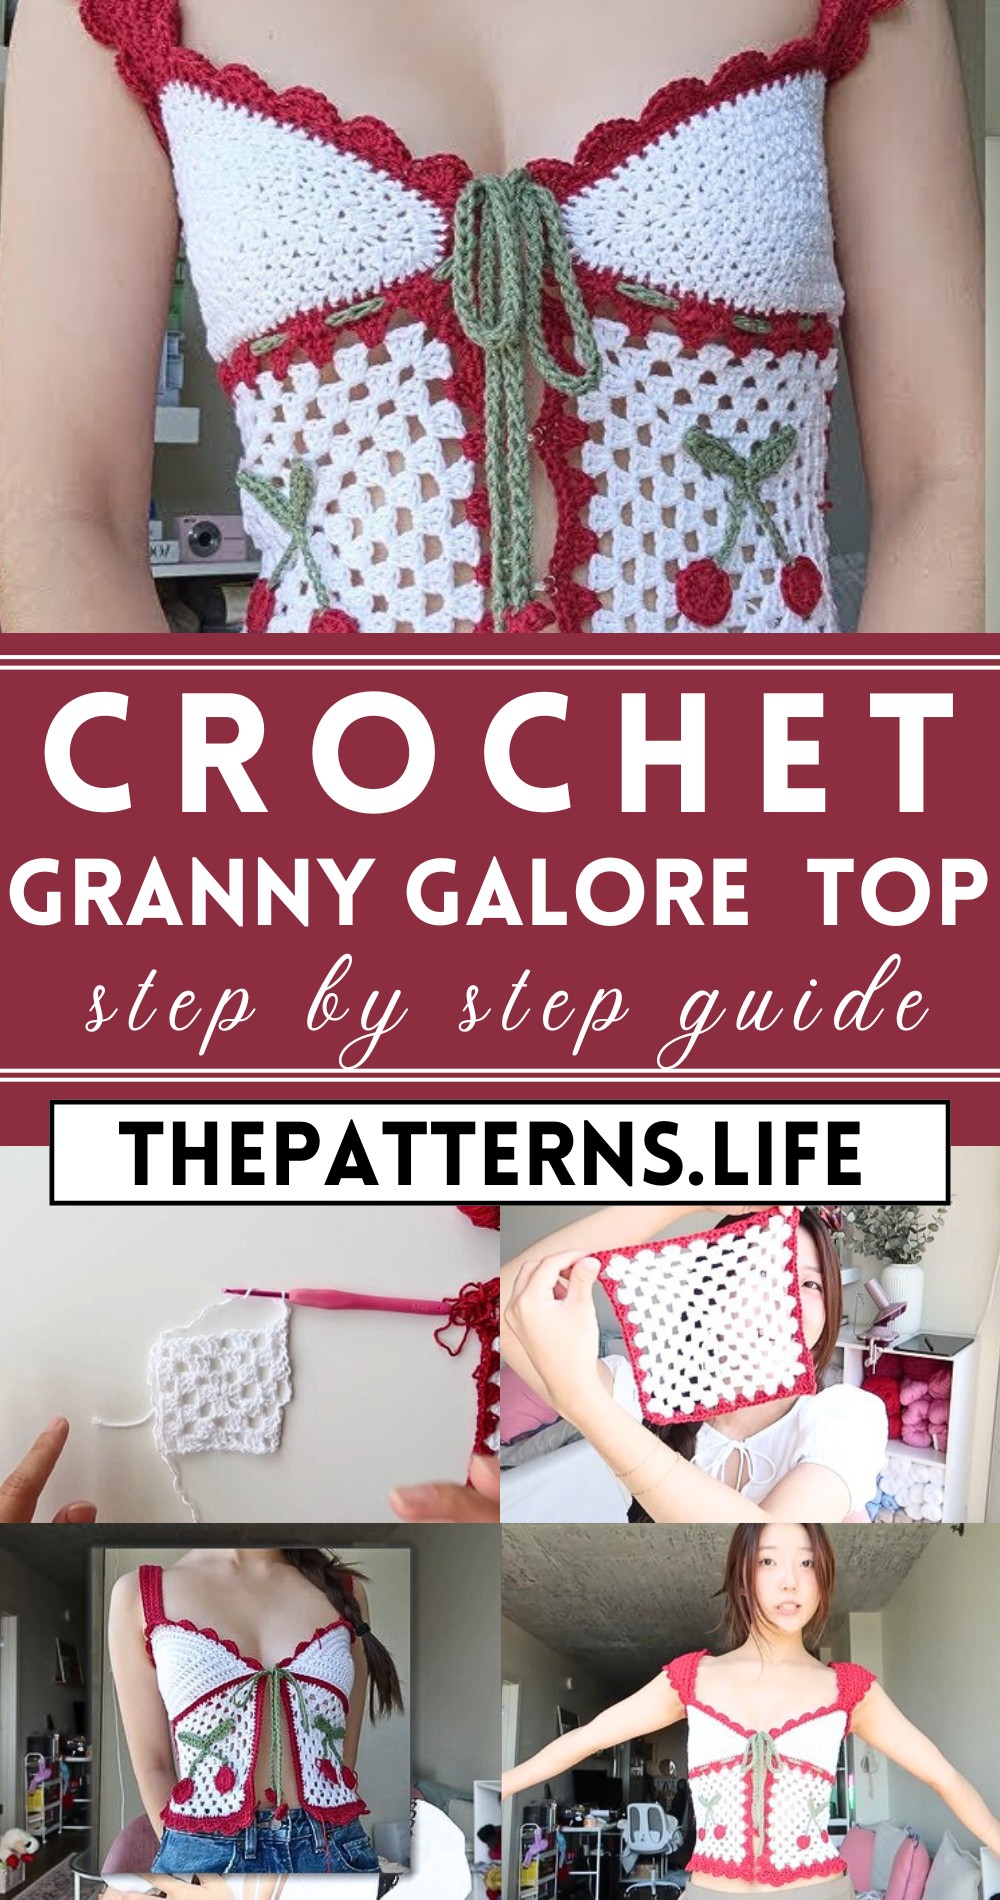
Using lightweight, airy yarn, this top ensures comfort while keeping you stylishly cool. The vibrant arrays of granny squares allow for experimentation with different color combinations, making each creation uniquely yours.
Tip:
To achieve the perfect fit, select a yarn with a bit of stretch and try the garment on as you progress, adjusting the size of the squares as needed for a more customized and flattering look.
Starting the Granny Square
Creating the Ring and First Cluster

Chain 3.
- Make a magic ring.
- Yarn over (YO) and insert your hook into the center of the ring.
- Pull up a loop (pull up yarn over, or YUPO).
- YO, pull through the first two loops on your hook.
- YO, pull through the last two loops on your hook.
- Chain 3 (counts as the first double crochet in the cluster).
- Repeat steps 4-6 two more times to complete a cluster of three double crochets.
- Chain 3 to start the next corner.
- Repeat steps 4-6 two more times to create another cluster of three double crochets.
- Repeat steps 8 and 9 two more times to create the remaining two corners and clusters.
- Chain 1, slip stitch into the top of the first chain-3 from the beginning of the round.
- Pull up the end of your yarn and tighten the ring.
Round 2
Creating the Second Round:

Chain 4 (counts as the first double crochet and a chain one).
- Double crochet (DC) in the first chain-3 space.
- Chain 1.
- DC in the same chain-3 space to create a cluster of three double crochets.
- Chain 3 to start the next corner.
- Repeat steps 2-4 in the same chain-3 space.
- Chain 1.
- Skip the next chain-3 space.
- DC in the next chain-3 space.
- Chain 1.
- DC in the same chain-3 space to create a cluster of three double crochets.
- Chain 3 to start the next corner.
- Repeat steps 2-11 two more times to create the remaining two corners and clusters.
- Chain 1, slip stitch into the top of the first chain-4 from the beginning of the round.
- Pull up the end of your yarn and tighten the ring.
- Repeat rounds 2-7 for additional rounds.
Round 8 (Front Panels Only)
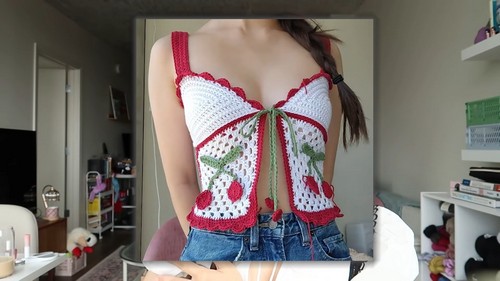
Creating the Front Panel Edge:
- Follow the steps from Round 2.
- Attach the red yarn to the corner of the granny square.
- Crochet another round of granny squares with the red yarn, weaving the end in as you go.
Back Panel
Creating the Back Panel:
- Work 34 rows of lemon peel stitch.
- Attach the second front panel to the back panel by slip stitching the corresponding stitches together.
- Work rows of lemon peel stitch around the sides of the front panels to the desired length.
- Add scalloped edges and hook and eye latches for closure.
Video Tutorial
Optional Cherry Detail
Adding the Cherry Detail:
- Crochet a small granny square in your chosen color for the cherry.
- Attach the cherry to the center of the bra cups using a single crochet stitch.


