
Adorable Crochet Star Cut Out Top Step By Step Pattern
Shine this summer with the Free Crochet Star Cut Out Top Pattern – easy, stylish, and perfect for creating your own unique fashion statement!
A fabulous and innovative design that promises to elevate your summer wardrobe with timeless elegance and creativity. This pattern is all about creating a versatile and trendy layering piece with unique star-shaped cutouts that add a whimsical twist to any outfit. It can offers endless styling possibilities. The design is highly customizable, allowing you to choose the size, color, and yarn type that best fits your personal style.
Crochet Star Cut Out Top

Whether you’re a beginner or an expert crocheter, this pattern is engaging and fun, resulting in a truly chic and fashion-forward addition to your collection. Embrace your creativity, and make a statement with this unique piece.
Tip:
Use metallic or glittery yarn to add a touch of sparkle to your stars, ensuring you truly shine wherever you go!
Materials Needed:
- Yarn of choice
- Crochet hook corresponding to the yarn’s recommended size
- Stitch markers
- Scissors
- Yarn needle
- Gauge swatch (for accurate sizing)
Abbreviations:
- ch: chain
- dc: double crochet
- sc: single crochet
- dc-dec: double crochet decrease
- sc-dec: single crochet decrease
- st(s): stitch(es)
- [ ]: repeat instructions within brackets
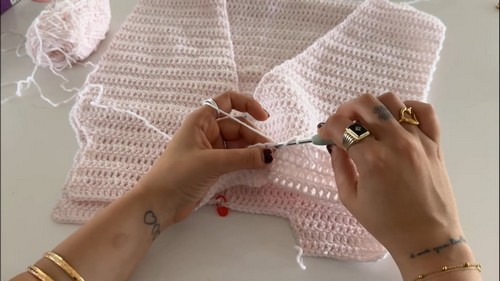
Front Panel:

Base of Top:
- Start with a slip knot, ch 61 (or any odd number that suits your size based on your gauge swatch), plus ch 2 more for turning.
- Turn and dc into the 3rd ch from the hook, dc in each st to the end.
- Ch 1 and turn. Start each new row with a starting dc to keep edges neat.
Creating Length:
- Repeat dc in every st across for 18 rows (or desired length before the star begins). Directly, this portion covers from the bottom of the bust to the belly button area.
Star Pattern Sides:
- Mark the center st of your base, then count and mark seven sts out on either side.
- Start creating the star following a chart (not provided) for increase and decrease points, but assuming a symmetrical design, you’ll incorporate increases at the edges initially to expand the shape of the star points.
- After establishing the star’s width, decrease to taper for each point of the star, working on one side at a time.
Connecting Star Points:
- Use markers to visualize and section off where each point of the star will be created.
- Increases are used to expand the points outward, and decreases are used to taper them off, creating the star shape.

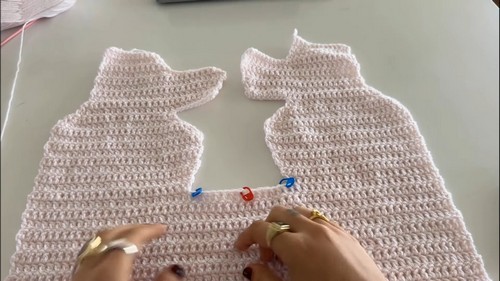
Back Panel:
- Replicate the front panel for size but without the complex star pattern. Create a simplified version that includes a triangular dip to mimic the front’s V-neck part if desired.

Seam and Finishing:
- Lay the front and back panels with right sides together. Seam them at the shoulders and sides, leaving armholes open.
- For sleeves, you might want to craft simple dc rows around each armhole, then fasten off neatly.
Final Touches:
- Weave in all ends.
- Optionally, you can outline the star or any design component with a contrasting color or the same yarn for detailed definition.


