Unique Crochet Striped Shorts Pattern For Beginners
Design stylish striped shorts with our free pattern, offering ultimate comfort and summer flair, perfect for beach days and casual outings.
The Crochet Striped Shorts Pattern brings this vision to life, featuring a sleek design that flatters every body type. With its striking horizontal stripes, these shorts offer a perfect balance of playful charm and sophisticated elegance. Choose vibrant, bold hues for a fun, energetic look or soft pastels for a more subtle, relaxed vibe. The beauty of this pattern lies in its versatility; you can customize the color scheme to reflect your personal taste or match your summer wardrobe.
Crochet Striped Shorts Tutorial
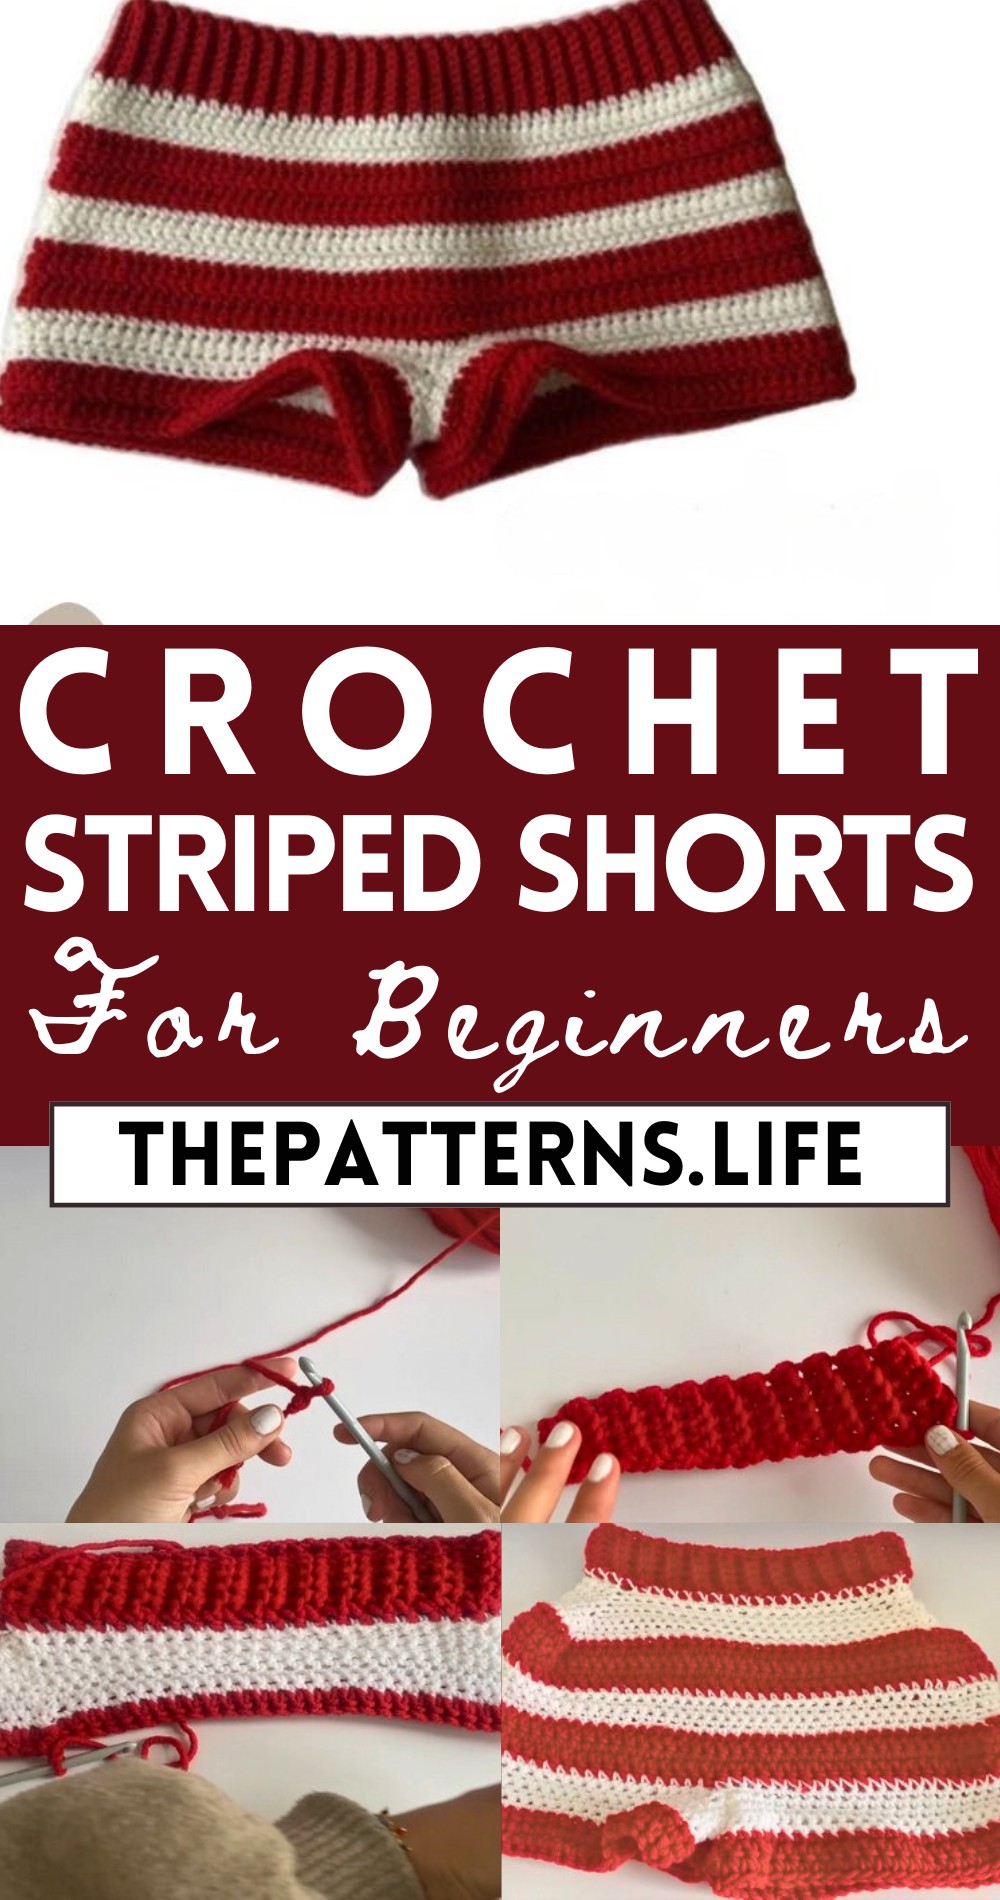
Lightweight and breathable, these shorts are the ideal companion for beach outings, casual gatherings, or lounging at home. Crocheted with attention to detail, they ensure a flawless fit and a stylish flair with every wear.
Tip:
Choose high-quality yarn to enhance durability and maintain the vibrant colors of your striped shorts.
Materials Needed:
- Three types of yarn (specifically mentioned were red ones which are 9 mm in thickness but will be used with a 4 mm crochet hook, and another yarn that is 4 mm presumably for the white color).
- A 4 mm crochet hook.
- Tape measure.
- A pair of scissors.
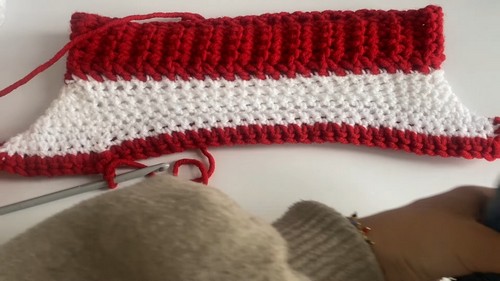
Waistband Creation:

Measure your waist and subtract 2 inches from this measurement for the waist chain length.
- Create a slip knot on the hook, then use a 6 mm hook for the red yarn to make it easy, switch back to the 4 mm when using the white yarn.
- Chain seven (or more/less based on desired waistband thickness).
- Single crochet in each stitch all the way down the first row.
- Chain one, flip your work. Now, single crochet into the back loop only to create ridges.
- Alternate between crocheting through both loops and then the back loop only for several rows until you reach your desired waistband length.
- Slip stitch the ends of the waistband together to form a circle.
Body of the Shorts:

Count the rows in your waistband (for example, if you have 50, you will single crochet into each row).
- Start by making rows downwards from the waistband, and add increases to accommodate hips.
- Switch colors as desired. For example, after several rows in one color, change yarn colors for the striped effect. Perform a slip knot with the new color and continue crocheting.
Increasing for the Hips:
- Place increases (three single crochets into one stitch) on each side where the hips will be to allow for added width.
- Continue this pattern, every few rows switch yarn colors to create stripes.
Separating the Legs:
- Once the body reaches the crotch area, count your stitches and divide by 4 to determine the start and end points of each leg hole.
- Chain a number of stitches (e.g., 12 stitches) to create the gap between the legs.
- Continue single crocheting around what will become one leg. To complete the first leg, single crochet in rounds until the desired length is reached.
- Cut the yarn, and then repeat the same steps for the second leg.
Finishing the Legs:
- To finish each leg, single crochet in rounds, aligning with the color pattern as before. Continue until you achieve the desired length for each leg.

Fasten off and weave in all ends.
Final Touches:
- Try on the shorts as you go, especially before dividing for the legs, to ensure a good fit. Keep in mind the stretchiness of the material; they should fit snugly since they will stretch out when worn.
Remember, this is a customizable pattern, so feel free to adjust lengths, colors, and sizes as needed.