Say Goodbye To Saggy Bag Crochet Simple Bag – Free Pattern
Elegantly crochet a beautifully simple and functional bag with this free pattern, blending charm and practicality for any occasion.
This pattern highlights a minimalist design that showcases clean lines and a sophisticated silhouette, perfect for both casual and formal occasions. The beauty of this bag lies in its ability to complement any attire, with endless possibilities for color combinations. Choose soft pastels for a delicate, feminine touch, or bold, vibrant hues for a striking statement piece.
Crochet Bag

Elevate your accessory game with the Crochet Simple Bag Pattern, a project that exudes timeless elegance and nuanced beauty. The pattern accommodates various yarn textures, allowing you to experiment and find the perfect blend of durability and softness.
Tip:
Use a sturdy yarn with a tight stitch to ensure the bag holds its shape beautifully.


Materials:
- 5.5 mm crochet hook (size I)
- Scissors
- Light (3) weight cotton yarn (which is sturdy and durable for a bag)
Instructions:
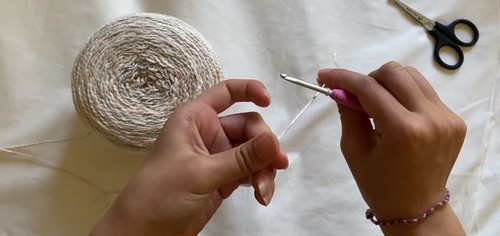
- Begin with a slip knot and chain 20 (or the length you desire for the base of your bag).
For Row 1:
- Chain two more (for turning) and make two double crochets in the third chain from the hook.
- Skip the first two chains, double crochet all the way until the last stitch. Do not double crochet into the last stitch.
- Make four double crochets into the last chain to turn the corner, essentially creating two increases.
- Now, work double crochets along the opposite side of your foundation chain, and make two double crochets into the first stitch from the beginning of the row.
- Slip stitch into the top of the first double crochet to join the round.
For Row 2:
- Chain two and double crochet into every stitch until you reach the corners with increases.
- At each corner, place two double crochets into each of the four increase stitches from the previous round (you will have eight increases in each corner).
Continue with subsequent rows:
- Doubling the number of increases at each corner.
- For example, Row 3 will have sixteen increases in each corner. Follow this pattern until the base is as large as you prefer.
- To work on the sides of the bag, chain two and double crochet in each stitch around without increasing.
- Slip stitch to join each round, and repeat this until the bag reaches the desired height.
- For the slouchy portion leading to the straps, count the total number of stitches around your bag.
- Subtract four from this total and divide by 6.8 (rounding as necessary) to determine the number of stitches between each strap’s starting points.
- Mark stitches on each side of the bag where the straps will begin. Ensure the same number of stitches are between each set of markers.
- Begin crocheting the slouchy part by inserting your hook at the marked stitch.
- Chain one and work half double crochet stitches to the other marked stitch, creating a panel.
- At the end of each row within the panel, chain one, turn, skip the first half double crochet, and continue with double crochets.
- Place a half double crochet in the second to last stitch.
Repeat:
- these rows until the panel reaches the desired strap width.
- For the strap, work a modified single crochet (thermal stitch) to make a thicker, sturdier strap.
- Chain one, go into the back loop of the stitch and the loop from the previous row, yarn over, and pull through both loops.
Single crochet to finish the stitch:
- Continue this pattern, making sure to count your stitches to maintain the same width across the strap.
- Repeat the strap pattern until it reaches your desired length.
- When finished, create a slip stitch and try fitting objects into the bag to ensure it is the right size.
Finishing:
To complete the strap:
- chain one at the end and pull tightly to secure.
- Repeat all steps to create the second strap ensuring it’s the same length as the first strap.
- To connect both straps, start with a slip knot, place the ends of the straps together, and slip stitch across to join them securely.
- Chain two, cut the yarn, and pull tightly to finish.
- Give yourself a pat on the back, and enjoy your new crocheted hobo bag!