
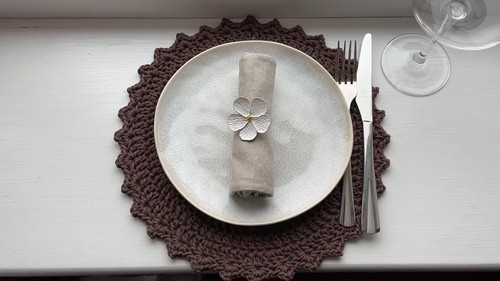
Cozy & Unique Crochet Placemat Pattern That Is Round
Grace your table setting with our “Free Crochet Placemat Pattern” — a charming way to incorporate handmade warmth and style into any dining experience!
This elegant pattern combines timeless design with the intricate beauty of crochet, resulting in placemats that are both functional and decorative. The detailed instructions guide you through creating these rectangular or round placemats, which feature delicate textures and patterns that instantly elevate any table setting. Choose your favorite yarn colors to match your decor, or opt for classic neutrals for a timeless look.
Crochet Placemat
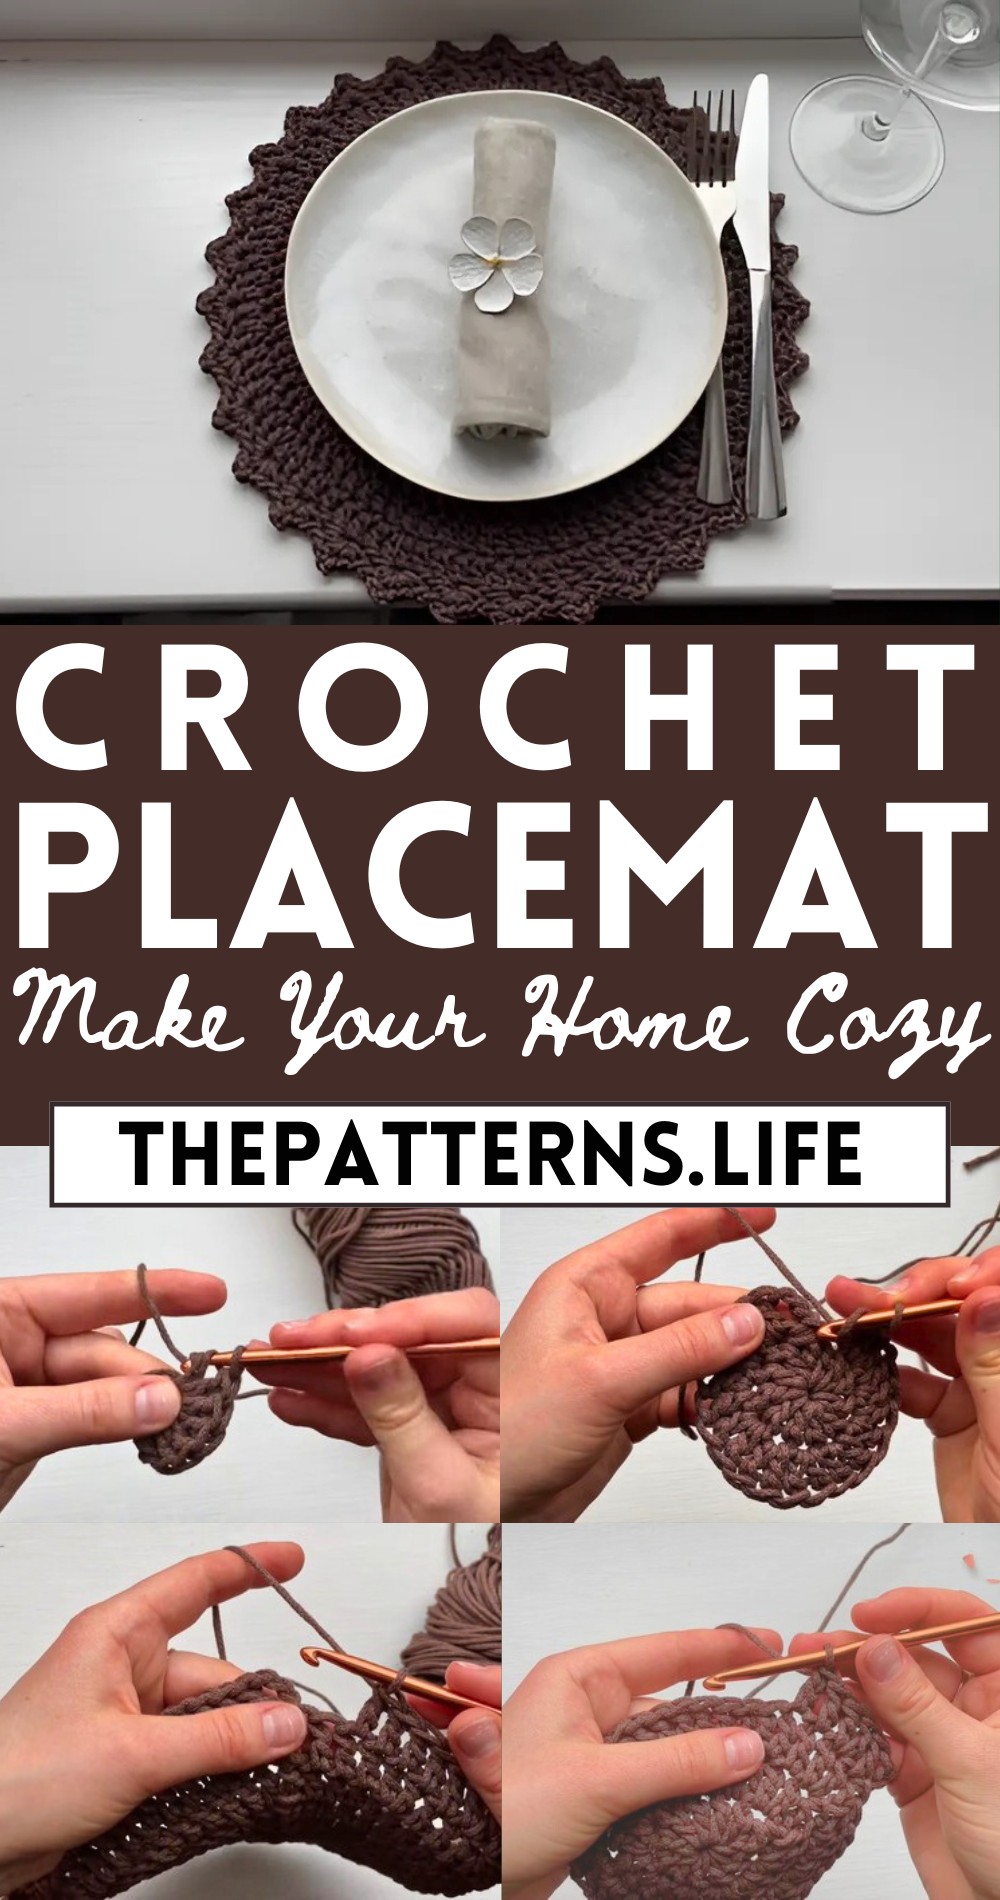
The placemats’ gentle drape and sturdy construction ensure they lay flat and stay in place, adding a polished touch to everything from casual dinners to festive gatherings. These handmade placemats also make thoughtful gifts that carry a personal touch and show off your creativity. Add charm and elegance without overpowering your existing decor, making these placemats a versatile addition to any home.
Tip:
Use a size larger hook for the foundation chain to keep the edges from curling.
Materials:
- Cotton macro cord (one full skein should be enough for two placemats)
- 5.5 mm crochet hook
Abbreviations:
- ch: chain
- st: stitch
- sl st: slip stitch
- dc: double crochet
- sp: space
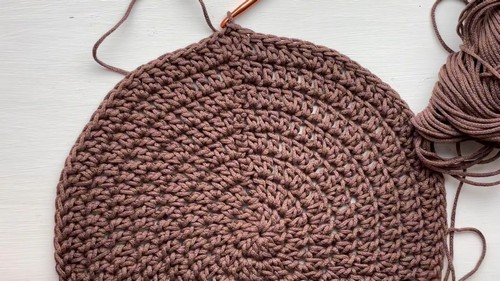
Pattern:
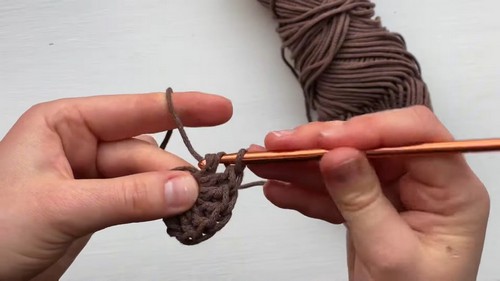
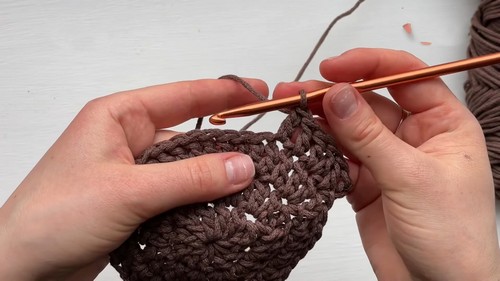
Round 1:
- Make a slip knot and ch 4 (counts as 1 dc).
- Work 11 dc in the first ch.
- Join with a sl st to the top of the 4th ch.
Round 2:
- Ch 3 (counts as 1 dc).
- Work 2 dc in the first st.
- Work 1 dc in each of the next 23 sts.
- Join with a sl st to the top of the 3rd ch.
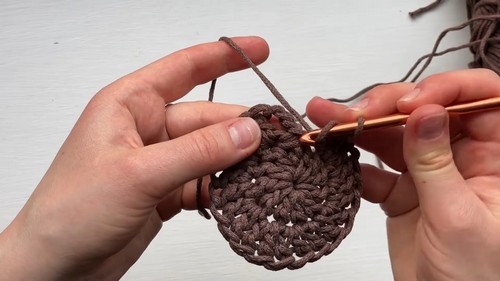
For Round 3:
- Ch 3 (counts as 1 dc).
- Work 2 dc in the first st.
- Work 1 dc in each of the next 2 sts.
- Work 2 dc in the next st.
- Work 1 dc in each of the next 2 sts.
- Repeat steps 3-5 until the end of the round.
- Join with a sl st to the top of the 3rd ch.
Round 4:
- Ch 3 (counts as 1 dc).
- Work 1 dc in the first st.
- Work 2 dc in the next st.
- Work 1 dc in each of the next 2 sts.
- Repeat steps 3-4 until the end of the round.
- Join with a sl st to the top of the 3rd ch.
Round 5:
- Ch 3 (counts as 1 dc).
- Work 2 dc in the first st.
- Work 1 dc in each of the next 3 sts.
- Work 2 dc in the next st.
- Work 1 dc in each of the next 3 sts.
- Repeat steps 3-5 until the end of the round.
- Join with a sl st to the top of the 3rd ch.
After Round 6:
- Ch 3 (counts as 1 dc).
- Work 2 dc in the first st.
- Work 1 dc in each of the next 4 sts.
- Work 2 dc in the next st.
- Work 1 dc in each of the next 4 sts.
- Repeat steps 3-5 until the end of the round.
- Join with a sl st to the top of the 3rd ch.
Round 7:
- Ch 3 (counts as 1 dc).
- Work 2 dc in the first st.
- Work 1 dc in each of the next 5 sts.
- Work 2 dc in the next st.
- Work 1 dc in each of the next 5 sts.
- Repeat steps 3-5 until the end of the round.
- Join with a sl st to the top of the 3rd ch.
Round 8:
- Ch 3 (counts as 1 dc).
- Work 2 dc in the first st.
- Work 1 dc in each of the next 6 sts.
- Work 2 dc in the next st.
- Work 1 dc in each of the next 6 sts.
- Repeat steps 3-5 until the end of the round.
- Join with a sl st to the top of the 3rd ch.
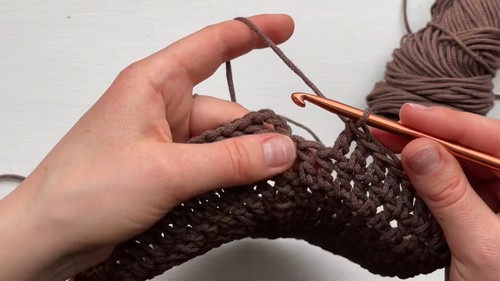
Edge:
- Ch 1, 2 sc in the same st.
- Ch 2, 2 sc in the same st.
- Skip 2 sts.
- Work 2 sc in the next st.
- Repeat steps 2-4 around.
- Join with a sl st to the first sc.
- Fasten off and weave in ends.
Tips:
- To ensure a perfectly round placemat, avoid placing increases in the same positions as in previous rounds.
- This pattern is for a 30 cm diameter placemat. For a larger placemat, add another round before the edge.


