
Unique & Easy Crochet Stunning 3d Shell Scarf Pattern
A luxurious feel with our free crochet Stunning 3D Shell Scarf Pattern, designed to add depth and texture for a truly eye-catching winter piece.
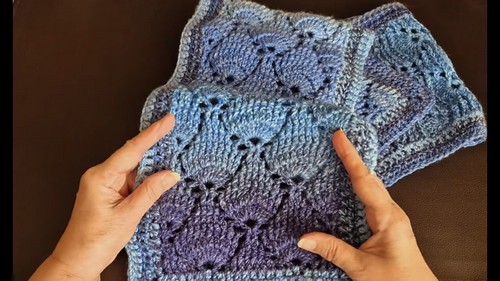
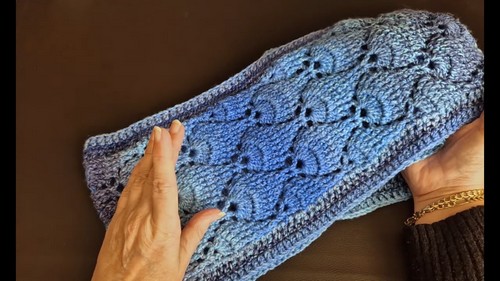
The enchanting world of this pattern, where texture meets beauty with a captivating design. This pattern brings your crochet to life with intricate shell motifs that create a captivating 3D effect. Ideal for adding a touch of sophistication to your winter attire, this scarf is perfect for both casual wear and special occasions.
Crochet Stunning 3d Shell Scarf
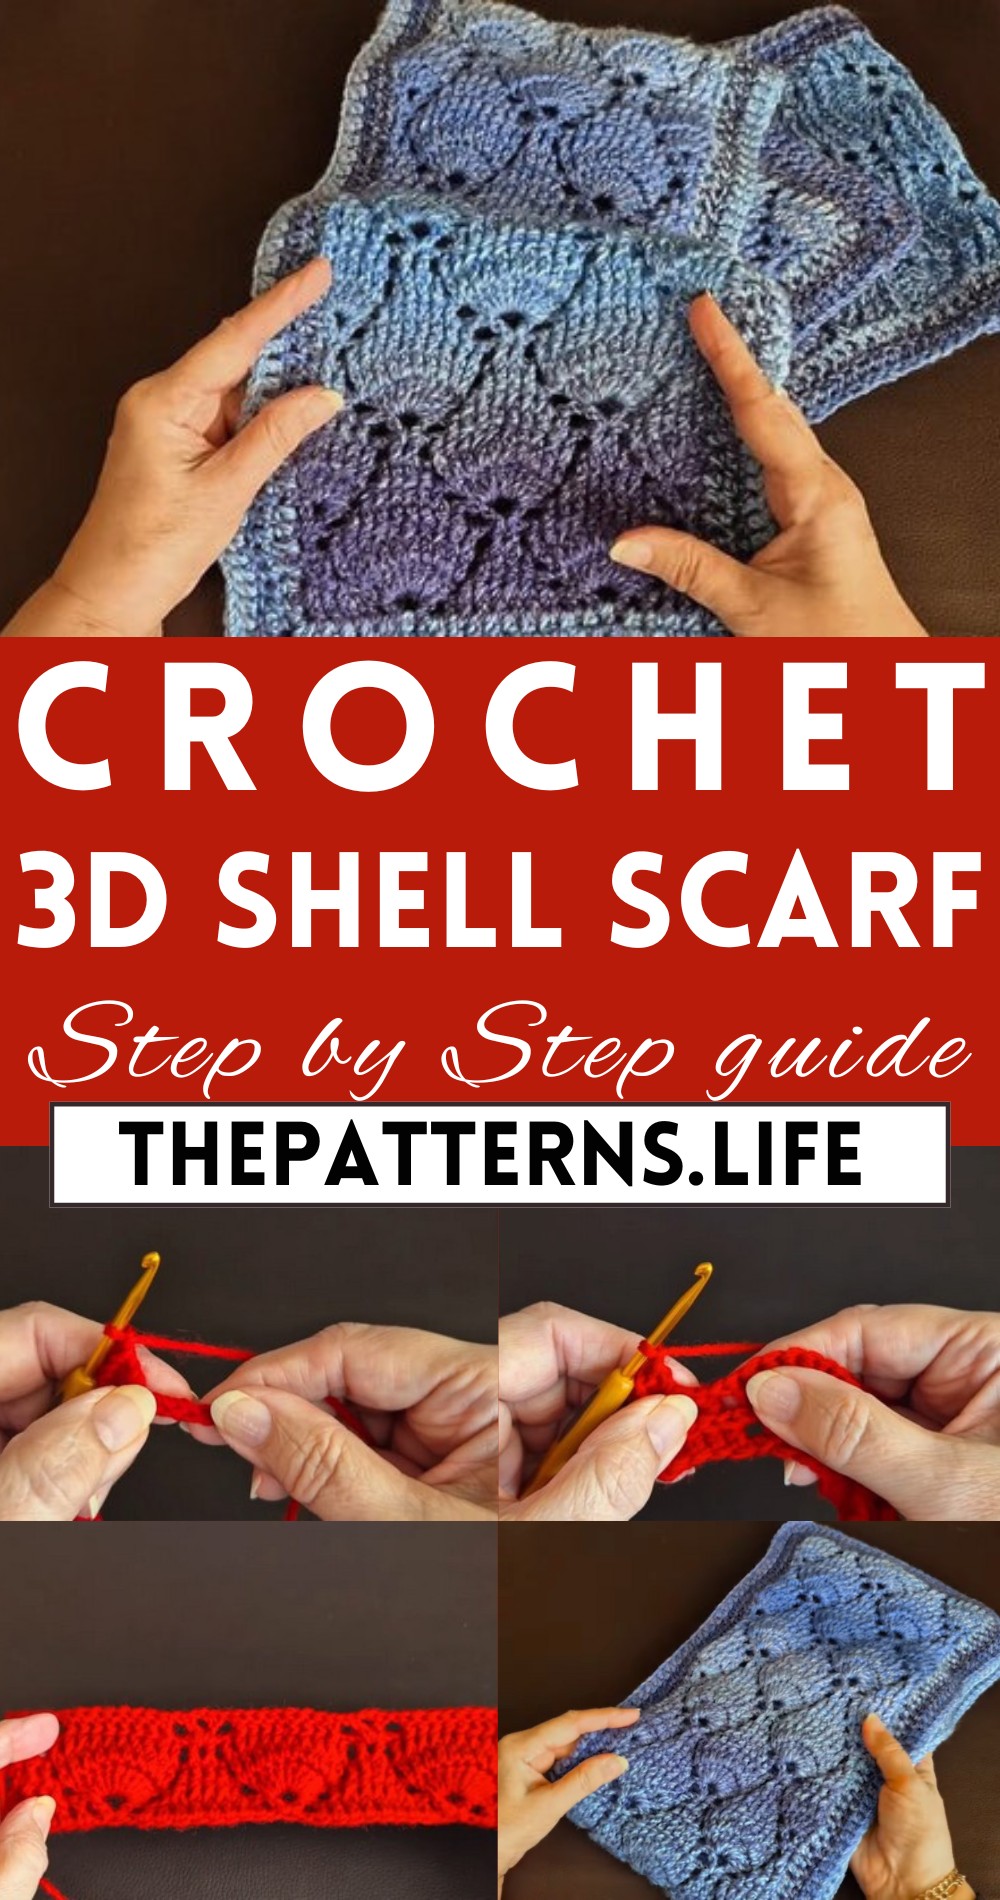
The detailed instructions ensure that both novices and seasoned crocheters can successfully create this intricate piece. The features include beautiful shell stitch patterns, a luxurious feel, and the opportunity to customize with various colors and yarn types for a personalized touch. From start to finish, ensuring you can follow along smoothly and have fun making a cozy, eye-catching accessory.
Tip:
Use a lighter shade of yarn to highlight the 3D shell pattern, making each delightful stitch stand out beautifully.
Materials Needed:
- Hook
- Yarn (double knitting yarn is used in the video, which is a weight three in the USA)
Stitch Details:
- UK Terminology: Treble Crochet (tr)
- US Terminology: Double Crochet (dc)
- Stitch count is usually in multiples of 11, with an additional two stitches added.
Pattern Instructions:
Base Chain:
- Chain stitches in multiples of 11 (+2 for the edge).
- For example, three sets of 11 = 33 stitches, +2 = 35 chains in total.
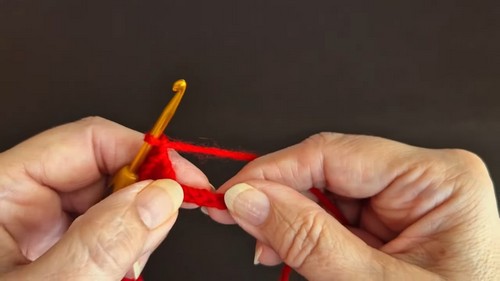
For Row 1:
- Start from the fourth chain from the hook, do a UK triple (US double) crochet; this counts as the first double crochet and chain-2 space.
- Skip 1 stitch, 5 dc in the next 5 stitches.
- “V” stitch in the next stitch (V stitch = dc, 2 chain, dc).
- Skip 1 stitch. Repeat from across, finishing with 5 dc after the last V stitch.
- Turn your work.
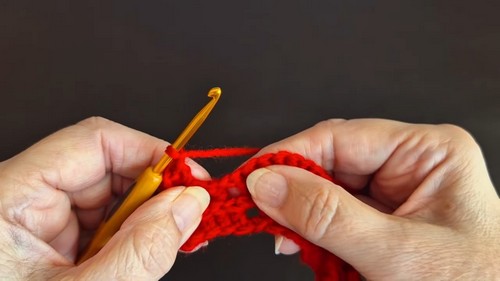
Row 2:
- Chain 2 (acts as the first dc).
- Front post dc around the next three stitches.
- Chain 1, skip two stitches.
- 10 dc in the chain space of the V stitch from the previous row.
- Chain 1, front post dc around the next set of stitches (refer to the video for specific numbers).
- Repeat the pattern across, ending with another V stitch.
- Turn your work.
Row 3:
- Chain 2, work back post dc on the front post dc from the previous row.
- Continue following the established pattern, working fans and V stitches as set by Row 2 placements.
- Adjust the posts and stitches as you move along the rows.
- Turn your work after each row completion.
Continuing Rows:
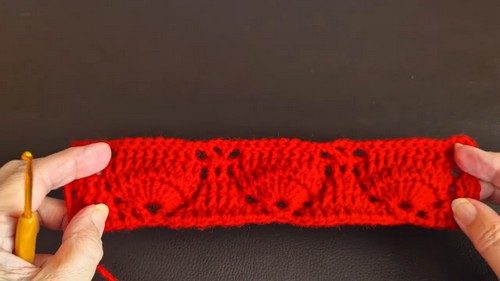
- Repeat the steps in Row 2 and Row 3, following the sequence and placement of stitches. Each row builds upon the previous, with front and back post stitches used alternately to provide texture and the sophisticated look of the finished pattern.
Finishing:
- The video suggests completing on a specific row to ensure symmetry and correct motif display.
- You may add fringes or an edge in a contrasting or complementary color if desired.
Additional Notes:
- Always count your stitches and ensure the pattern matches on both sides, especially if creating a symmetrical item like a scarf or blanket.
- Be mindful of the gauge and tension, especially when working with different yarn weights.


