
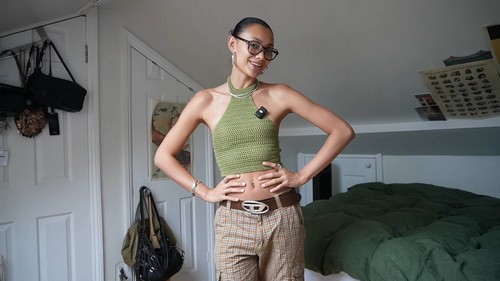
Crochet High Neck Halter Top Pattern For Summer Wardrobe
Make your next favorite summer outfit with our Free Crochet High Neck Halter Top Pattern—where style meets breezy, playful vibes!
This pattern allows you to design a sophisticated halter top that pairs perfectly with your favorite jeans or a flowy skirt, ideal for beach outings, festivals, or casual gatherings. Its intricate design showcases your crochet skills while providing comfort and elegance, making it a versatile addition to your handmade collection. The chic high neck adds a touch of modern flair, and you can customize the fit for a flattering look on any body type. Plus, making your own top means you get to choose your favorite yarn and colors for a truly unique style.
Crochet High Neck Halter Top Tutorial
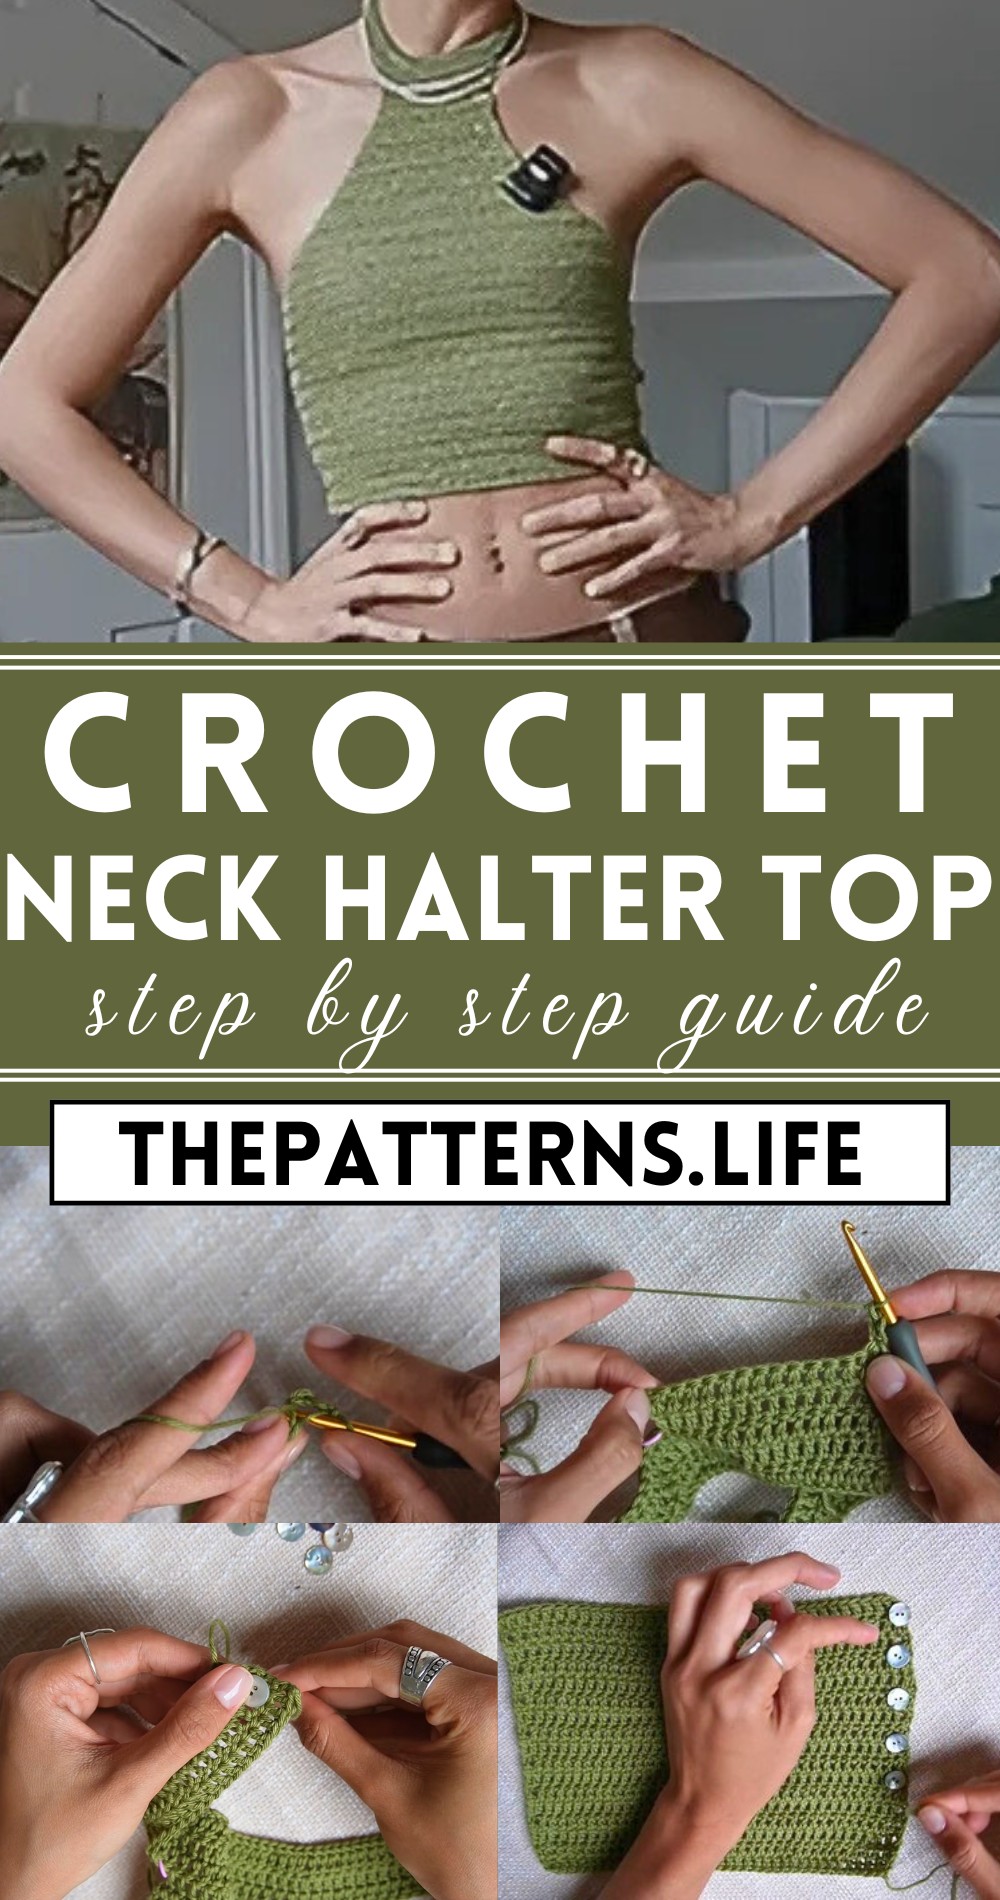
The high neck offers a touch of modern flair, and the customizable fit ensures a flattering silhouette for various body types. What’s more, creating your own top adds a personal, handcrafted touch to your wardrobe, emphasized by the creative freedom in yarn and color choices.
Tip:
For a breathable and light finish, opt for natural fibers like cotton or bamboo yarn to keep you cool and comfortable during sunny days.
Materials
- Paintbox Cotton DK yarn
- 4 mm hook
- Buttons (optional, 15 suggested for full decoration, 1 needed for the neck closure)
Instructions
Neck Piece
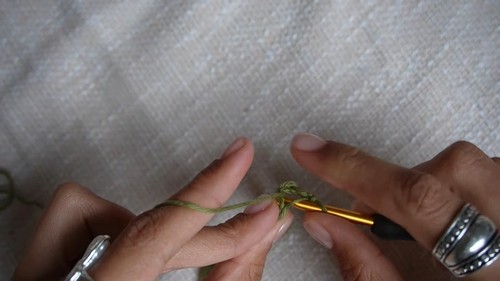
Start with a Foundation Single Crochet (FSC) or a chain that fits snugly around your neck. The tutorial suggests starting with an FSC for ease and comfort.
- Note: The creator mentions making a slip knot and chaining a length that when pulled tight fits around the neck. For the illustrated top, the chain was 54 stitches long.
First Row: Move onto double crochets. Chain two (counts as the first double crochet), turn your work, skip the first stitch because the chain two counts as the first stitch, and double crochet into each stitch across.
Following Rows: Continue for 2 more rows of double crochets for a total of 3 rows, remembering that the chain two at the beginning of each row counts as a stitch.
Body
Marking Out the Body: Determine the width of your halter top’s start by using stitch markers. Divide your work into three sections to mark the starting points for increasing.
- For a top starting with a neck piece of 54 stitches, you could remove 14 stitches for the central piece and equally distribute the remaining stitches on either side (20 stitches on each side for the tutorial example).
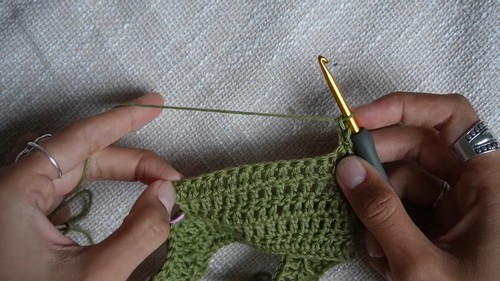
First Row of the Top: Begin by doing a standing double crochet or chain three at one of the markers towards the center of your work and double crochet in each stitch to the next marker.
Increases: At the end and beginning of each row, increase by making two double crochets in those stitches. This helps shape the top to accommodate the body’s width.
- Repeat this increase strategy for every row until the top fits around the sides of your body. For the top in the tutorial, the creator did 21 rows.
Final Adjustments and Finishing Touches
No-Increase Rows: Once you’ve reached the desired width, continue with rows of double crochets without increases until you reach the desired length of the top.
- The creator added 18 rows of double crochets without increases.
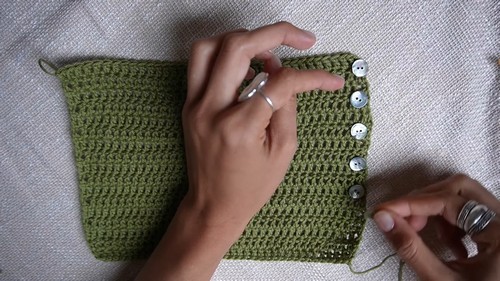
Side Edges: Add a row of double crochets along each side edge of the top to create a clean finish and a base to attach the buttons.
Back Panel (Optional): If you opt not to do a corset back, create a back panel by making a foundation double crochet that spans the width of your back when stretched. Attach this panel to the base of your halter top.
- Match the number of rows in this back piece to the number of non-increase rows in the front piece.
Sewing on Buttons: Attach buttons along one edge of the back panel and possibly one at the neck if you’ve made a separate piece, ensuring the buttons can be fastened securely through the stitches or loops created.
Note
- The tutorial highlights the importance of taking measurements tightly due to the stretchy nature of crochet.
- Adjustments may be needed based on individual body sizes and preferences.


