
Crochet Waffle Stitch Top No Sew – Free Pattern For A warm Hug
Create some wardrobe magic with our Free Crochet Waffle Stitch Top Pattern—super fun to make and adds irresistible charm to your outfits!
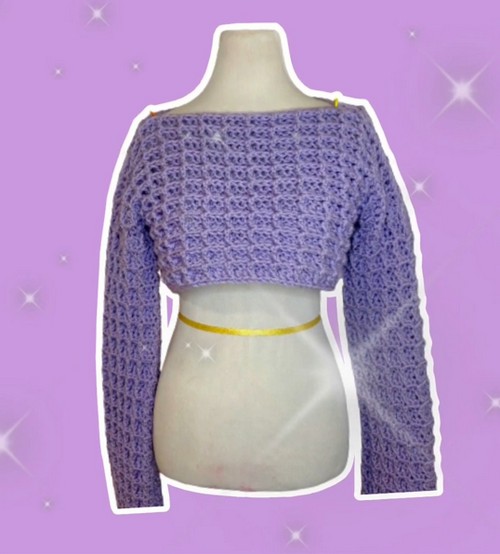
This fabulous pattern is designed to create a stunning top featuring the unique waffle stitch, which provides a cozy yet breathable feel, perfect for all seasons. Whether you’re dressing up for a casual brunch or adding a chic layer to your evening wear, this versatile top is your go-to piece. This pattern is like a warm hug on a cool day, and it’s perfect for anyone who enjoys a touch of homemade charm in their wardrobe.
Crochet Waffle Stitch Top
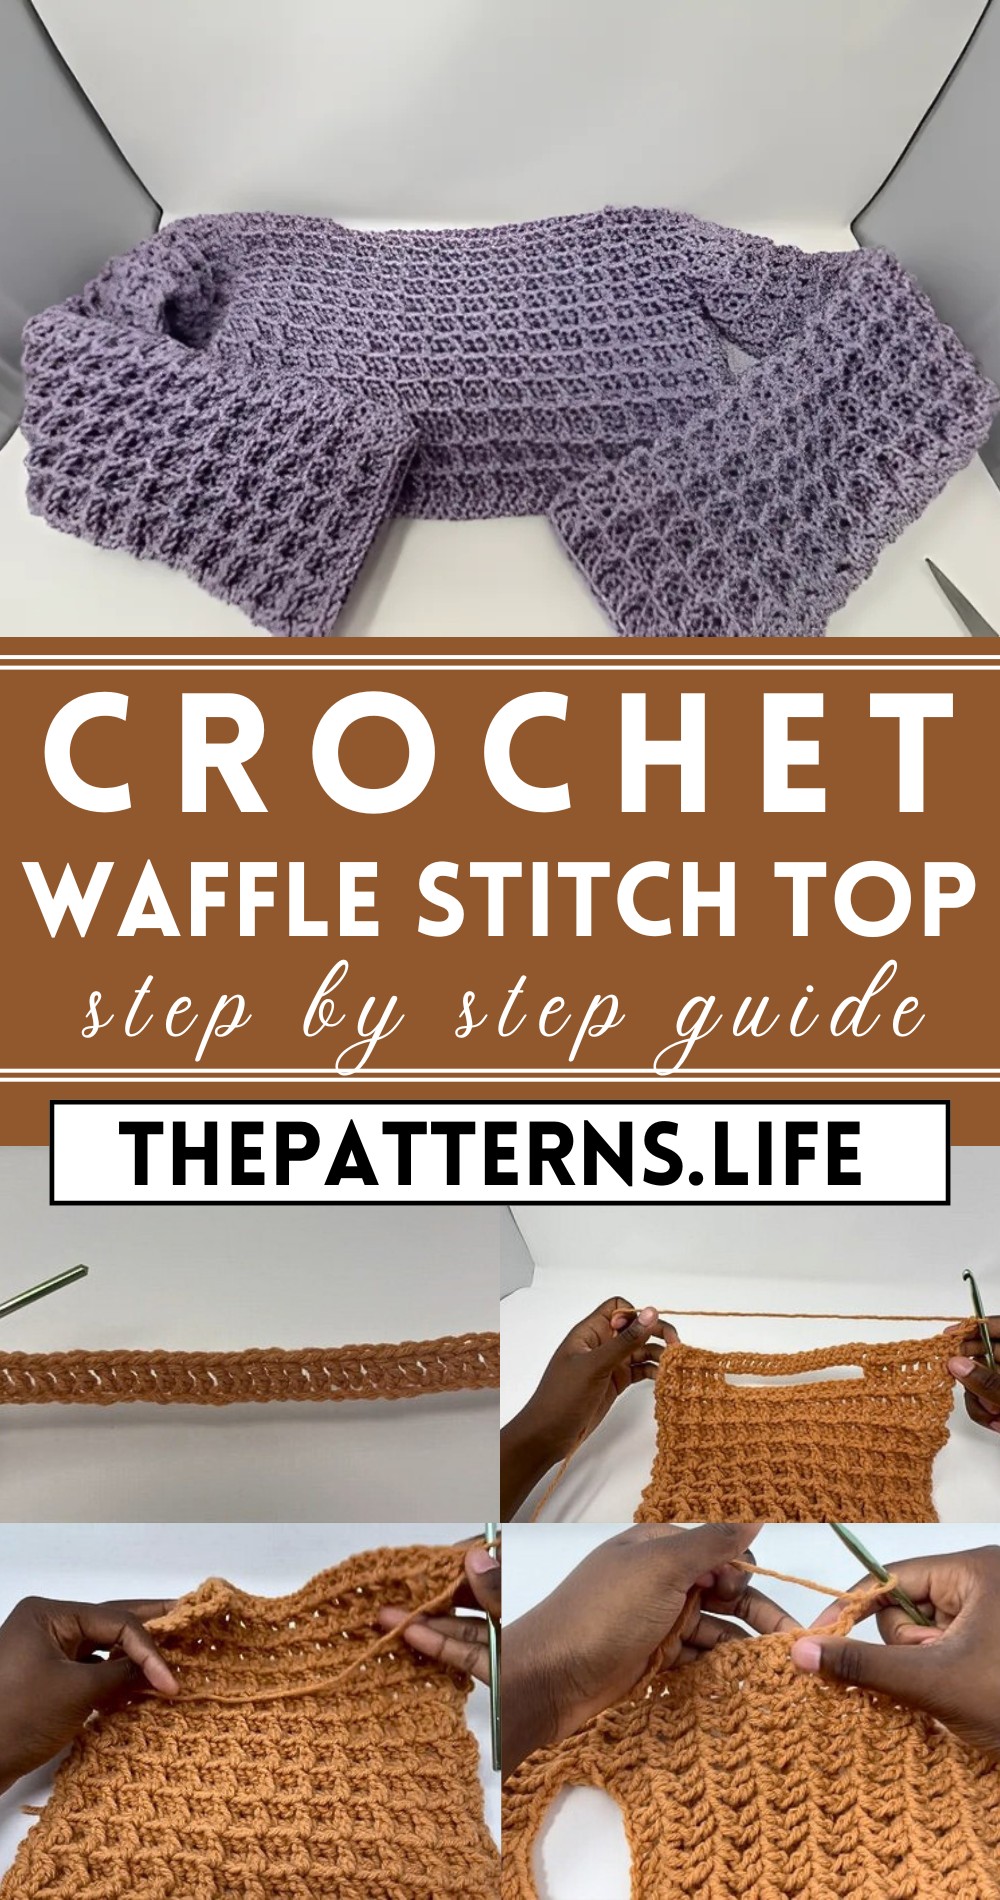
Crocheted with precision, this pattern ensures a snug fit while allowing plenty of room for movement, making it ideal for fashionistas of all sizes. Dive into a world of creativity and customize your top in an array of vibrant colors to match your personal style. The vision behind this pattern is to empower crafters with a project that’s both enjoyable and rewarding, ensuring you look fabulous all year round.
Tip:
Use a lightweight yarn for a more drapey and comfortable fit!
Materials Needed:
- Yarn of your choice
- Crochet hook (suggested size: 4.25 mm for demonstration, or 6.5 mm hook with size 5 yarn for a sweater)
- Scissors
- Darning needle
- Stitch markers
- Measuring tape
Pattern Steps:
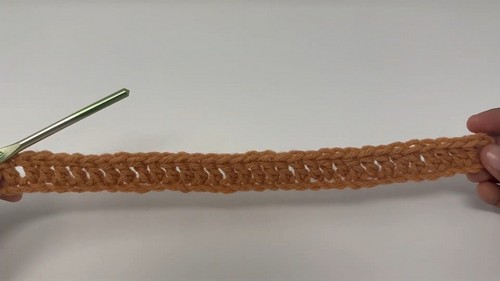
Step 1: Starting Chain
- Chain a length that is a multiple of three, to your desired width. Example given was 33 stitches for a chain 10 inches long (front panel of the sweater).
Step 2: First Row
- Chain 2, then make a double crochet all the way down the chain.
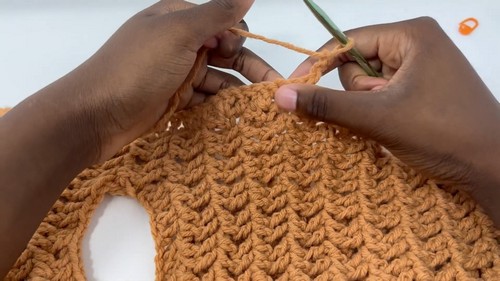
In Step 3: Waffle Stitch Foundation Row
- Chain two and turn your work.
- Start with a normal double crochet in the first stitch.
- The next stitch will be a front post double crochet.
- Follow with two normal double crochets, and then a front post double crochet.
- Continue this pattern (two normal double crochets and one front post double crochet) to the end of the row.
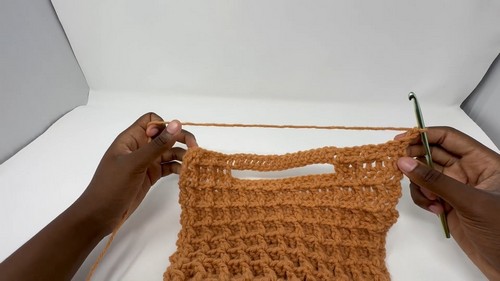
Step 4: Second Row and Beyond
- At the end of the row, chain 2 and turn your work.
- This row will start with two normal double crochets.
- Then make two front post double crochets in the next stitches (these should pop forward due to the previous row’s work).
- Follow this with one normal double crochet, and then two front post double crochets.
- Continue this pattern (one normal double crochet and two front post double crochets) to the end of the row.
Repeat Pattern:
- Continue repeating these last two rows (the foundation row of Step 3 and the alternate row of Step 4), ensuring that you’re working the appropriate stitches into each corresponding previous stitch (normal into normal, front post into front post) to build the waffle stitch effect.
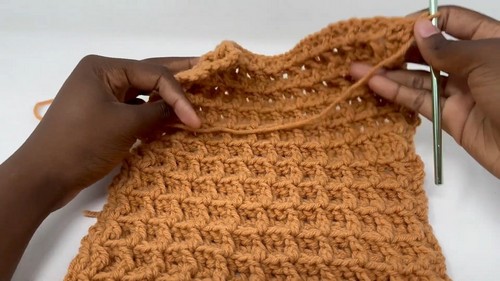
Creating the Neck Hole and Sleeves:
- Work until your piece reaches the desired length for the front panel.
- For the neck hole, work a partial row to the desired width of the shoulder, chain enough stitches to skip the neck area, and then continue the pattern on the other side.
- Match the first side’s post to post and stitch count on the second shoulder.
- Repeat the waffle stitch rows to build up the back panel to match the front panel’s length.
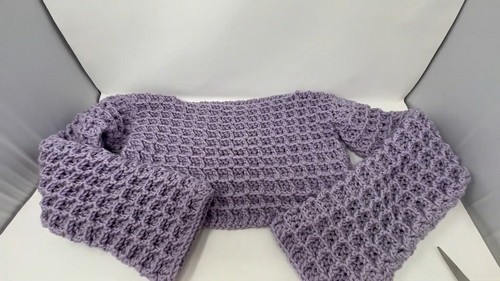
- Finish by joining the front and back panels at the sides and sleeves, marking the desired length for the sleeves, and sewing or slip stitching the sides together.
Finishing Touches:
- Sew in all ends neatly.
- You may add additional rows to the sleeves if a longer sleeve is desired, repeating the established pattern.


