
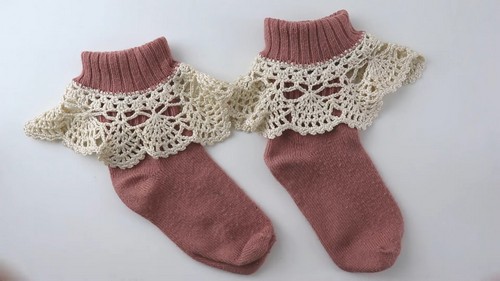
Cute & Stylish Crochet Mittens Lace Cuffs & Socks For Winter
Keep warm and stylish this winter with these free crochet patterns for lace cuffs, mittens, and socks, adding a delicate touch to your cozy essentials.
A delightful way to elevate your winter wardrobe with a touch of elegance and warmth. These patterns allow you to create beautiful, intricately designed mittens, lace cuffs, and socks that not only provide cozy comfort but also showcase your personal style. Ideal for both everyday use and special occasions, these accessories are perfect for keeping your hands and feet toasty during the colder months.
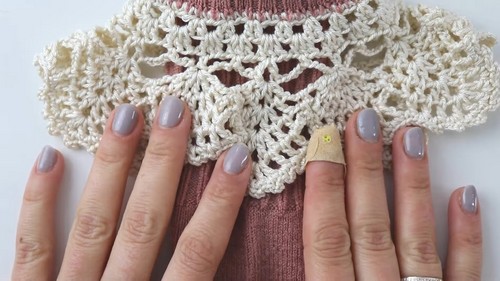
Crochet Mittens Lace Cuffs

The lace cuffs add a feminine, delicate touch to your outfits, making them great for layering under sweaters and coats. Furthermore, these handmade items make thoughtful, personalized gifts for loved ones. With detailed instructions suitable for all skill levels, the patterns ensure a satisfying and enjoyable experience.
Tip:
Keep warm and stylish this winter with these free crochet patterns for lace cuffs, mittens, and socks, adding a delicate touch to your cozy essentials.
Materials:
- Yarn: Category 1 Silky Yarn (suitable for use with a 2 mm hook)
- Hook: 2 mm crochet hook
- Scissors
- Steam iron (optional for finishing)
Abbreviations:
- ch: chain
- sc: single crochet
- hdc: half double crochet
- dc: double crochet
- tr: triple crochet
- sl st: slip stitch
- st: stitch
- rep: repeat
- sp: space
- BLO: back loop only
- FLO: front loop only
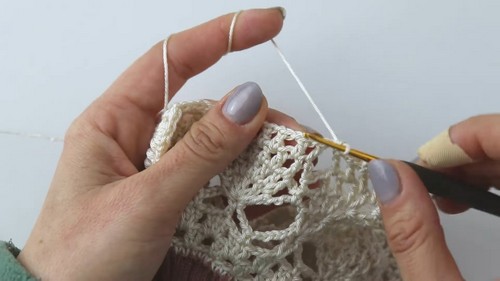
Pattern:
Cast on:
- Make a slip knot and chain 60.
- Join with a sl st to the first sc to form a ring.
- Ch 3, turn.
Row 1:
Repeat [dc, ch 1, skip 2 st, dc] to the end.
- Ch 1, turn.
Row 2:
- Repeat [hdc, ch 1, skip 2 st, hdc] to the end.
- Ch 1, turn.
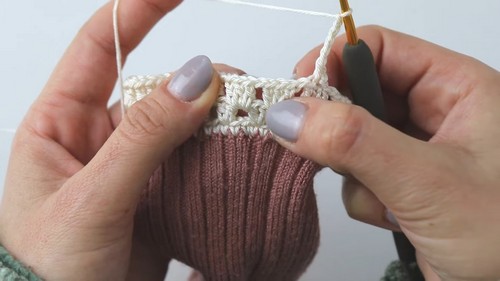
Continue the pattern:
Follow the same structure, alternating the stitches for each row as outlined till Row 45:
- Odd Rows (3, 5, 7, …, 43): sc, ch 1, skip 2 st, sc rep to the end.
- Even Rows (4, 6, 8, …, 44): hdc, ch 1, skip 2 st, hdc rep to the end.
Row 45:
- Repeat [dc, ch 1, skip 2 st, dc] to the end.
- Ch 1, turn.
Finishing:
- Cut the yarn, leaving a tail for weaving.
- Use the yarn needle to weave in ends neatly.
- Optionally, lightly steam iron the piece to give it a finished look and help shape it.


