
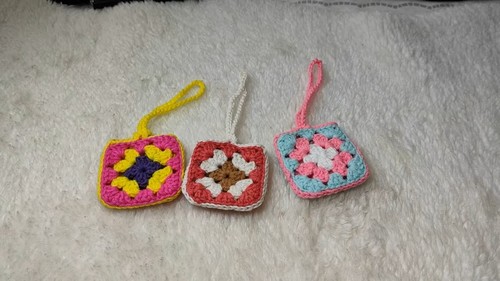
Cute And Functional Crochet Easy Air pod Case Pattern
Keep your AirPods stylish and protected with our free, easy-to-follow crochet pattern for a fun and unique case that’s perfect for personalizing!
It is a delightful blend of creativity and functionality, providing a simple yet detailed guide to making an attractive accessory for your beloved AirPods. This pattern is designed with beginners in mind, ensuring a straightforward project that results in a snug, stylish case. The final product not only adds a personalized touch to your tech but also provides essential protection against scratches and minor drops.
Crochet Air pod Case
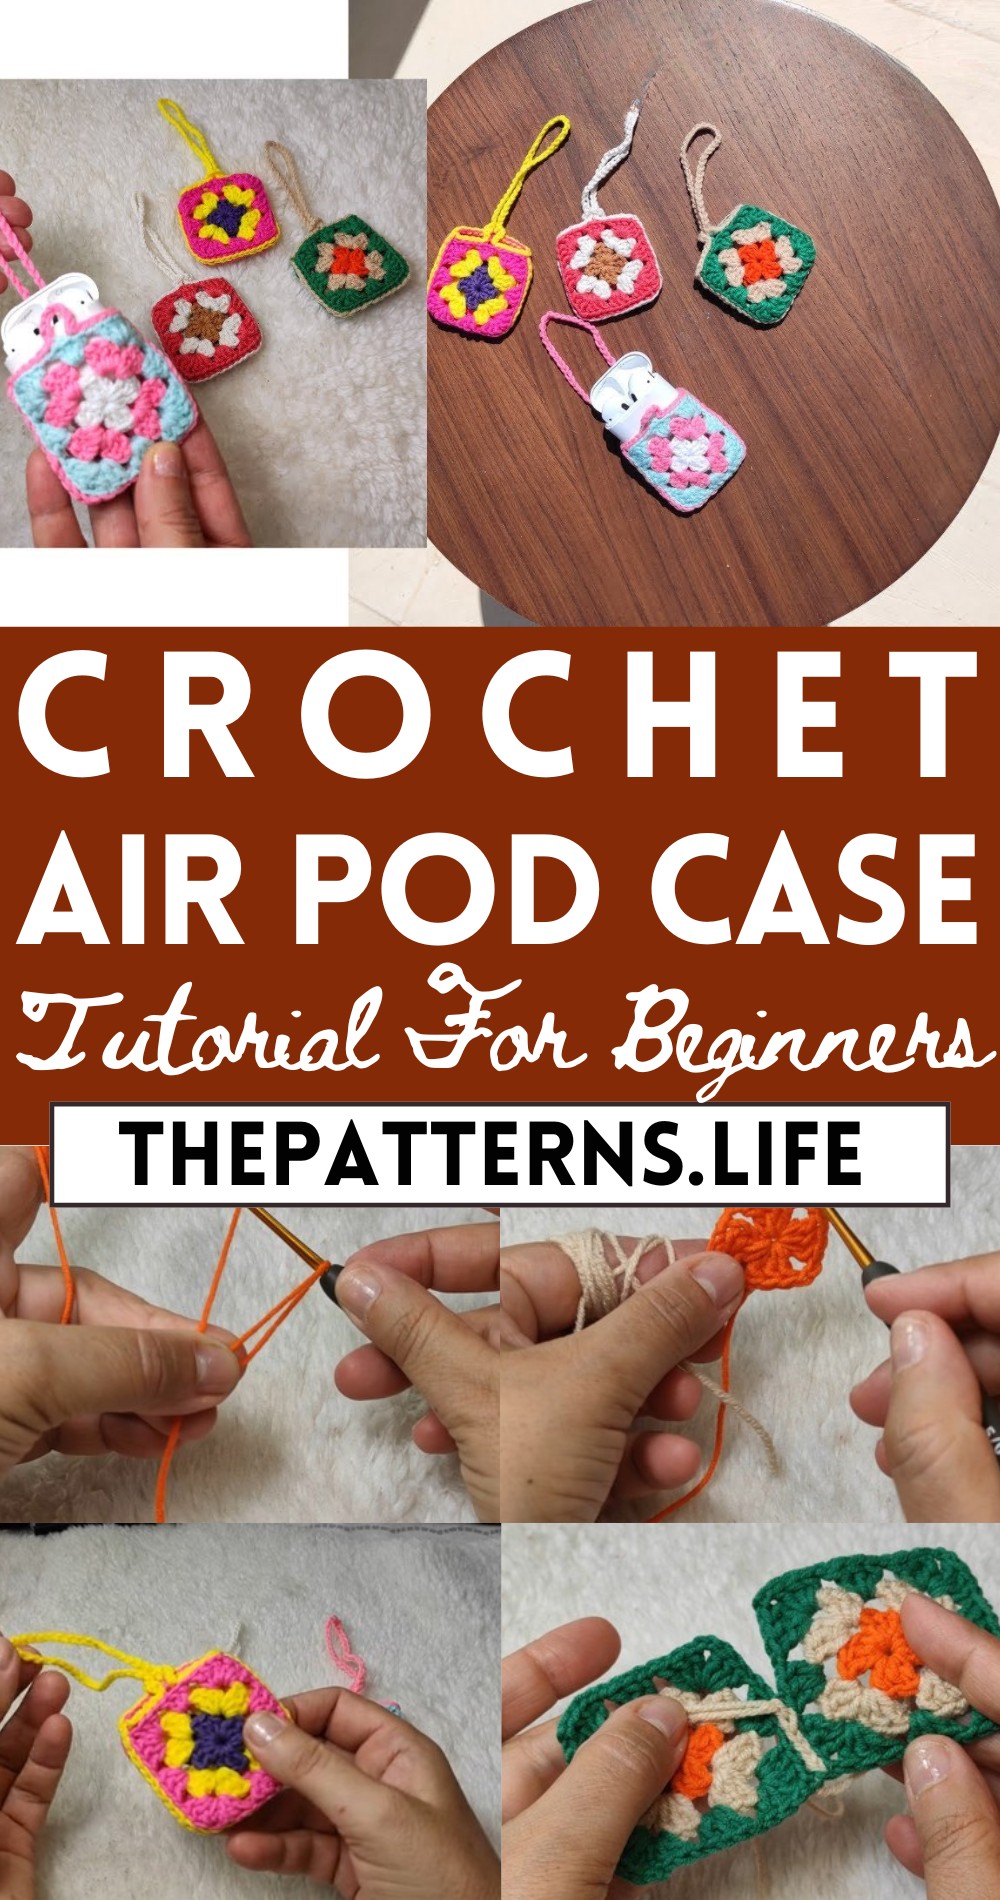
The intricate stitches form a durable yet flexible shell, making it easy to slip your AirPods in and out while keeping them secure. With clear instructions and step-by-step visuals, this pattern allows you to create a unique case that reflects your style and attention to detail.
Tip:
For a more durable finish, consider using a blend of cotton and polyester yarn to ensure the case holds its shape and withstands regular use.
Materials Needed:
- Cotton yarns in three colors
- Crochet hook (2.5 mm size)
- Scissors
- Yarn needle or smaller crochet hook (1.5 mm) for weaving in ends
Start with a magic ring:
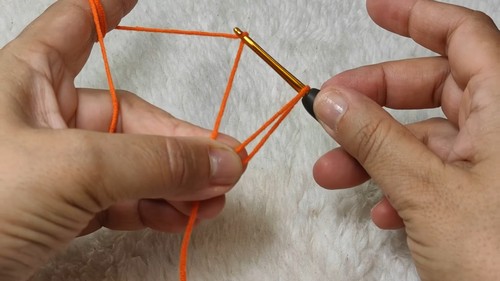
Make a magic ring.
- Chain 3 (counts as first double crochet).
- Make 2 double crochets into the ring.
- Chain 2.
- Make 3 double crochets, chain 2 three more times.
- Pull the ring closed.
- Join to the top of the initial chain 3 with a slip stitch.
Round 2:
Join new color in any corner space.
- Chain 3 (counts as first double crochet).
- Make 2 more double crochets in the same space.
- Chain 2.
- Make 3 double crochets in the same space (first corner made).
- Chain 1.
- (3 double crochets, chain 2, 3 double crochets) in the next corner space.
- Repeat from to in each corner.
- Chain 1.
- Join to the top of the initial chain 3 with a slip stitch and cut the yarn.
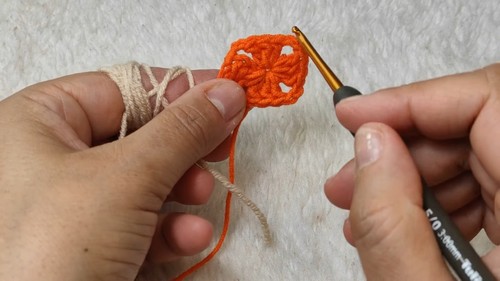
Round 3:

(final round for the standard airpod size, repeat round 2 format with a new color):
- Attach a new color in any corner space.
- Make 3 double crochets, chain 2, 3 double crochets in the corner spaces and 3 double crochets in each chain-1 space from the previous round, separating each block by 1 chain.
- Finish the round with a chain 1 and join to the top of the initial chain 3 with a slip stitch and cut the yarn.
- Weave in all ends using a smaller hook or yarn needle.
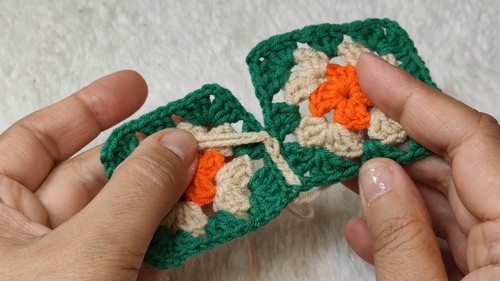
Joining and Finishing:
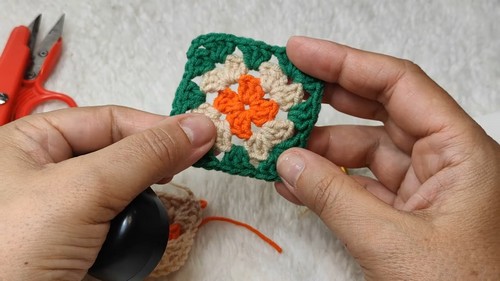
- Place two granny squares side by side, wrong sides together.
- Start by joining new yarn through the back loops of the corner stitches of each square to make a slip knot.
- Continue joining the granny squares by working slip stitches through the back loops only.
- Work the joining slip stitches down to the middle of one side and chain 10 (this creates a loop you can hook onto things).
- Finish joining down the side to the corner.
- Repeat the same joining process on the opposite side.
Making the Loop:
- Instead of joining the second half of the sides, work slip stitches through the back loops along one side to the middle.
- Chain 10 and join with a slip stitch to the same space where the chain started, creating a loop.
- Finish the edge with slip stitches in back loops and fasten off.
Finishing Up:
- Weave in any remaining ends.
- Cut the yarn and hide it neatly at the back.


