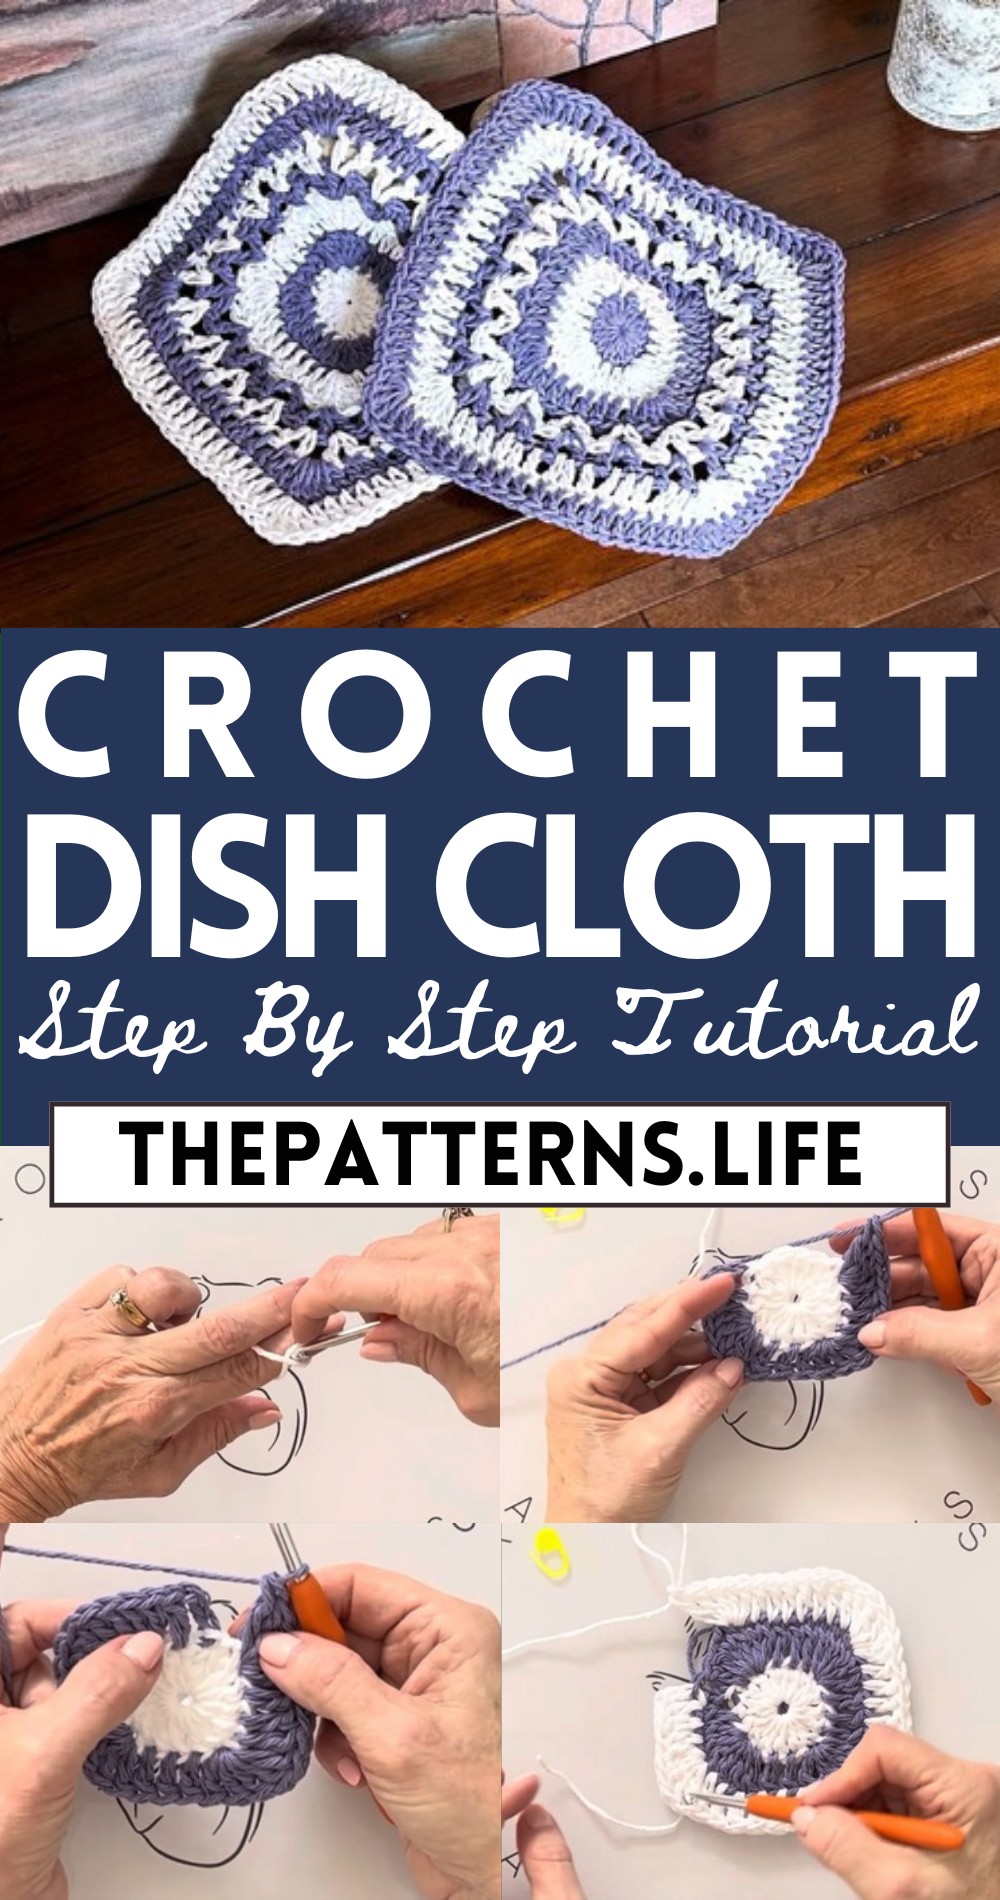
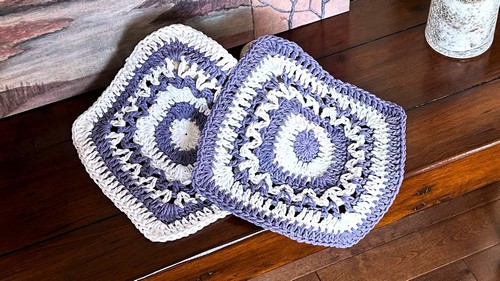
Step By Step Crochet Dish Cloth Pattern For Beginners
Upgrade your kitchen basics with our Free Crochet Dish Cloth Pattern—produce durable and stylish cloths that offer a personal touch to daily chores.
This easy project offers a practical and enjoyable way to produce essential kitchen items with a personal touch. These dish cloths are not only visually appealing but also highly functional, making dishwashing a more pleasant experience. The pattern allows you to use various colors and textures to match your kitchen decor, adding a unique flair to your space.
Crochet Dish Cloth Tutorial
Additionally, crocheted dish cloths are eco-friendly and reusable, helping reduce waste and promoting a sustainable lifestyle. Made with durable materials, they are long-lasting and can withstand multiple washes without losing their shape or effectiveness. These handmade dish cloths make wonderful gifts or personal items that enhance everyday chores with warmth and charm.
Tip:
Use 100% cotton yarn for your dish cloths as it is highly absorbent and gentle on delicate surfaces, making it perfect for washing dishes and other kitchen duties.
Materials Needed:
- Loops and Threads Classic Cotton yarn in colors Iris and White
- 5 mm crochet hook
- Stitch marker (a bobby pin is used in the video)
Pattern Steps:
Starting the Dishcloth:
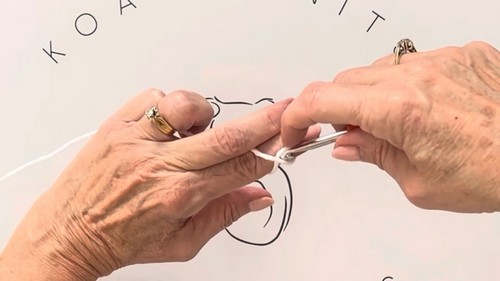
Create a Slip Knot:
- Wrap yarn around your finger, cross it over, go under the first loop, and pull up the second loop to form the knot.
Chain 4:
- Yarn over and pull through the loop on your hook, repeat for a total of four chains.
Row 1:
- First Double Crochet (DC) Stitches:
- Yarn over, insert into the first chain, and perform a double crochet.
- Continue making 15 more DCs into the same stitch, placing a stitch marker on the first DC for easier counting.
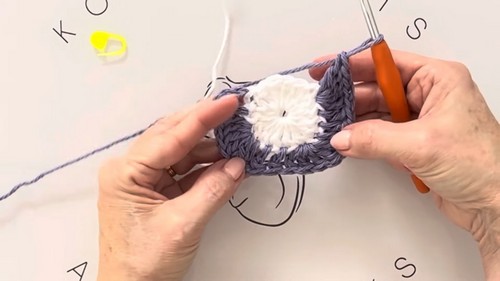
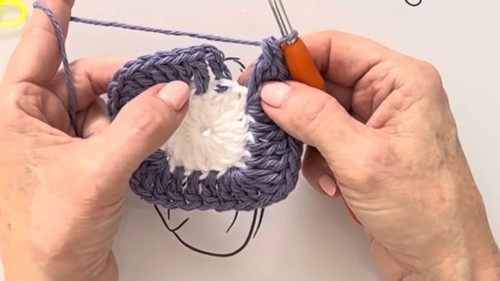
- Joining a New Color:
Switch to Iris Yarn:
- Cut the white yarn, pull through and tie off.
- Attach Iris yarn with a slip stitch into the top of the third chain from the last row.
Row 2:
- Begin Expansion:
- Chain 3 (counts as first DC).
- DC into the next stitch.
- Make 5 DCs into the next stitch (forming a corner), then DC in each of the next three stitches.
- Repeat from to around, ensuring you create corners and flat sides.
Row 3:
- Building Shape:
- Continue the expand pattern, with each flat side increasing by one DC between corners.
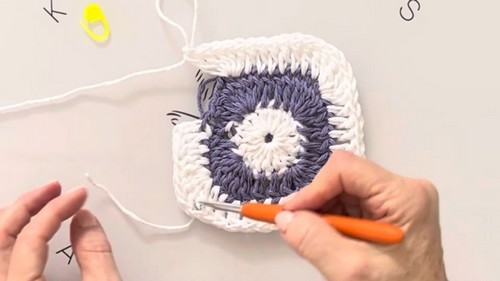
- Rickrack V-Stitch Pattern:
Initiating Rickrack V-Stitch:
- Chain 4 after connecting the new row (counts as DC plus chain space).
- In the same space, add a DC to complete the first V-stitch.
- Skip two stitches, and make a V-stitch (DC, chain 1, DC) in the next.
- Continue the pattern around, finishing at the starting V-stitch.
Subsequent Rows:
Continuing Pattern:
- Alternate colors as needed or desired, following the V-stitch pattern around the squares, and increasing the number of stitches as the dishcloth expands.
- Every new row in V-stitch will align with the ‘spine’ of the V from the previous round to keep the rickrack appearance.
Binding Off:
- Finish with a Slip Stitch:
- Once desired size is achieved, slip stitch to join the end of the row to the beginning. Cut the yarn and weave in the ends using a yarn needle.
- Final Touches:
Block the Dishcloth:
- Optionally, block the finished dishcloth to give it a professional finish and even out the stitching.