Snug & Cozy Crochet Hooded Poncho Pattern Step By Step
Pompous in cozy fun with our Free Crochet Hooded Poncho Pattern – perfect for staying snug and stylish while making a playful fashion statement!
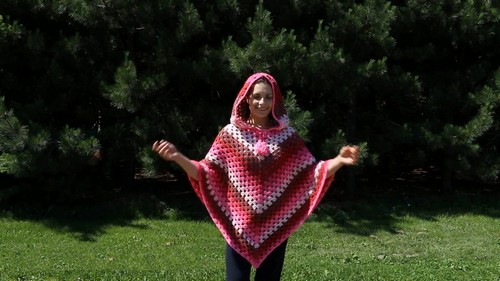
It is a delightful addition to any crochet enthusiast’s catalog, offering a blend of style, comfort, and functionality. This charming poncho features a cozy hood and an easy-to-wear silhouette, making it perfect for casual outings or cuddling up at home. Its versatile design allows it to be worn over various outfits, providing an added layer of warmth without sacrificing style. Crocheted using soft yarn, this poncho is lightweight, ensuring comfort while keeping the chills at bay. It’s simple to make and offers both comfort and style.
Crochet Hooded Poncho

The pattern provides clear instructions suitable for crocheters of all skill levels, making it an excellent project for those looking to refine their skills or try something new. With endless possibilities for color combinations, you can customize this piece to suit any personal style.
Tip:
Select a yarn with a nice drape and texture to enhance the poncho’s flow and overall appearance.
Materials Needed:
- The Poncho you’ve already made
- Crochet hook (6.00 MM)
- Scissors
- Yarn needle
- Measuring tape
- Additional matching yarn
Pattern Steps:

Prepare the Poncho:
- Fold the Poncho so the increase is facing you.
- Place a stitch marker in the space where the increase started.
Attach Yarn:
- Skip the first three spaces from the marked space.
- Attach the yarn in the next space up using your preferred method (e.g., slip knot).

Start Crocheting:
- Chain three (this counts as the first double crochet).
- Place two more double crochets in the same space to complete the first block.
Continue Around:
- Chain one, then create a three double crochet block in the next space.
- Repeat this around the Poncho.

First Row Completion:
- Upon reaching the marked increase space, stop one space before it for round completion.
- Chain three and turn your work to start the next row.
Second Row and Beyond:
- Place a block in each chain one space from the previous row.
- Continue with this pattern (chain three and turn at the end of each row) until the hood measures 15-16 inches tall.

Closing the Hood:
- After reaching the desired length, cut the yarn leaving a long tail.
- Use the yarn needle to sew the top of the hood closed using a whip stitch method.
Creating and Attaching a Drawstring:
- Create a chain long enough to stretch across the hood opening and weave through.
- Optionally, add decorative tassels to the ends of the drawstring.

Adding a Border (Optional):
- Single crochet around the opening of the hood for a neater finish.
- Perform two rows of single crochet stitches, placing two single crochets into each side of a double crochet from the previous rows.
Finishing:
- Weave in any loose ends.
- Attach tassels or pom poms if desired to the drawstring ends.

Care and Maintenance
- Follow typical care instructions for the yarn used to ensure longevity of the hood.
Additional Tips:
- Ensure consistent tension to keep the hood even.
- Customize the hood size and drawstring length according to your needs or style preferences.