For Festive Decor Crochet Granny Circle Bauble Pattern
Adorn your space with our Free Crochet Granny Circle Bauble Pattern—ideal for infusing a touch of handmade charm into your holiday decor.
These delightful ornaments combine traditional granny square motifs with a modern circular twist, creating a unique and eye-catching design. The pattern offers the beauty of intricate stitches and allows for versatile color combinations, perfect for complementing any holiday theme. Each bauble, with its delicate and lacy appearance, adds an elegant touch to your festive ambiance.
Crochet Granny Circle Bauble
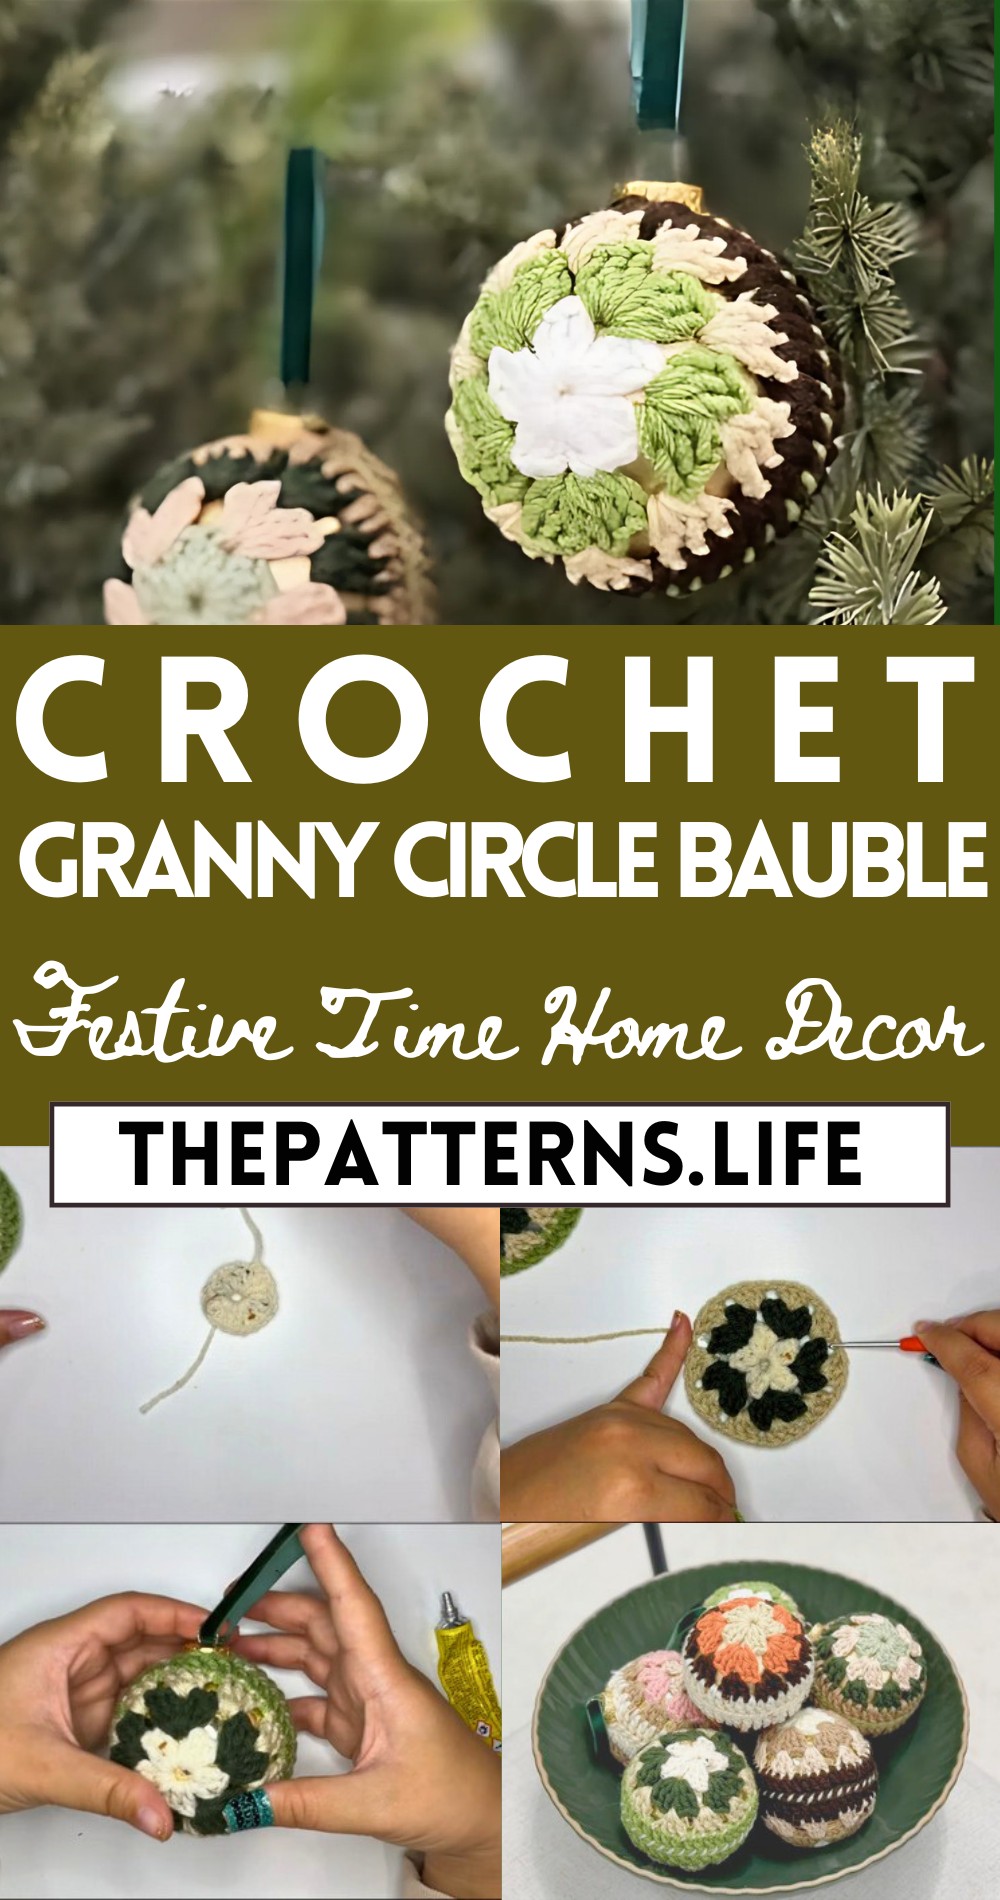
These baubles can be used to adorn Christmas trees, enhance wreaths, or even embellish your home’s interior for a sophisticated seasonal look. The lightweight and durable design ensures they’ll become a cherished part of your holiday collection for years to come. Whether you’re a beginner or a seasoned pro, these baubles are a joy to work on and create a statement wherever they hang.
Tip:
Use metallic or shimmering yarn to add a festive sparkle to your Granny Circle Baubles.
Materials Needed:
- Yarn: Number 4 medium worsted weight yarn in four colors. The example uses earthy tones and accent colors.
- Crochet Hook: 3.25 mm hook (such as Clover Amour).
- Others: Bent tip needle, mini Patchwork scissors, and velvet ribbon (3/8 of an inch wide for handles).
Pattern Overview:
Color Key:
- Color 1: Creamish color (center)
- Color 2: Dark green (first round of clusters)
- Color 3 and 4: Used in subsequent rounds
Beginning The Pattern :
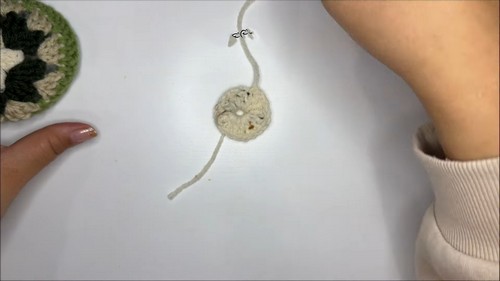
Foundation and Round 1:
- Start with a slip knot.
- Chain 6, slip stitch into the first chain to form a loop.
- Chain 2 (counts as first double crochet), then make 2 double crochets into the loop (first cluster).
- Chain 1, then make three double crochets into the loop for the second cluster. Repeat until you have five clusters in total with a chain-1 space between them.
- Slip stitch to the top of the starting chain-2 to close the round.
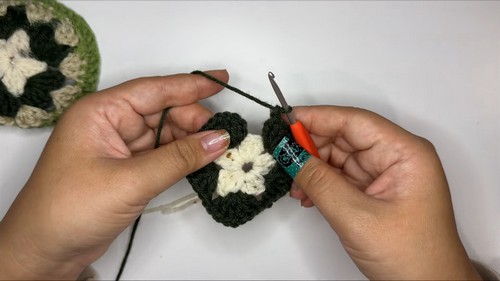
After Round 2: Join Color 2:
- Join color 2 in a chain space opposite of the fasten-off point.
- Chain 2 (counts as the first double crochet), then make two more double crochets into the same chain space.
- Chain 1, then make three double crochets into the same space (completing a double cluster).
- Repeat this process in each chain space around, creating a total of five double clusters with a chain-1 space between them.
- Slip stitch to the top of the starting chain-2 to close the round.
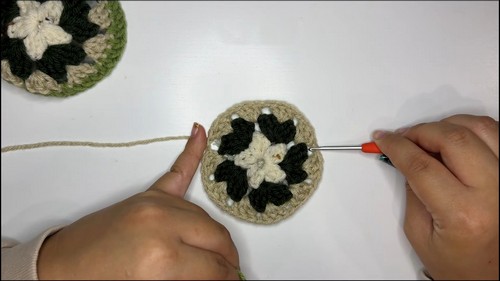
Round 3: Join Color 3:
- Join color 3 in a chain space opposite of where you fastened off color 2.
- Chain 2, then make two more double crochets into the same chain space.
- Repeat the process of creating clusters in each chain space around, but without increasing. This will make the sides start to curl in, creating a cup shape.
Round 4: Join Color 4:
- Using color 4, crochet in every stitch around (including chain spaces), matching the crochet style (i.e., double crochets) from the previous rounds.
- This creates a defined cup shape. If the ornament or ball you’re covering is larger or smaller, adjust by adding or reducing rounds or stitches.
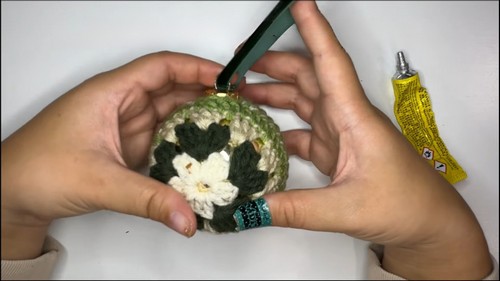
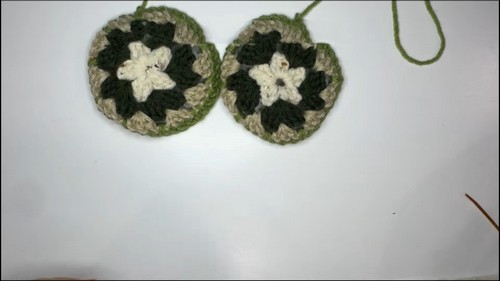
Assembly:
- After completing the crochet work, cut about 20 inches of yarn in color 1 for seaming.
- Hold two crocheted pieces together, and using a darning needle, seam them together with a whip stitch or mattress stitch.
- Leave an opening at the top for the ornament insert.
- Insert the ornament.

- Finish seaming, then create and attach a velvet ribbon handle as desired.
Finishing Touches:
- Trim any excess yarn tails and secure them.
- Decorate or personalize as desired.