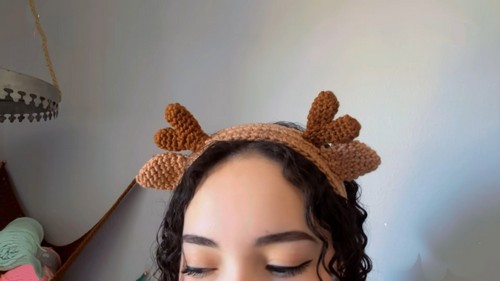
Adorable Crochet Deer Headband Pattern For Fun
Uncover a delightful free crochet deer headband pattern to sprinkle some woodland whimsy onto your winter wardrobe and festive celebrations!
It is an enchanting project that effortlessly blends creativity with practicality. Perfect for adding a touch of woodland charm to your winter wardrobe or as a unique accessory for festive occasions, this headband is bound to turn heads. Whether you’re looking to enhance your child’s holiday outfit or seeking a whimsical addition to your own collection, this pattern is versatile and suitable for all ages.
Crochet Deer Headband
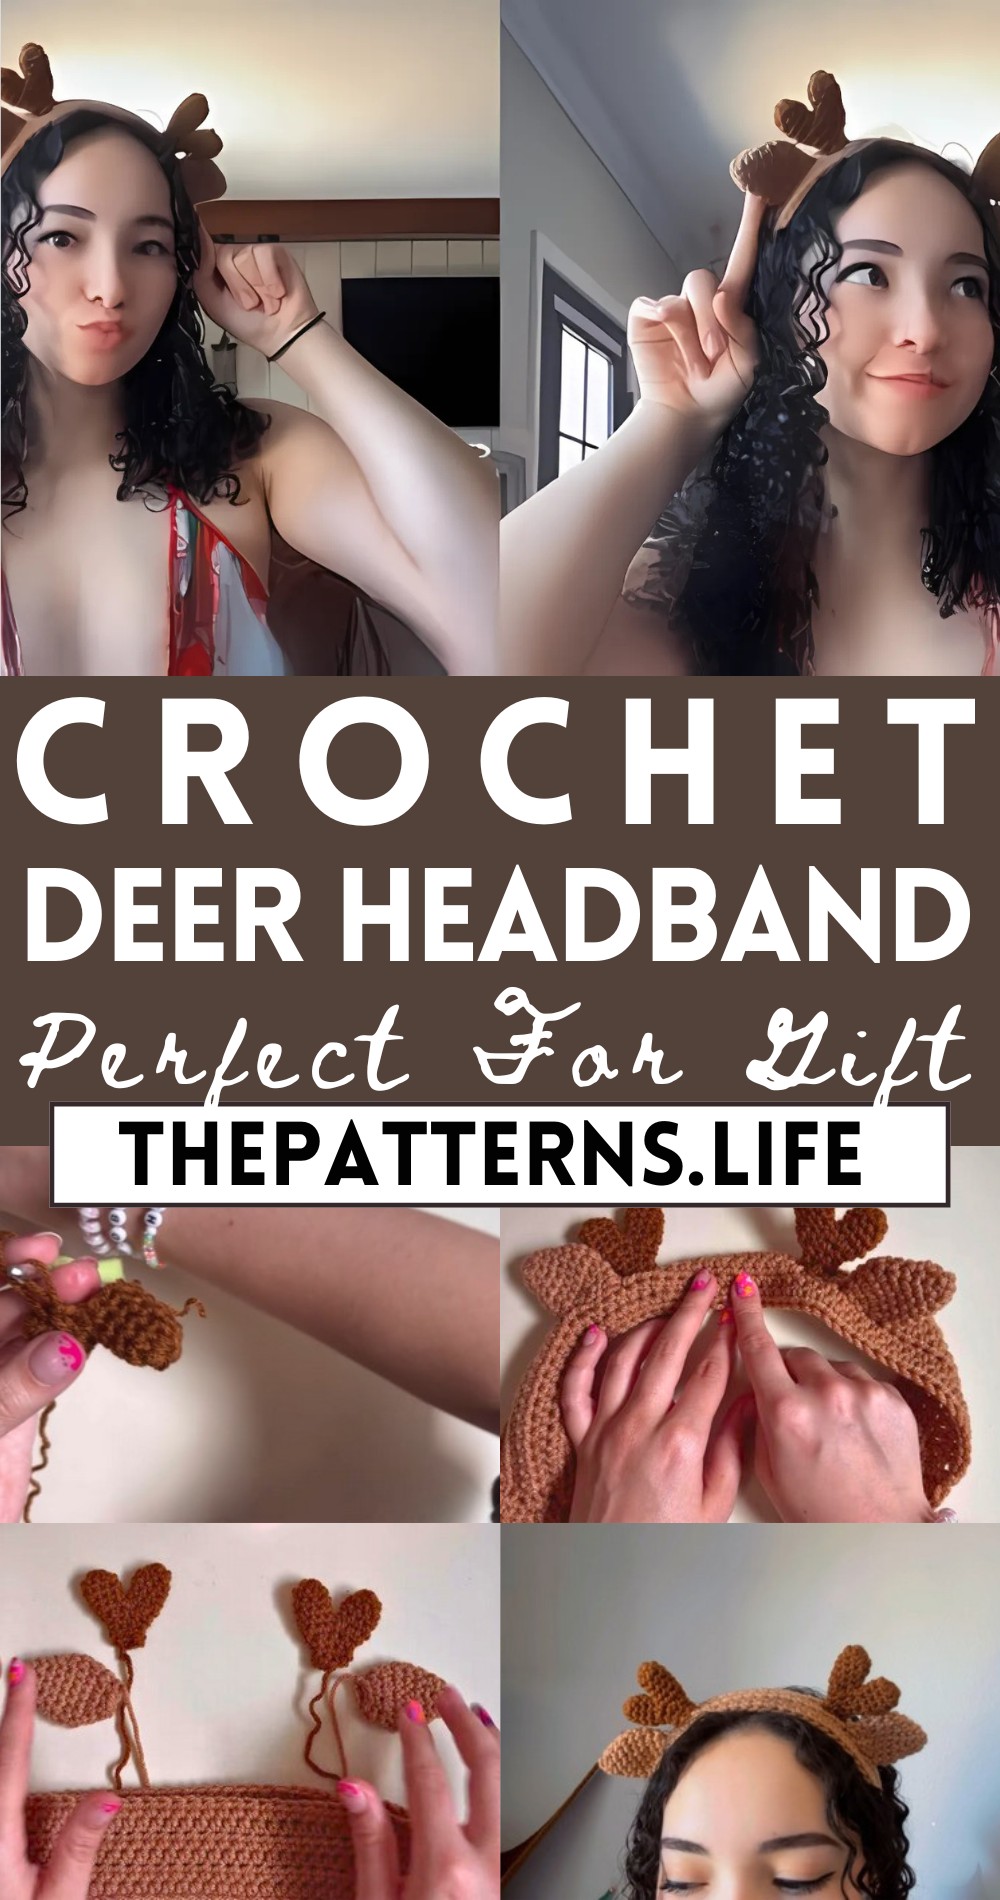
Plus, it’s an ideal gift for animal lovers and those who appreciate handmade treasures. Beyond its aesthetic appeal, the headband also provides a cozy and warm feel, making it ideal for chilly days.
Tip:
For a polished look, ensure your stitches are consistent and consider using a yarn color that complements the rest of your winter attire. This will make your headband not only functional but also a fashionable statement piece.
Materials:
- Worsted weight acrylic yarn in light brown (for the base and ears) and dark brown (for the antlers)
- 5 mm crochet hook
- Yarn needle
- Scissors
- Bobby pin or stitch marker
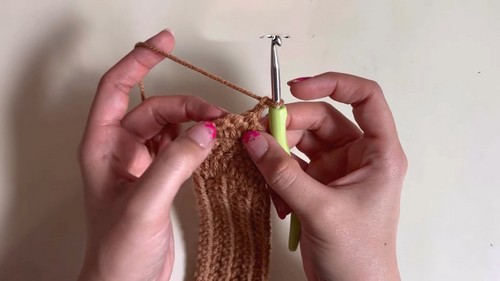
Headband Base:
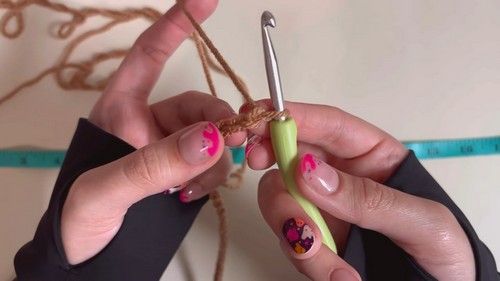
Start:
- Using light brown yarn, make a slip knot and chain 55 (this will wrap partway around the head).
Row 1:
- Chain one more for the turning chain. Half double crochet in the second chain from the hook and in each chain across.
Rows 2-6:
- Chain one, turn your work, and half double crochet in each stitch across. Repeat this for five more rows.
Edge:
- Single crochet along the side of the band to create a neat edge.
Tapered Ends:
Row Setup:
- Chain 2, skip the first stitch, and double crochet in the second stitch and each stitch across until the last two stitches.
Decrease:
- Start a double crochet decrease over the last two stitches.
Repeat:
- Continue the pattern, creating a tapered end by decreasing at each end in every row until you have just a couple of stitches left.
String Ties:
Create String:
- Chain 2, then double crochet into the middle loop of the last decrease made. Continue this pattern until the string measures about 8 inches.
Finish the String:
- Chain one, cut the yarn, leaving a long tail for weaving in ends.
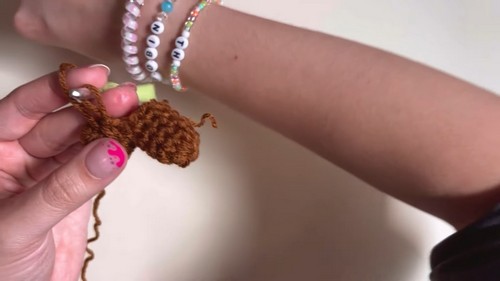
Ears:
Start:
- With light brown yarn, make a slip knot and chain 2. Work 4 single crochets in the first chain (or use a magic ring).
Increments:
- Increase by making two single crochets into each stitch around (8 stitches total).
Shape the Ear:
- Continue to crochet around, adding increments strategically to shape the ear as described in the video.
Detailing:
- Use invisible decreases for shaping the tip of the ear.
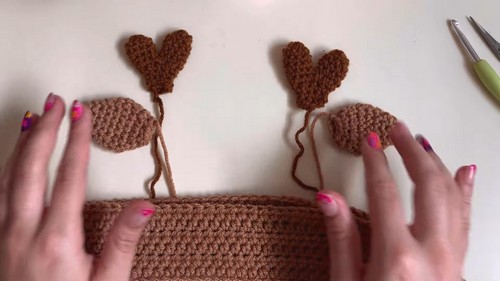
Antlers:
Start:
- Using dark brown yarn, perform a similar start as the ears. Chain 2 and then 8 single crochets in the first chain.
Rows:
- Work four rows of 8 single crochets each.
Assemble:
- Make another section of the antler and connect it to the first, gradually decreasing for the tips and tapering as described.
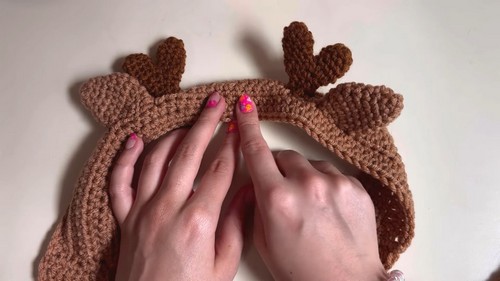
Assembly:
Positioning:
- Use bobby pins to mark the placement of the antlers and ears on the headband.
Sewing:
- Sew each piece onto the headband securely, starting with the antlers and then the ears adjacent to them.
Finishing Touches:
- Weave in all ends and secure everything neatly.
Completion:
- Test the fit on your head, adjust placement if necessary, and ensure all sewn pieces are firm and won’t shift.