
Crochet Top For Beginners Step By Step Pattern
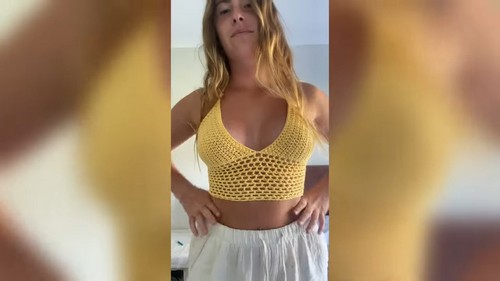
Gleeful summer vibes await with the Free Crochet Top Pattern—perfect for adding a handmade touch to your wardrobe and showcasing your style!
this pattern provide a delightful balance of simplicity and sophistication. Featuring versatile designs and customizable elements, each top can be tailored to reflect your unique style and preferences. The ensuring effortless, hand crocheted fabric ensures both comfort and elegance, making your crochet creation a summer staple or a year-round favorite.
Crochet Top

The world of Crochet Patterns and bring your creative vision to life! Infuse your personal flair into every stitch with patterns designed to fit any occasion—from casual beach outings to chic evening gatherings. With endless possibilities in colors and textures, you’ll never run out of ways to make a fashion statement. Elevate your wardrobe with pieces that are not just trendy but also crafted with love and creativity.
Tip:
Experiment with different yarn weights to achieve varied textures and drapes for your crochet tops.
Materials:
- Yarn: Four Seasons, 50% Cotton 50% Acrylic, 8 ply
- Crochet Hook: 4 mm
- Scissors
- Yarn Needle
- Stitch Marker
Pattern Instructions:
Foundation and First Row:
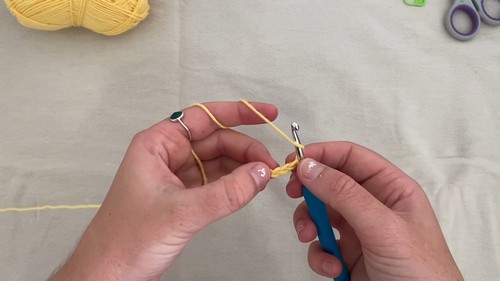
Start with a Slip Knot:
- Wrap the yarn over your two fingers, twist, then pull through another piece of yarn.
Chain 12:
- This creates the foundation chain for your project.
Add 2 Extra Chains:
- These extra chains count as your first half double crochet.
Half Double Crochet (HDC):
- Skip the first two chains. In the third chain from the hook, work your first HDC. Continue with HDC in each chain across.
- You should have 12 HDCs for this row.
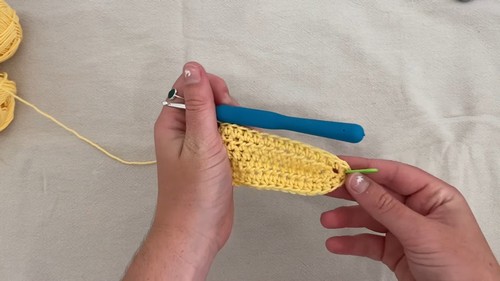
Second Row:
- Chain 2 and turn your work. This counts as the first HDC of the new row.
HDC in Every Stitch:
- Start in the first stitch, work an HDC, and continue in all stitches across.
Work 3 HDCs in Top Chain:
- At the end, place three HDCs in the top chain of the turning chain from the previous row. Place a stitch marker in the second HDC (the middle HDC of this cluster) for orientation.
Continue HDC Across:
- Now, working on the opposite side of your foundation chain, HDC in each stitch to the end. Make sure you maintain 12 HDCs after your cluster of three.
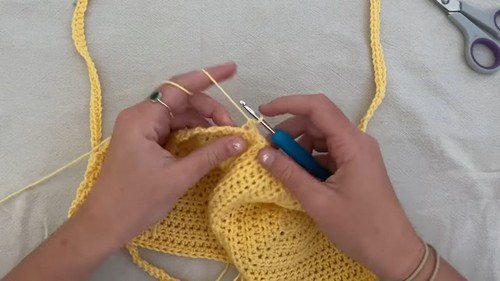
Continue Building Rows:
Pattern Repeat:
- Repeat the pattern of turning your work, chaining two, and working HDCs into each stitch. When you reach the stitch with the stitch marker, work 3 HDCs into it. Move the stitch marker into the middle HDC of this new cluster after each row.
Total Rows:
- Repeat this process for a total of 12 rows or until the piece measures appropriately against your chest.
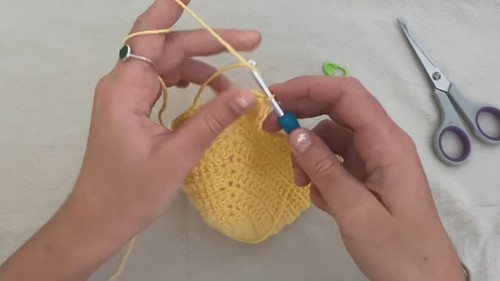
Tie Off:
- Chain one, then cut the yarn, leaving a long tail. Pull this tail through the loop on your hook to secure.
Making the Straps:
Create a Slip Knot and Chain 100:
- (Adjust the length if needed, shorter options could be 80 chains).
Turn and Work Single Crochets Back Along the Chain:
- After completing your chains, add an extra chain, then starting from the second chain from the hook, work single crochets back along the chain.
Securing the Straps:
- After reaching the end, slip stitch to the base of the first cup, creating the first strap.
- Repeat for the Second Strap.
Connecting the Cups:
Attach Yarn with a Slip Knot:
- At the base of the first cup where the last row ended.
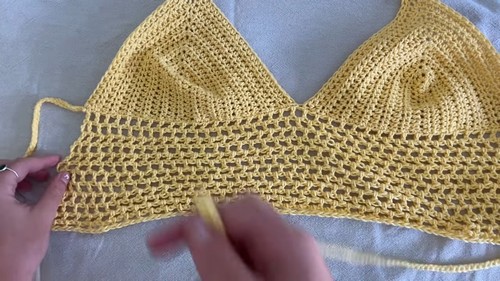
Single Crochet Along the Bottom:
- Work a row of single crochets along the bottom edge of each cup, putting the hook through clear spaces at the top part of the stitches. Ensure an odd number of stitches by the end.
Chain 3 and Turn Your Work:
- For the next row, double crochet skipping one stitch and into the next, creating a mesh-like pattern. Chain one between each double crochet.
Continue with Pattern:
- Repeat the double crochet and chain one pattern for as many rows as desired. The example has 12 rows.
Final Row:
- End by chaining one, pulling through a long loop, and cutting the yarn.
Finishing Touches:
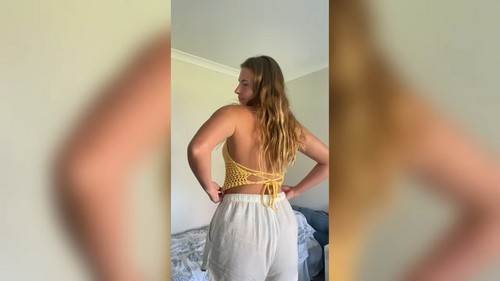
Back Straps:
- For back straps, attach yarn with a slip knot at the end of a row, chain 120 (or desired length), then slip stitch back down the chain. Secure and cut the yarn. Repeat on the other side.
Weave in Ends:
- Secure all loose yarn ends by weaving them in with a yarn needle.
Adjustments:
- For a personalized fit, you may need to adjust the number of chains at the beginning, the number of rows for the cups, and the lengths of both the shoulder and back straps.


