
Simple Crochet Mitered Granny Square Blanket – Free Pattern
Cozy, heartwarming memories with our Free Crochet Mitered Granny Square Blanket Pattern, blending timeless elegance and handmade beauty for your home.
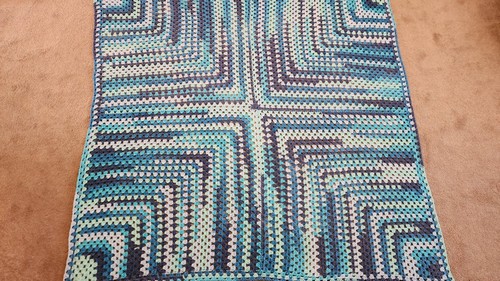
The pattern is a delightful project that combines classic design with a modern twist, making it a versatile and cherished addition to any home. This pattern features unique mitered squares that create a visually striking, geometric effect, perfect for adding a touch of handmade elegance to your living space.
Crochet Mitered Granny Square Blanket
Ideal for crocheters of all skill levels, the blanket can be customized with your favorite colors to match any decor, serving as a cozy throw, a baby blanket, or even a thoughtful gift for loved ones. The repetitive nature of the granny squares makes the project both soothing and rewarding, providing the satisfaction of seeing your blanket grow with each square.
Tip:
To ensure your blanket holds its shape and maintains its beauty, use a high-quality yarn that is both soft and durable.
Materials Needed:
- Lion Brand’s Ice Cream Big Scoops (Approx. 3 skeins; over 1,000 yards each, weight of 3, 100% acrylic)
- 5 mm size H crochet hook
Pattern Instructions:
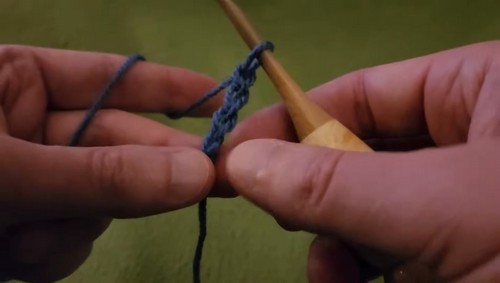
In Round 1:
- Begin with a slip knot and chain 4 (ch 4).
- Slip stitch into the first chain to form a ring.
- Chain up 3 (counts as the first double crochet DC).
- Work 2 more double crochets (DC) into the ring.
- Chain 3.
- Work 3 DC into the ring.
- Chain 3.
- Work 3 DC into the ring.
- Chain 3.
- Work 3 DC into the ring.
- Chain 3.
- Slip stitch to the top of the starting chain 3.
- Slip stitch across to the next chain space.
Row 2 (“Solid Row”):
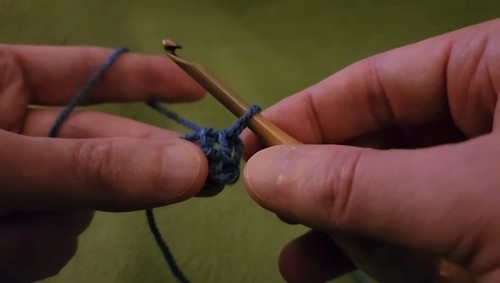
- Chain up 2 (this will act as a DC; can chain 3 for a looser edge if preferred).
- Work 2 DC into the same space.
- Chain 1.
- In the next space, make a corner with: 3 DC, chain 3, and 3 DC.
- Chain 1.
- For the last set of stitches in the row, do 2 DC into the space, and for the third DC, work it into one of the chains from the previous row for a cleaner edge.
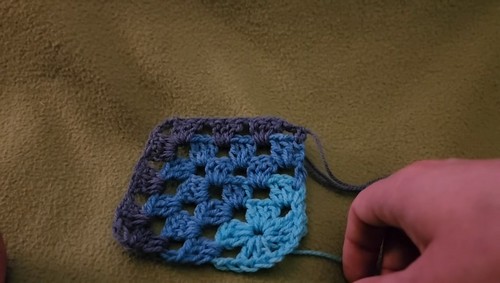
Row 3 (“Eyelet/Open Row”):
- Chain up 3 (counts as a DC and chain 1; chain 4 if you use ch-3 at the start of rows).
- Skip to the first chain space and work 3 DC.
- Chain 1.
- Make a corner in the corner space with: 3 DC, chain 3, and 3 DC.
- Chain 1.
- Work 3 DC in the next chain space.
- Chain 1.
- Then, work a DC into the top of the starting/ending DC of the previous row.
- Continue alternating between a “solid row” and an “eyelet row,” ending with an “eyelet row.”
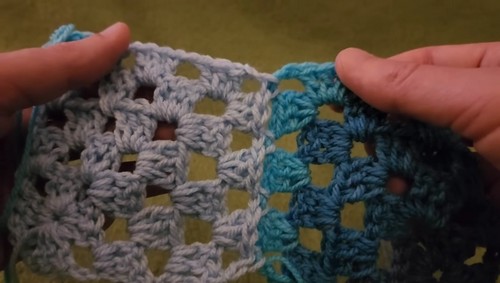
Joining Squares:
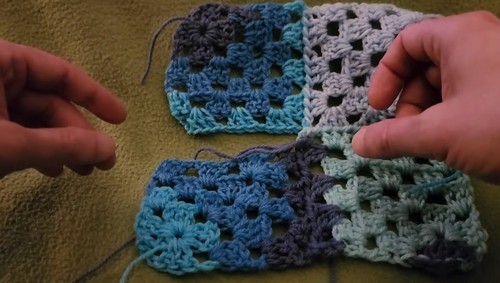
- When assembling the blanket, arrange the squares to have their corners meet.
- Use the “join-as-you-go” method to attach the squares together. This can be done by slip stitching through corresponding chain spaces of the adjacent squares or by using a cleaner “pull loop through technique” as demonstrated.
Border (Optional):
- Begin in any corner after assembling the squares.
- Work rounds of granny clusters (3 DC, chain 1) across each edge and corners with 3 DC, chain 3, 3 DC to smooth out edges.


