Step By Step Pattern: Crochet Herringbone Single Stitch
Delight in the Crochet Herringbone Single Stitch Pattern, weaving playful elegance and stunning textures into your creative projects.
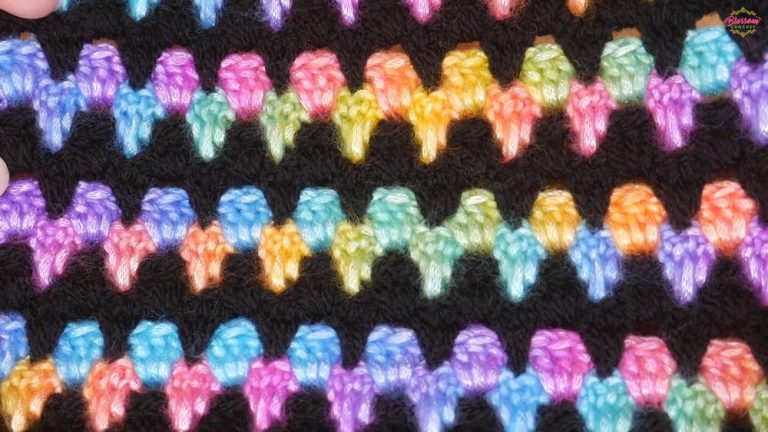
The Crochet Herringbone Single Stitch Pattern combines simplicity with elegance, making it a popular choice for a variety of projects. This snazzy little stitch involves creating a unique herringbone effect by working the stitches slightly differently than traditional single crochet, which results in a closely woven, zigzag pattern that adds texture and visual interest.
Crochet Herringbone Single Tutorial

Perfect for blankets, and scarves, this stitch offers both durability and a sophisticated look. The pattern’s dense fabric provides extra warmth and structure, making it ideal for cozy and stylish pieces.
Tip:
To achieve a more defined herringbone effect, use a slightly larger hook than recommended for your yarn to allow the stitch texture to stand out beautifully.
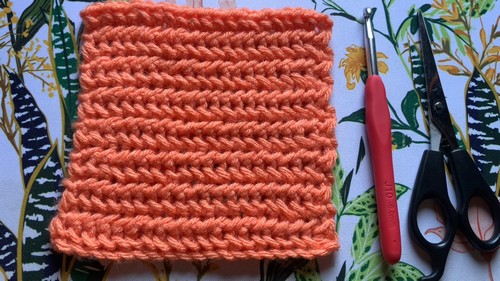
Material:
- Big Twist yarn in the color coral (or any yarn of your choice)
- 6 mm crochet hook
- Scissors
Instructions:
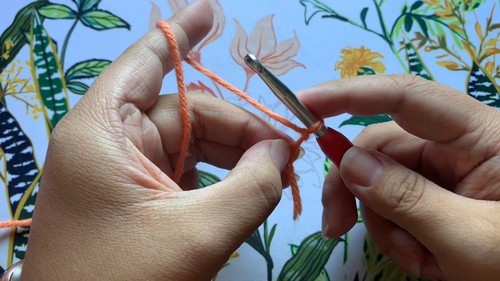
Start with a Slip Knot:
- Make a slip knot using your preferred method.
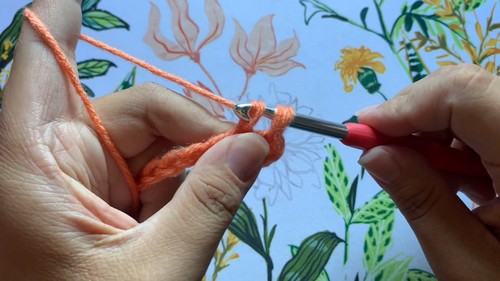
Chain Stitches:
- Chain 21 (or any number of chains for your project plus one additional chain).
- To make a chain, yarn over and pull through the loop already on your hook.
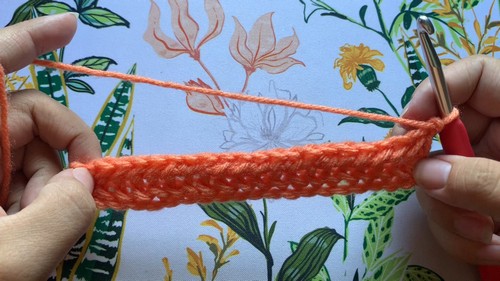
First Row:
- Skip the very first chain from the hook.
- Insert your hook into the second chain from the hook.
- To make a single crochet, yarn over, pull up a loop (two loops on hook), yarn over again, and pull through both loops on the hook.
Start Herringbone Single Crochet:
- Look for the vertical loop behind the loop on your hook.
- Insert your hook into this vertical loop.
- Insert your hook into the next chain, yarn over, and pull up a loop (now three loops on hook).
- Yarn over and pull through all three loops.
- Continue this pattern across the row.
Turning Your Work:
- After the last stitch of the row, chain one to turn your work.
Second Row:
- Begin with a single crochet into the first stitch.
- You’ll be working from the back: insert your hook from behind instead of from the front.
- Follow the same steps as the first row, inserting into the vertical loop and the next stitch.
Continuing the Pattern:
Repeat Rows 1 and 2 for the length of your project.
- Maintain a loose tension, especially when pulling up loops from the back.
Finishing:
- To finish your project, after completing the last stitch of your final row, chain one.
- Cut your yarn, pull the yarn through the loop on your hook, and pull tight.
- Weave in any loose ends.