
Crochet Granny Square With Ruffles Top Step By Step Pattern
Get trendy this summer with the Free Crochet Granny Square Top With Ruffles Pattern—ideal for adding a touch of retro charm and flair to your wardrobe!
This is a delightful project that combines the classic charm of granny squares with the playful elegance of ruffles. Perfect for adding a touch of vintage flair to your summer wardrobe, this pattern is both fun and functional. The top features vibrant, cozy piece, colorful squares and delicate ruffled edges, making it an eye-catching piece that stands out in any crowd.
Crochet Granny Square Top With Ruffles
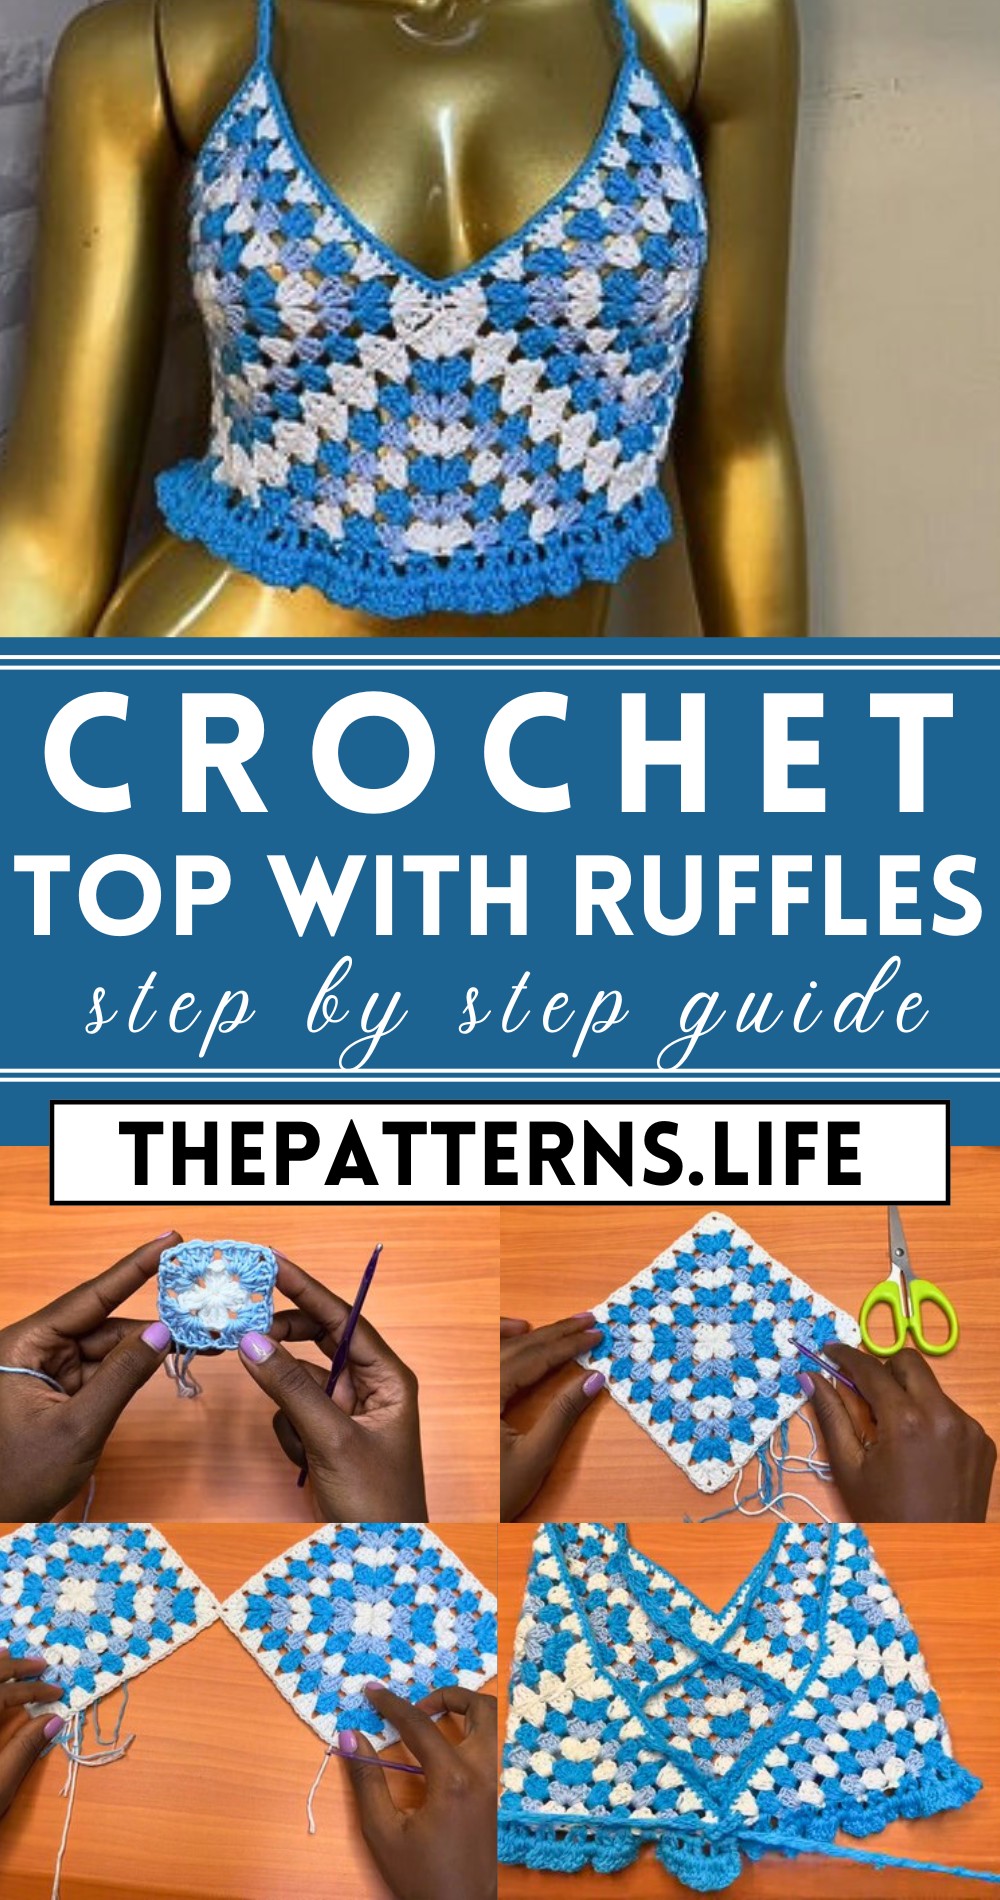
Designed for crocheters of all skill levels, the pattern includes clear, step-by-step instructions to guide you from start to finish. Whether you’re layering it over a tank for a casual day out or dressing it up for an evening event, this top is versatile and stylish. The lightweight fabric ensures comfort and breathability, making it ideal for warm weather.
Tip:
To keep your top looking fresh, block each granny square before assembling to ensure uniformity and a professional finish.
Materials;
- Yarn in your desired colors (the example uses light blue, white, and a darker shade of blue)
- 3.75 mm crochet hook
- Scissors
- Measuring tape
- Darning needle
Abbreviations:
- ch: chain
- dc: double crochet
- sl st: slip stitch
- st: stitch
- rep: repeat
- beg: beginning
- rnd: round
- sk: skip
- inc: increase
- dec: decrease
Preparation
- Take your full bust measurement and divide it by four to determine the size of each granny square.
Creating the Granny Squares
Start the first granny square:
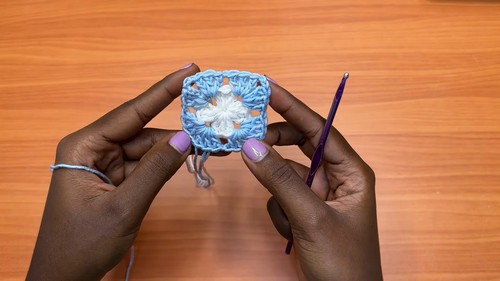
Round 1:
- Create a magic ring.
- Chain 3 (counts as the first double crochet, dc).
- Place 2 more dc into the magic ring.
- Chain 2.
- Place 3 dc into the magic ring.
- Repeat the previous 2 steps two more times.
- Pull the tail to close the magic ring.
- Chain 2 and slip stitch (sl st) into the top chain of the beginning chain 3.
- Chain 1 and cut your yarn.
For Round 2:
- Attach your yarn to the chain 2 space before the tail from the previous round.
- Chain 3 (counts as dc).
- Place 2 more dc in the same space.
- Chain 1.
- Create a shell: Place 3 dc into the next chain 2 space, chain 2, and place 3 more dc into the same space.
- Repeat from * to * until you have a shell in each chain 2 space.
- Chain 1 and complete the round with a sl st into the top chain of the first chain 3 of the round.
- Chain 1 and cut your yarn.
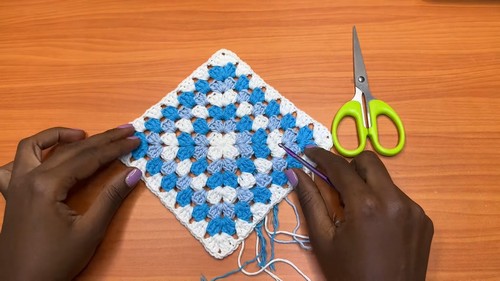
Round 3 and Beyond:
Repeat Round 2 until your granny square measures one-fourth of your bust measurement.
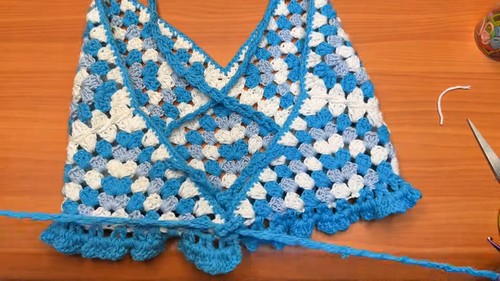
Final Row:
- Attach the final color of yarn.
- Chain 3, remove your hook and go into the very first corner, pull through and create a chain 4.
- Work dc into spaces as shown in steps 5 to 9 of the Final Row in your provided instructions, creating the ruffled border.
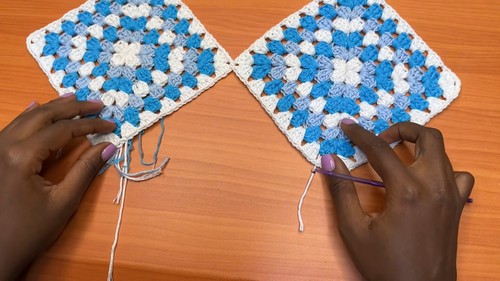
Attaching the Straps
- Fold your work in half, with the ruffle section on the back side.
- Attach yarn to the middle of the 3 single crochets created previously.
- Chain 3, then make a dc into the space below.
- Continue to create a strap long enough to tie at the bottom of your bust.
- Repeat for the other strap.
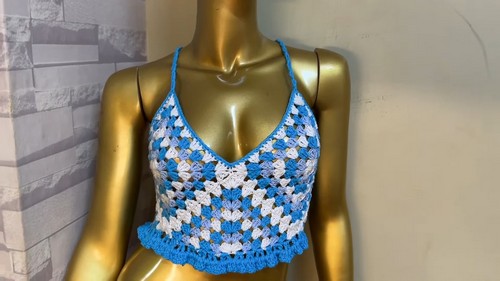
Finishing Touches
- Weave in any loose ends.
- Turn your top to the right side.
- Adjust the straps for a comfortable fit.
- Tie the straps at the back of your top.


