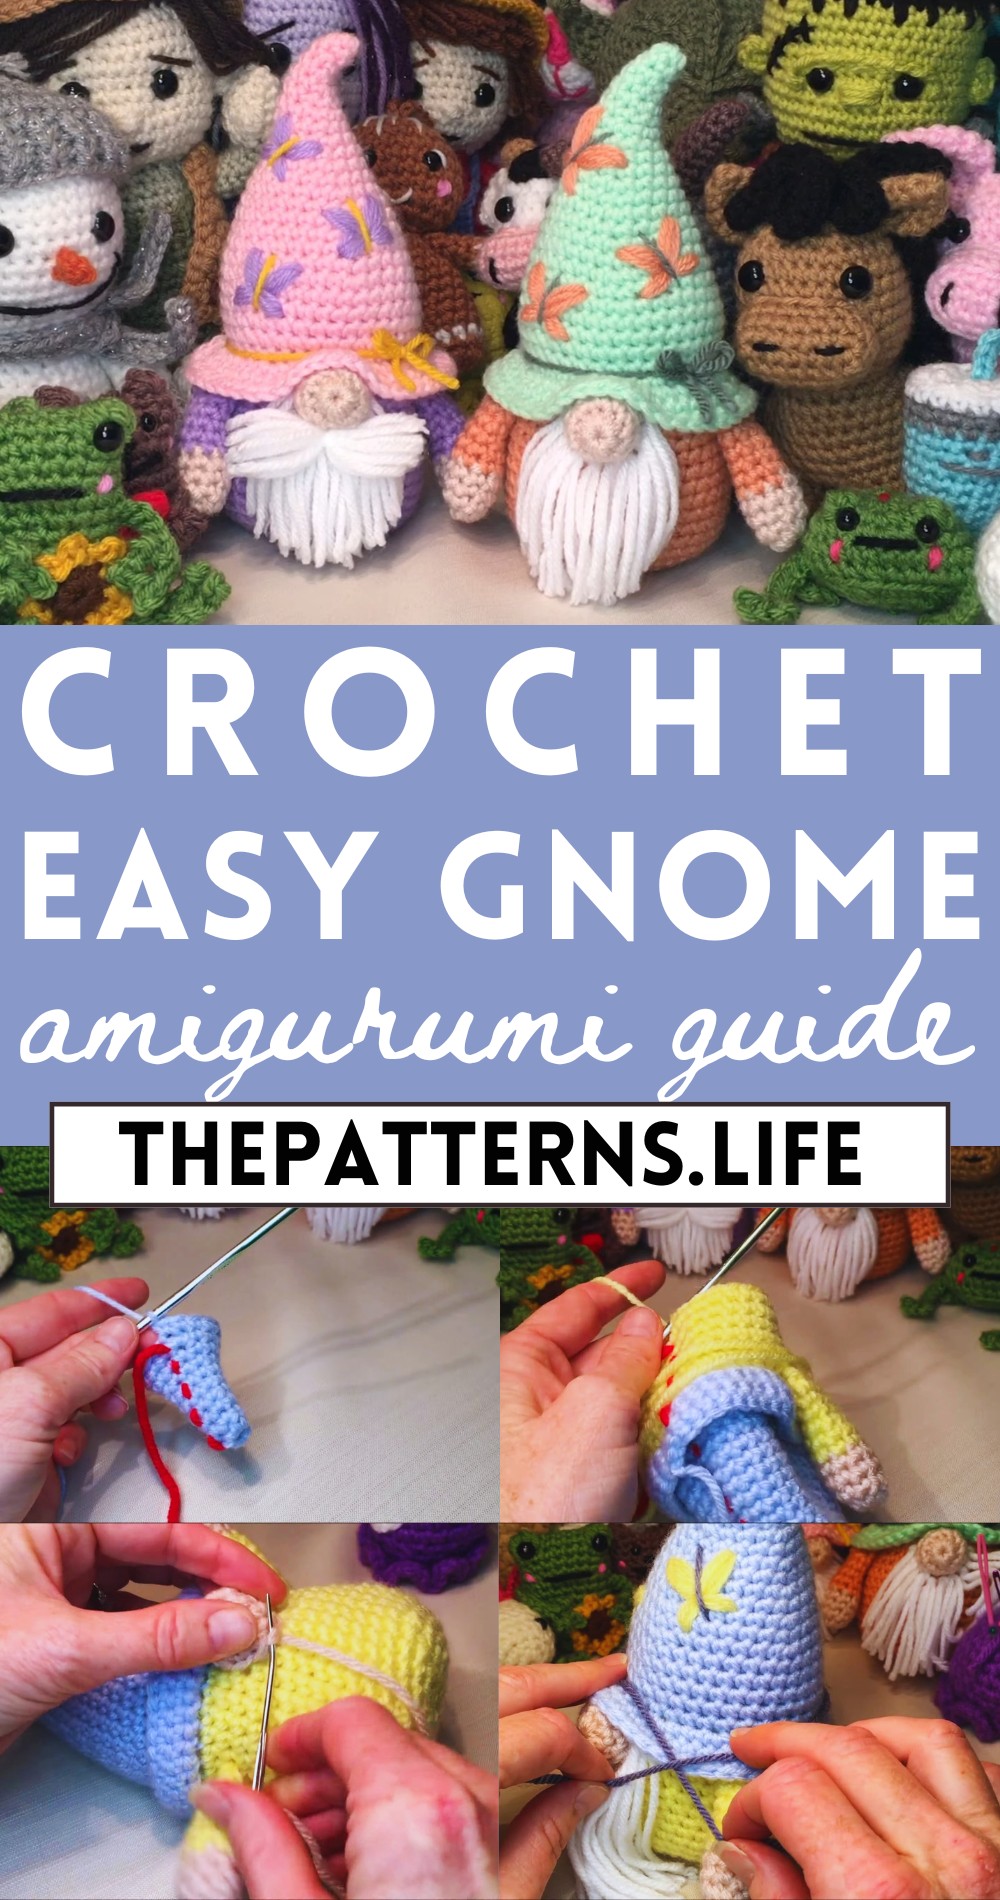
Step By Step Guide Crochet Colorful Gnome Amigurumi Pattern
Uncover the joy of the free crochet Colorful Gnome Amigurumi pattern, designed to add a splash of whimsy and charm to your collection or gift-giving.
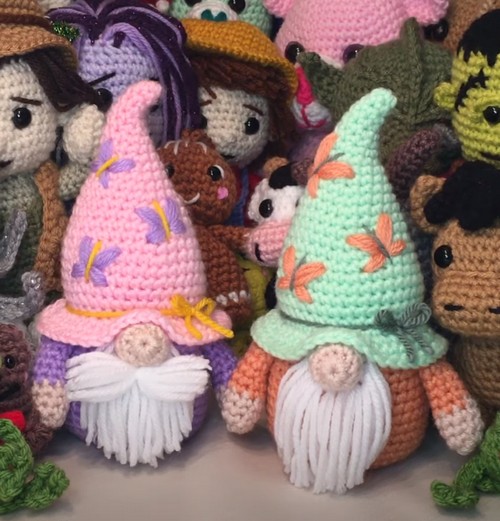
Each whimsical gnome adorned with a quirky hat and charming outfit adds a burst of personality to any space. This engaging pattern combines lively colors and intricate details, making it perfect for both novice and expert crocheters. The clear, step-by-step instructions ensure an enjoyable and stress-free crochet experience. Use these colorful gnomes as decorative pieces to brighten up your home or as thoughtful gifts that carry your unique touch.
Crochet Gnome Amigurumi Tutorial
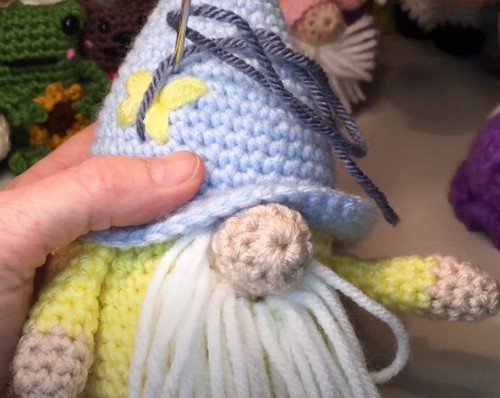
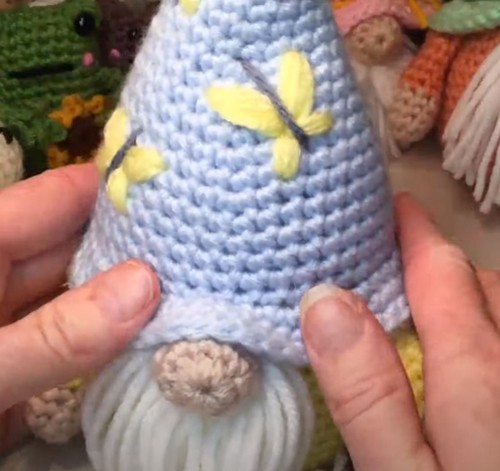
The final result is not just a cute and quirky creation but also a testament to your personal creativity. This project offers an irresistible opportunity to infuse any setting with warmth and character, turning simple materials into delightful treasures. on this gnome the small colorful butterfly and ribbon add a touch of smile. The gnome’s white mustache and beard dangle cheekily below its gentle smile, crocheted from the softest white yarn, giving it a wise yet playful look.
Materials Needed:
- No. 4 Medium weight yarn
- 4.25 mm crochet hook
- Stitch marker, yarn needle, scissors
Hat and Body (One Piece):
- Row 1: Begin at the top of the hat. Make a knot with a loop on the end, chain 1 (this doesn’t count as a stitch), then 6 single crochets (sc) into the loop.
- Row 2: 6 sc all the way around (6 stitches total).
- Row 3: 2 sc, 2 increases, 2 sc (8 stitches total).
- Row 4: 8 sc all the way around.
- Row 5: 3 sc, 2 increases, 3 sc (10 stitches total).
- Row 6: 10 sc all the way around.
- Row 7: 4 sc, 2 increases, 4 sc (12 stitches total).
- Row 8: 12 sc all the way around.
- Row 9: 2 sc, 1 increase; repeat sequence all the way around for a total of 16 stitches.
- Row 10: 16 sc all the way around.
- Row 11: 3 sc, 1 increase; repeat sequence all the way around for a total of 20 stitches.
- Row 12 – 14: Continue same pattern increasing 4 stitches per row until you reach 28 sc (Row 15).
- Row 16 – 17: Repeat 28 sc all the way around for two rows.
- Row 18 – 24: Continue the pattern as indicated, increasing the stitch count as guided, eventually reaching 36 sc by Row 19 and maintaining that count until Row 24.
Brim of Hat:
- Row 25: In the front loops only, 2 sc, 1 increase; repeat all the way around for a total of 48 stitches. This will create the brim of the hat.
Arm (Make 2):
- Start with the chosen skin color.
- Chain 1 and within the same loop, perform 8 sc. This forms the hand.
- For Rows 2 to 4, perform 8 sc all the way around. Every 8th stitch, flip your stitch marker.
- Change color to the body color of your gnome and continue with 6 rows of 8 sc each.
Assembly and Finishing:
- Stitch the arms to the body.
- Continue the body in the chosen body color, attaching it under the brim of the hat and proceeding with 36 sc around following the pattern provided in the video for the specified number of rows.
- Proceed to decrease and shape the body according to the instructions while integrating stuffing to maintain shape.
Nose and Beard:
- Create a nose using the skin color yarn by starting with 10 sc in a loop and performing 3 rows of 10 sc each.
- Attach the nose to the gnome’s face.
- Cut yarn strands for the beard, fold them in half, and attach them under the gnome’s nose by pulling the loops through with your crochet hook.
Decorative Elements (Butterflies):
- Embroider or crochet small butterflies or other decorations as desired around the gnome’s hat for thematic embellishments.
Remember, feel free to customise your gnome with different colors, facial features, or accessories to match your desired theme. Happy crocheting!