Crochet Cute and Beautiful Owlbear Pattern – For Home Decor
Uniquely charming, the Cute and Beautiful Owlbear pattern offers delightful fun for crocheting whimsical toys and heartwarming handmade gifts.
This enchanting pattern uniquely combines the wisdom of an owl with the hug-worthy appeal of a bear, making it an irresistible project for anyone looking to create heartwarming gifts, playful toys, or charming home decor. With its simple, step-by-step instructions, this pattern is perfect for crocheters of all skill levels, from novices to seasoned pros. As you work on your Owlbear, you’ll experience a relaxing and fulfilling creative journey, resulting in a finished piece that spreads joy and warmth.
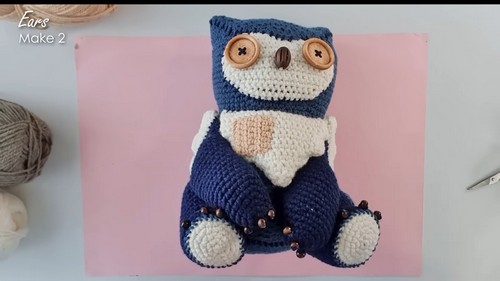
Crochet Owlbear

This delightful Owlbear pattern promises to add a dash of whimsy and fun to your crocheting repertoire, capturing the hearts of both the maker and the recipient. Embrace the magic of this cute and beautiful Owlbear, and let it brighten the days of everyone who encounters it.
Materials:
- 8 ply 100% acrylic yarn in at least two colors (main color – dusty brown, accent color – cream, and scrap amounts of flesh tones)
- 3.5mm crochet hook
- Scissors
- Pins and needles
- Stuffing
- Buttons for eyes (optional, can be sanded and modified to preference)
- Beads for the beak and claws (8mm round wooden beads for claws, 20mm wooden oval beads for the beak)
Ear (Make 2):

Start with a magic ring of 6 stitches using the main color yarn.
- Place a 2-stitch increase on one side, and a 3-stitch increase on the other side to create asymmetrical slopes for the ear.
- Repeat the increase pattern to create the desired shape. (Row 4-7 continue building the slopes)
- Finish off the ears and leave them aside.
Body Base:

Begin with a magic ring of 6 stitches using the main color yarn.
- Increase in rounds to expand the circle hexagon to 48 stitches in total. (7 rows total)
- Begin to create the subtle tail by implementing a 3-stitch increase at about two-thirds of the way around the circle.
- Continue expanding the base following the pattern. (Increase rounds with certain repeat patterns)
- Begin faking the base seam by working double rows of the back loop single crochet, leaving the front loops free.
- Complete rows 13-36 to build up the body.
- Start building up the head from rows 37 onward by adding increases across the front for the face.
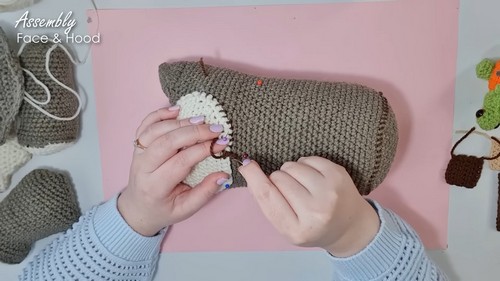
Head and Face Detailing:
Continue shaping the head with rows of single crochet and increases as needed.
- Begin to decrease towards the crown to close the head, and add stuffing along with weight for stability if desired.
- Attach the ears to the head using corresponding stitches and creating the shape of the head and ears.
- Add a face piece and a hood piece by crocheting them separately and attaching them to the head.
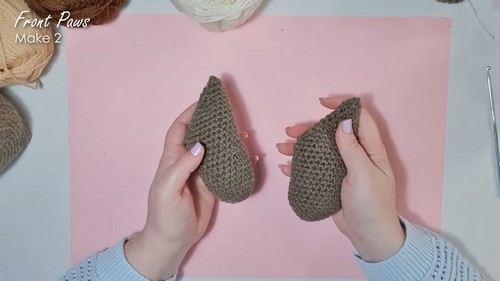
Limbs (Front and Back Paws):
Create limbs starting with magic rings and increasing for the paws.
- Build the limb length with rows of single crochet and add detailing to simulate seams.
- For back paws, use a contrasting color at the base of the paw, and switch to the main body color as you work up the limb.
- Close the limbs with stuffing, creating the shape of the shoulders and paw details.
Fluffy Details:
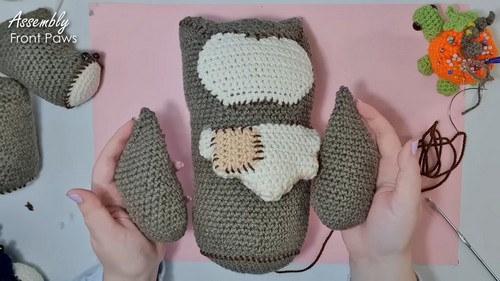
Crochet rectangular pieces for the chest fluff and limb fluffs, following a pattern that decreases towards one side to create a tapered look.
- Layer two pieces together, sew around the edges, and invert them for a fluffy appearance.
- Finally, attach the patches to the body, with one on the chest fluff, one on the back, and one on a hind leg.